Jira
Sometimes, an alert detected by Monte Carlo may take weeks to fix, or requires work from someone outside the data team. Converting alerts like these into issues in Jira makes it easy to track work over weeks or months, and mobilize resources from teams not in Monte Carlo.
This integration allows:
- Users in Monte Carlo to click a button to convert an alert into an Issue in Jira, or link an existing Issue. Multiple Jira Issues may be linked or created from a single alert in Monte Carlo.
- Monte Carlo to automatically send notifications directly to Jira to create Issues.
- Status updates from those Jira issues can also be synced back to the corresponding alert in Monte Carlo.
Both Jira Cloud and Jira Data Center are supported.
Integration setup
An Account Owner must go to Settings > Integrations. In the Notifications and Collaboration section, click Create and select Jira, and complete the form.
For Jira Cloud
Input:
- Display name: this gives a superficial name to the integration within Settings, e.g. “Jira production”
- Server URL: expressed as
https://companyname.atlassian.net/ - Authentication type: select API token or password
- User name: expressed as a user email address
- API Token: You must use Create API Token from your Atlassian account settings. See this link to see how to obtain a Jira API token.
Note: If you are using a scoped API token, then you must select the following scopes:
read:jira-userread:jira-workwrite:jira-work
The Jira API token will inherit the same permissions as the user who generated it. This means that Monte Carlo will only have access to the projects and issue types that the user who generated the API Token has access to. The permissions needed for this integration to function are minimal, as Monte Carlo only needs to:
- List projects
- List issue types for a given project
- Create Issue Project Permission
To do that, the following permissions are sufficient:
- Browse Projects
- Create Issue Project Permission
For Jira Data Center
Input:
- Display name: this gives a superficial name to the integration within Settings, e.g. “Jira production”
- Server URL: Jira Data Center URL, often expressed as
jira.companyname.com - Authentication type: select either
- API token or password, which requires the user to enter
- User name: Username used to log in to Jira Data Center
- Password: Password used to log in to Jira Data Center
- Personal access token
- In Jira you can get this token by selecting your profile picture at the top right of the screen, then choose Profile. Once you access your profile, select Personal Access Tokens in the left-hand menu to create new tokens.
- API token or password, which requires the user to enter
Syncing Status from Jira Issues back to Monte Carlo Alerts
Syncing the status of Jira issues back to Monte Carlo Alerts is optional and requires additional configuration.
First, map your Jira statuses to Monte Carlo statuses:
- Within the integration create/edit page, toggle Sync Jira issue status to alert to
on - Since statuses in Jira are highly customizable, the user is asked to manually type the specific Jira statuses that should update the alert status in Monte Carlo.
- The status will sync when the status is updated in Jira. A status update from within Monte Carlo does not have any impact on the status of a Jira issue.
- Note: if an alert has multiple Jira issues associated with it, then Status syncing is disabled for that alert. This is to avoid conflicting status updates.
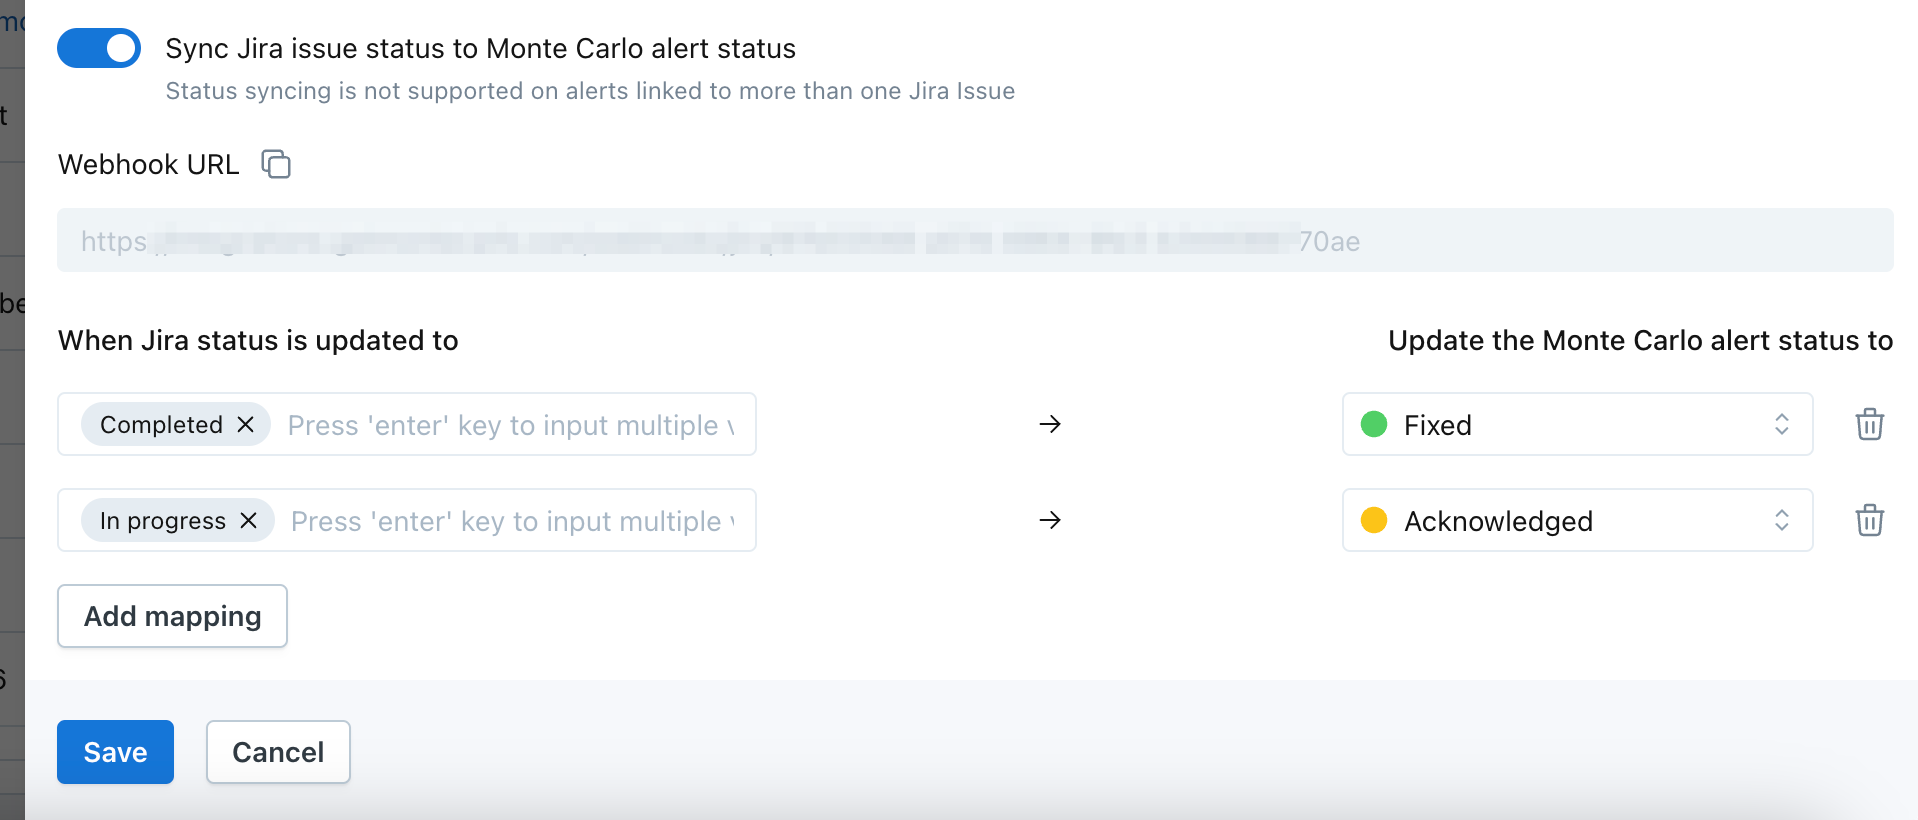
An example where 'Completed' and 'In progress' in Jira is mapped to 'Fixed' and 'Acknowledged' in Monte Carlo
Second, you must configure a webhook to send Jira issue updates back to Monte Carlo:
- When you first save your Jira integration after toggling Sync Jira issue status to alerts, you will get a webhook URL. You will also be able to see this URL if you go back to edit the Jira integration.
- Configure a webhook to send Jira issue updates to this URL, following these Jira docs on configuring webhooks.
- It is optional to also include a webhook secret, for additional security.
- When enabling the webhook, select the event
Issue: updatedto trigger the webhook to be sent. - Expect latency of 30-60 seconds between Jira and Monte Carlo.
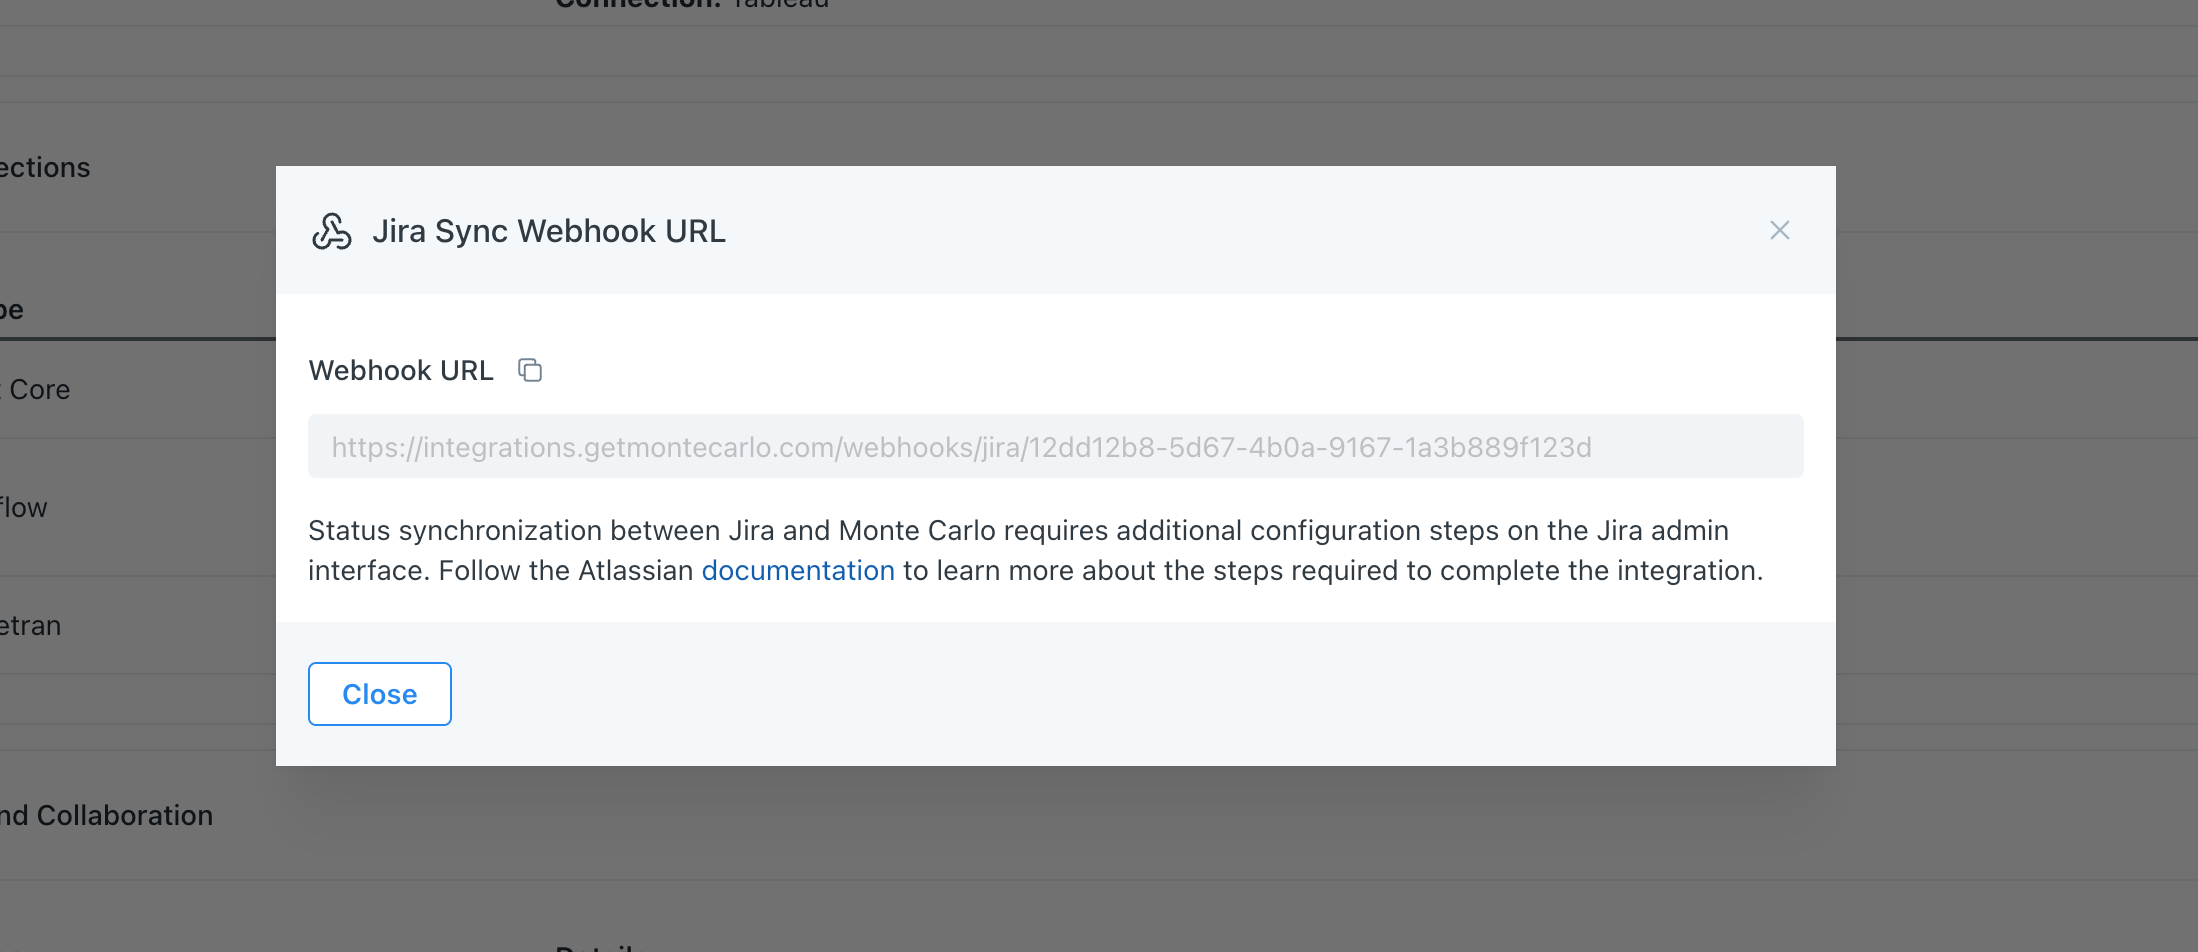
After you click 'Create', you will be given a Webhook URL to sync status updates from Jira back to Monte Carlo
Creating a Jira Issue from a Monte Carlo Alert
After the integration is set up, a user has two different ways they can create a Jira Issue from a Monte Carlo alert:
- Add Jira as a recipient in an Audience. Notifications sent to Jira will generate an Issue.
- click a button from alert page that lets them create a new Jira Issue or link an existing one
To create a Jira Issue from the alert page, first click the Jira button on the top-right.
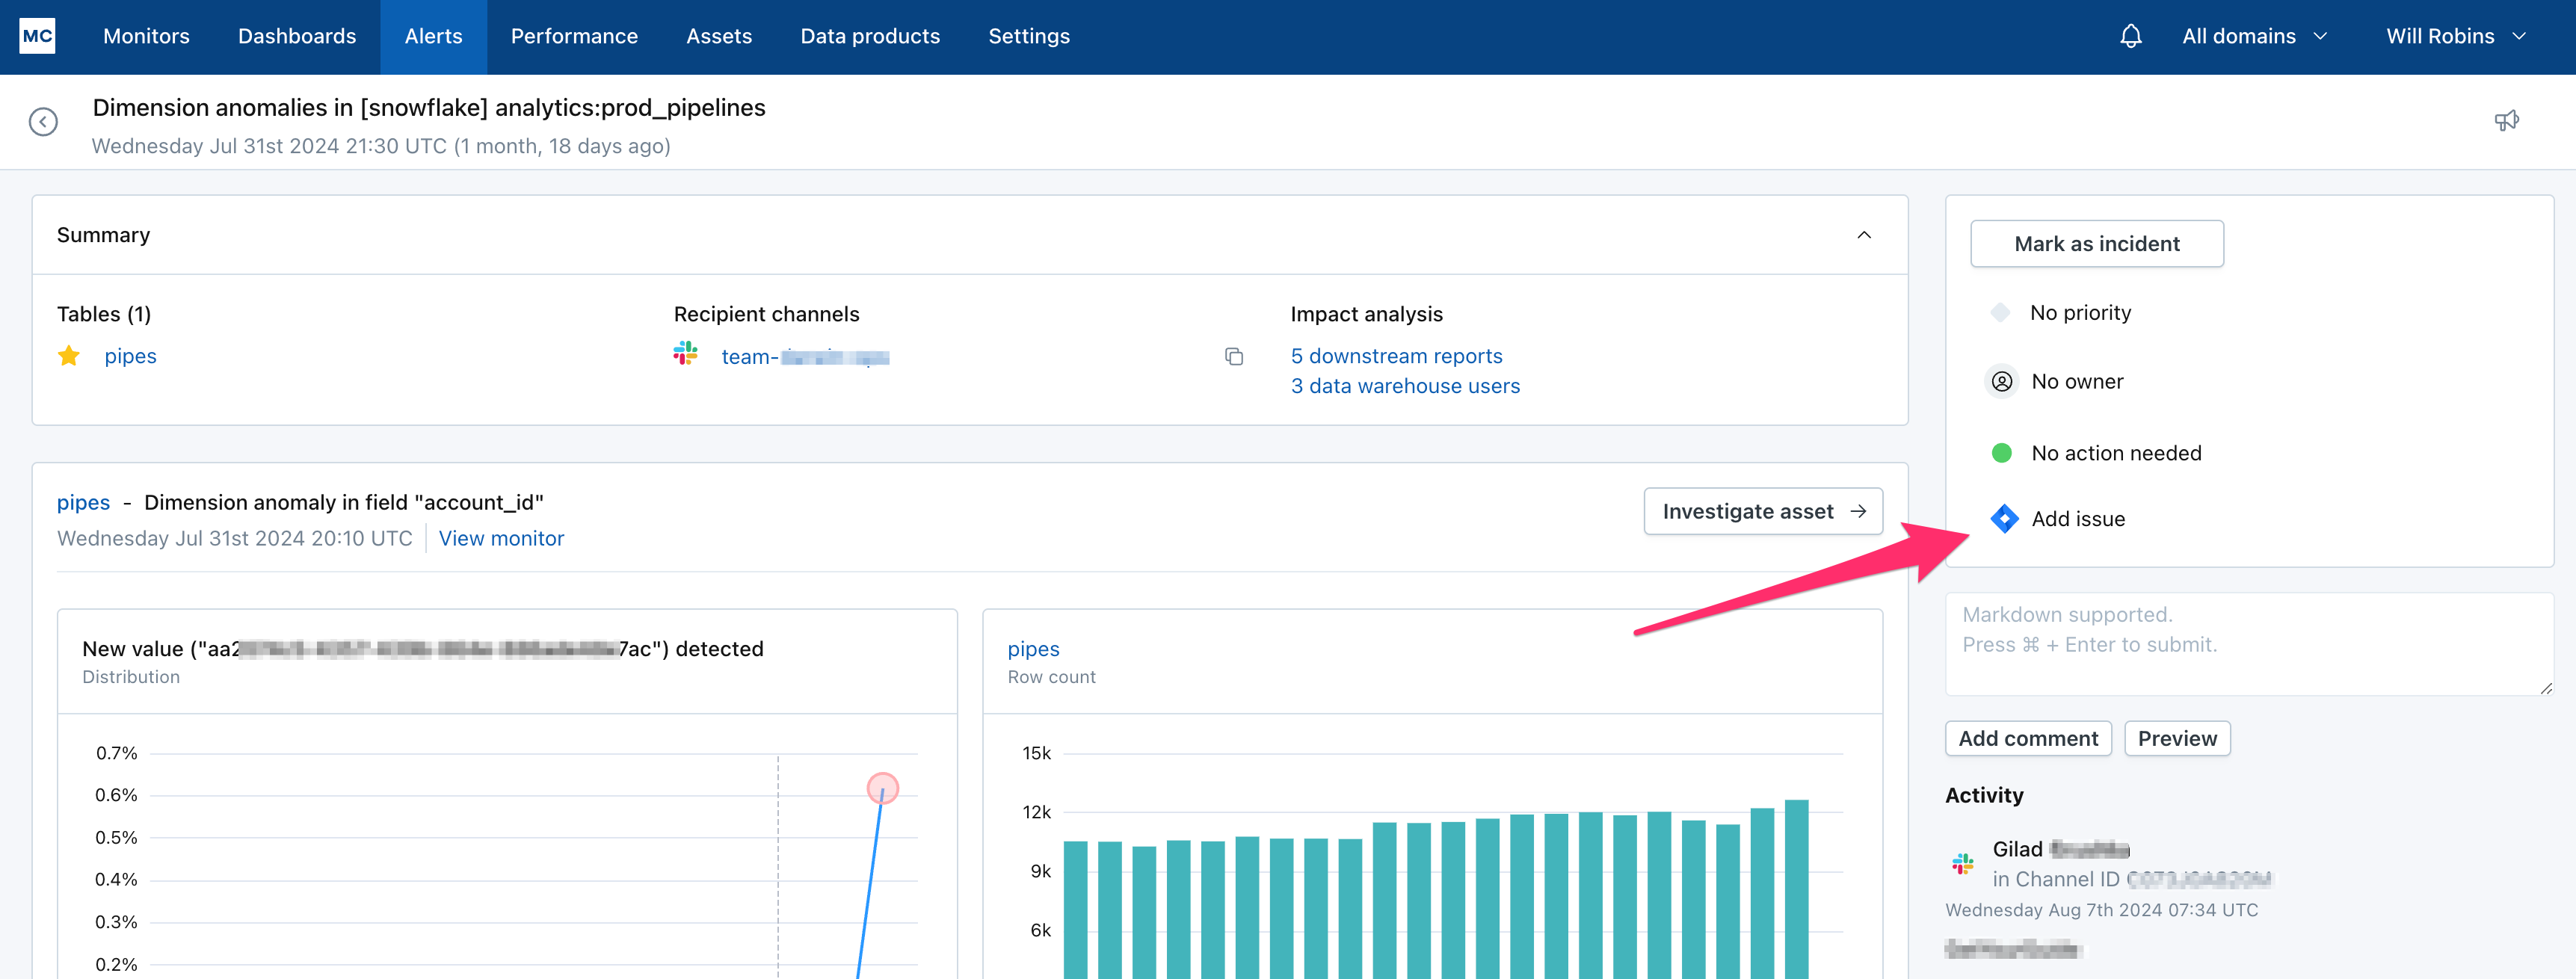
The button to create or link a Jira Issue.
Once clicked, a slide-out opens. If creating a new Jira issue, the user can input the Project, Issue Type, Summary, Description, and Owner. Summary and Description are pre-populated with some information about the alert and a URL to link back to the alert in Monte Carlo.
Click Create, and the user is given a confirmation that an Issue has been created, along with a 1-click link to view the Issue in Jira. This process can be repeated to link multiple Jira issues to the alert.
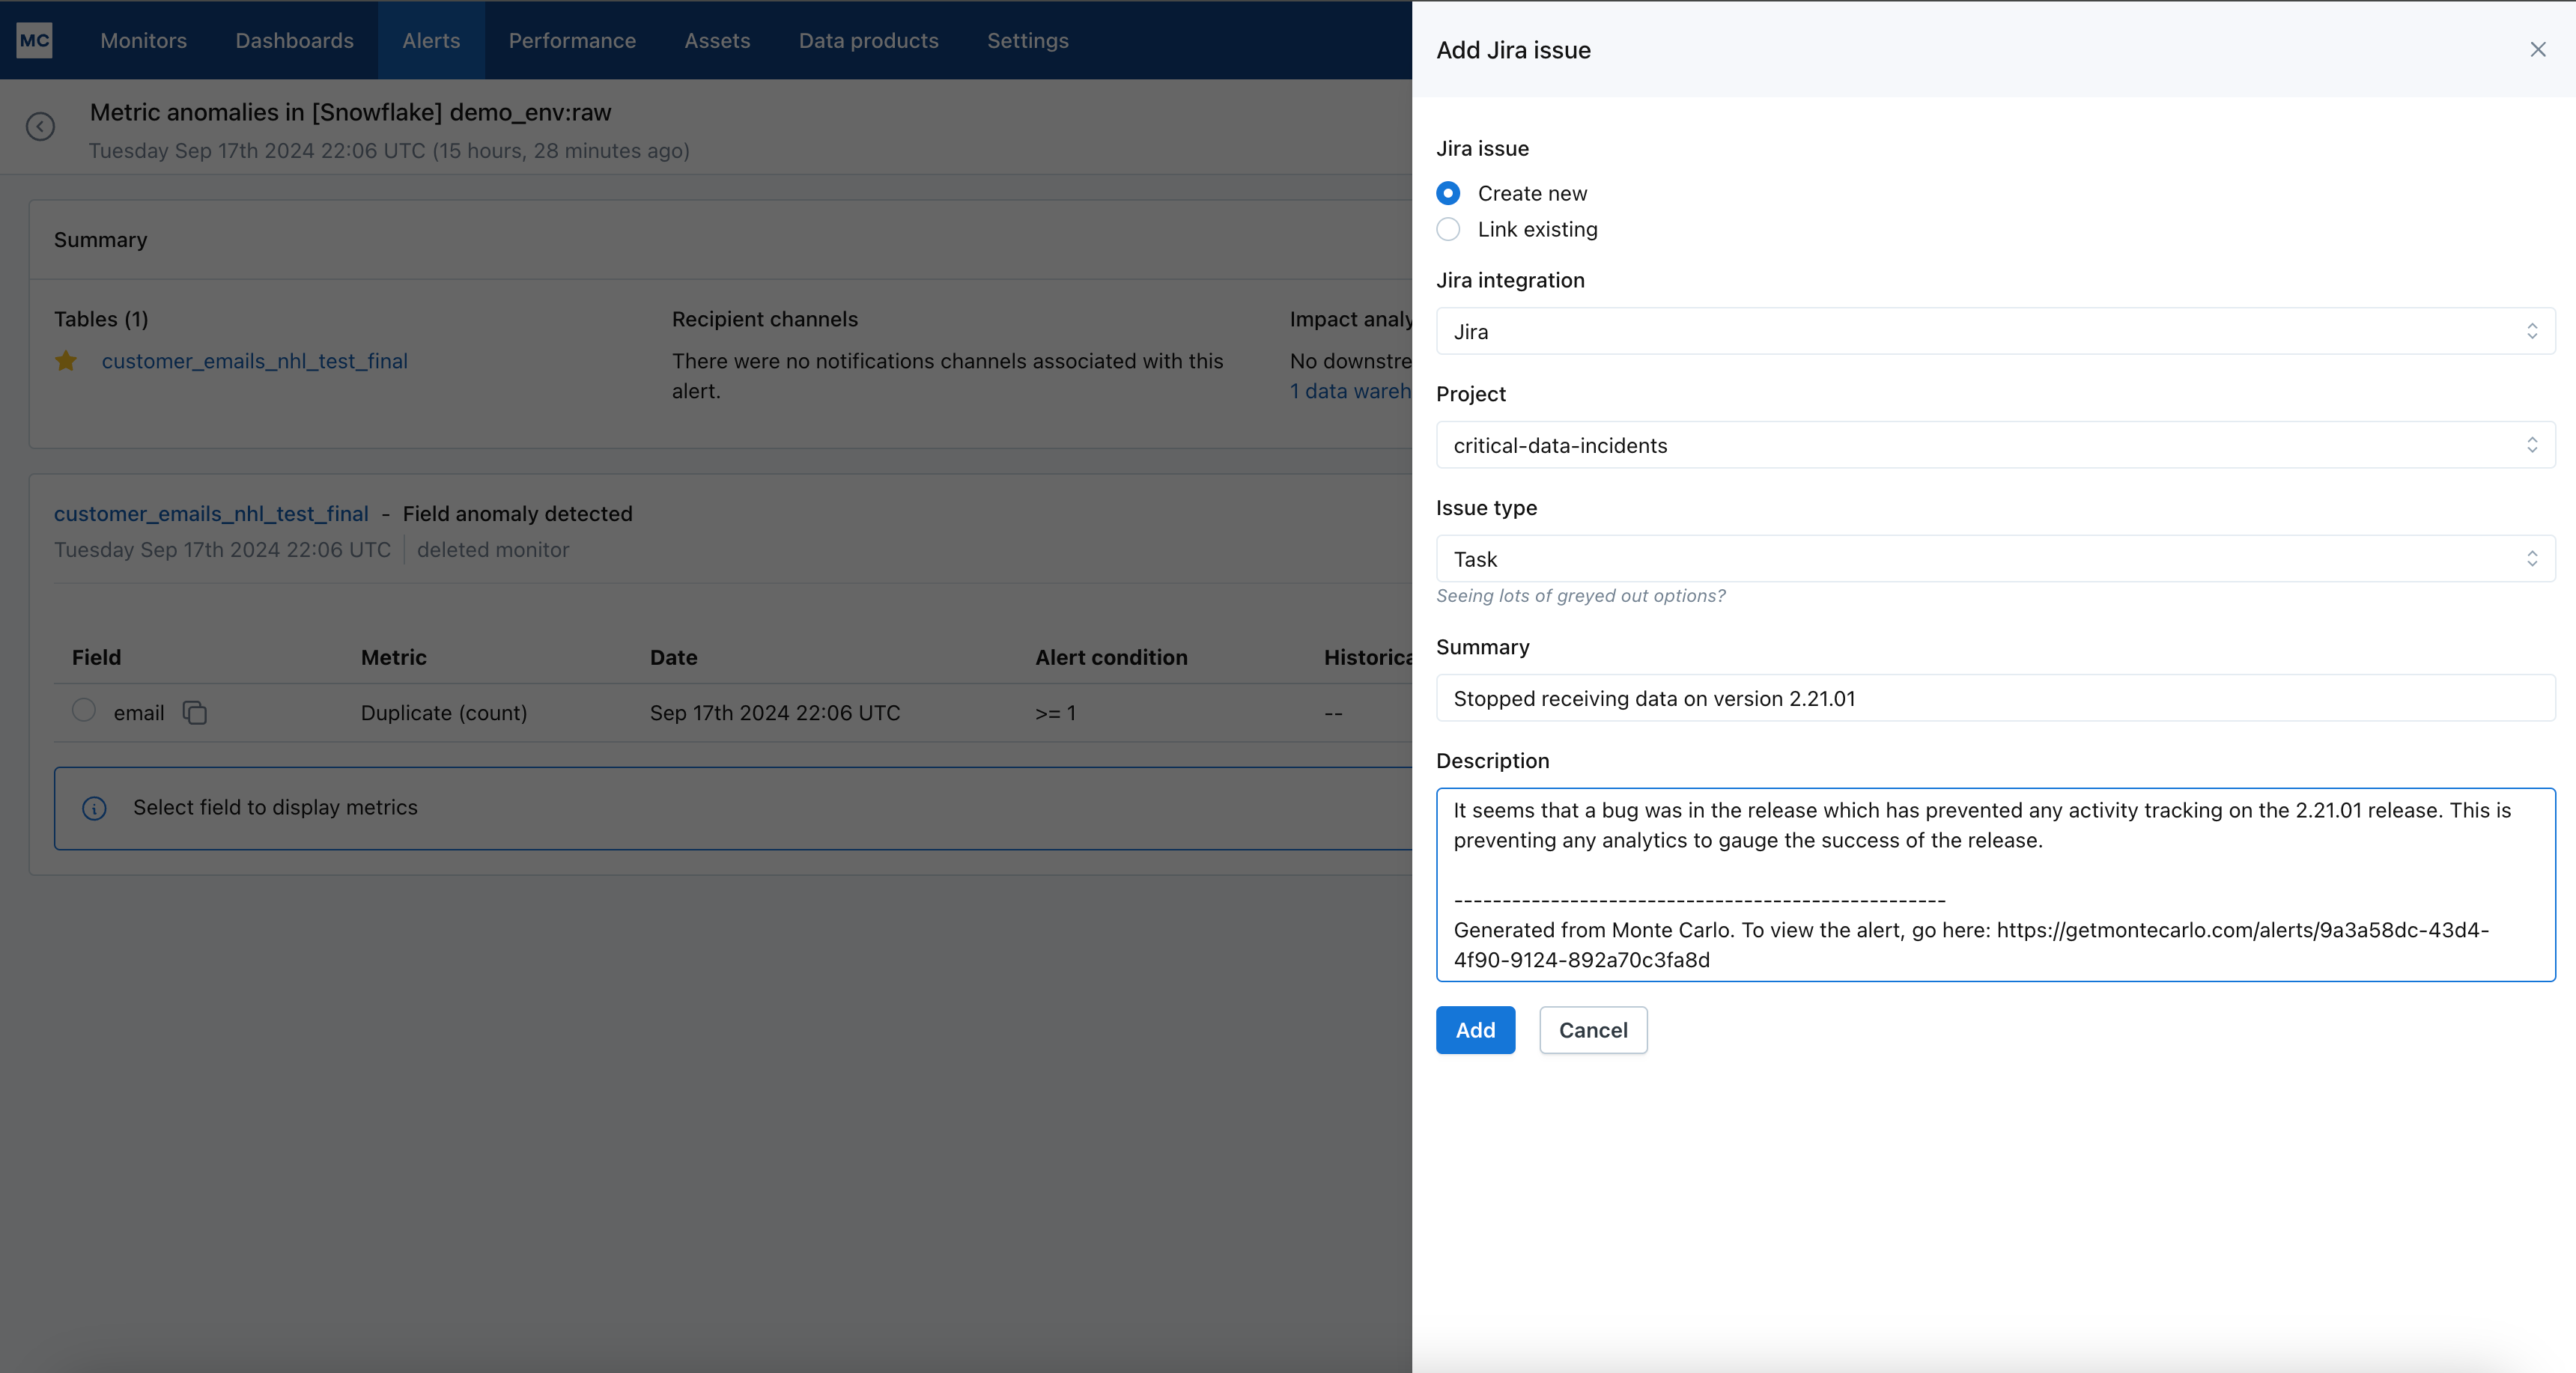
Users can easily pass information about the alert into the Jira Issue.
Interacting with Jira Issues from within Monte Carlo
Once a Jira issue is created or linked to an alert, it is visible from within the alert page and from the Alert Feed. There is also a filter on the Alert Feed to only see alerts with a Jira Issue.
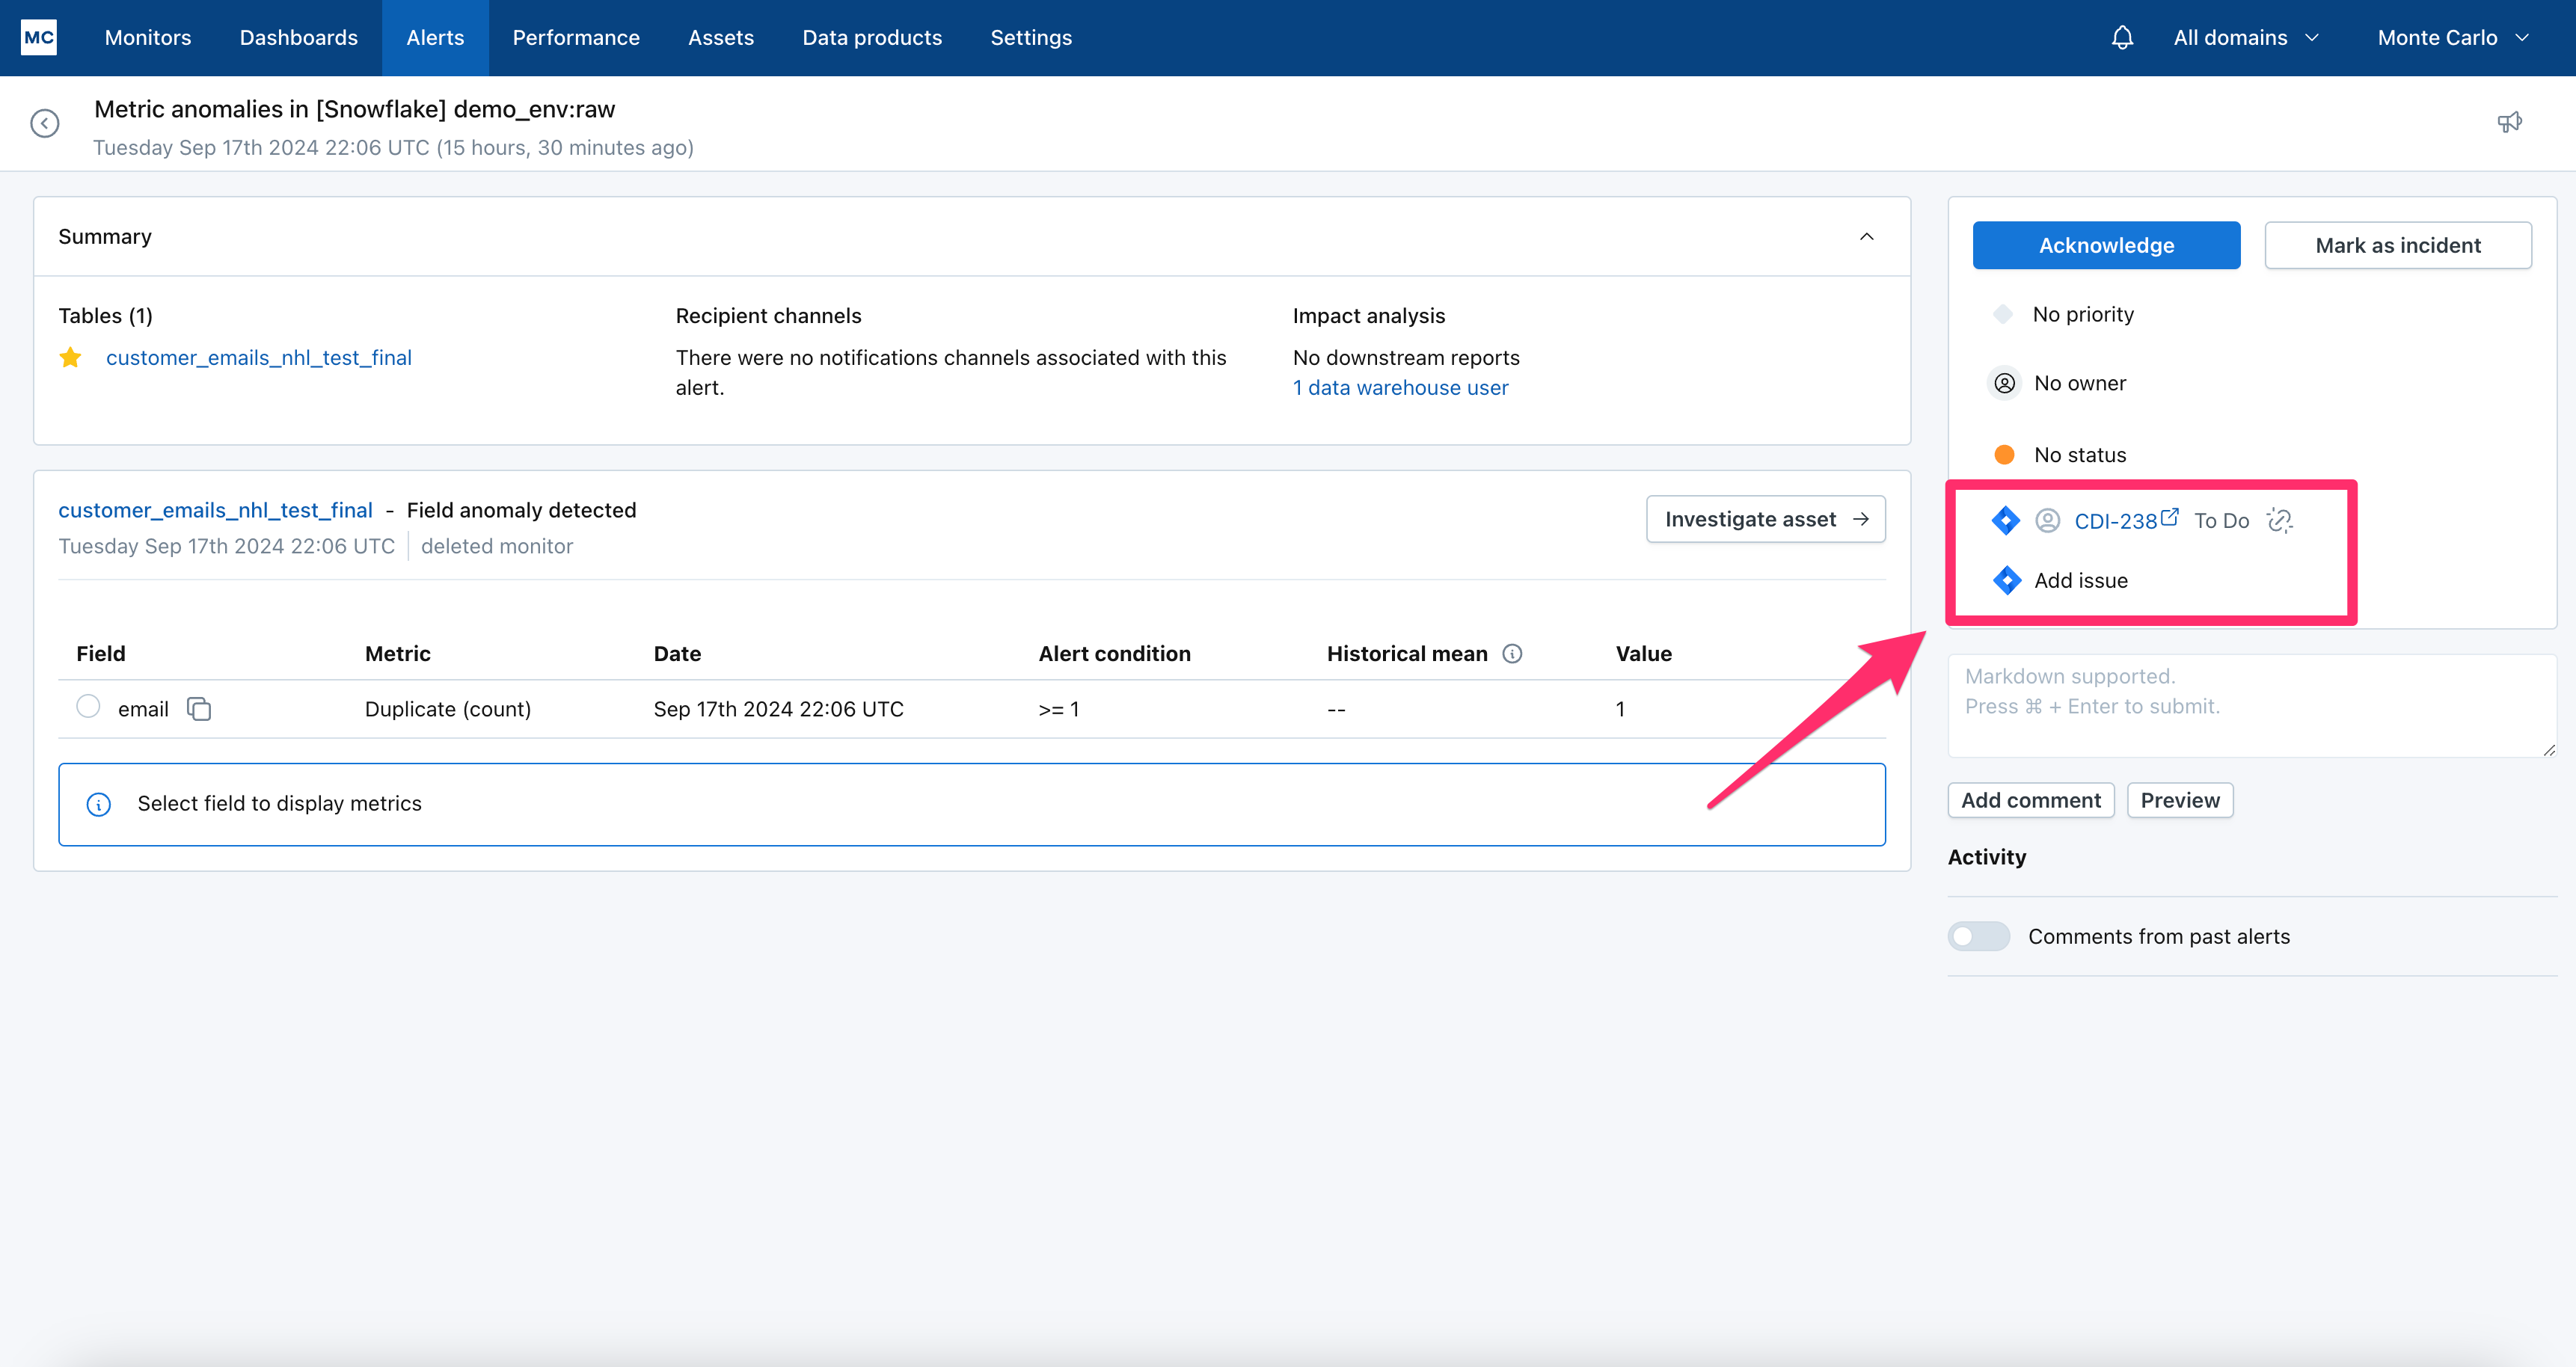
1-click link to the Jira issue is available from the alert page, along with details of the current owner and status
Once a Jira issue is created or linked to an alert, any Slack notifications from that alert are updated to show that the link was made.

Notification in Slack showing that a Jira Issue was created for this alert
Automating Jira Issue Creation through Notifications
You can add Jira as a recipient of an audience. As a result, an issue in Jira will be created any time an alert is sent to that audience.
To get started, navigate to Notifications and click "Create audience." Add a recipient and integrate it with your Jira account, making sure to link it to the correct project and issue type:
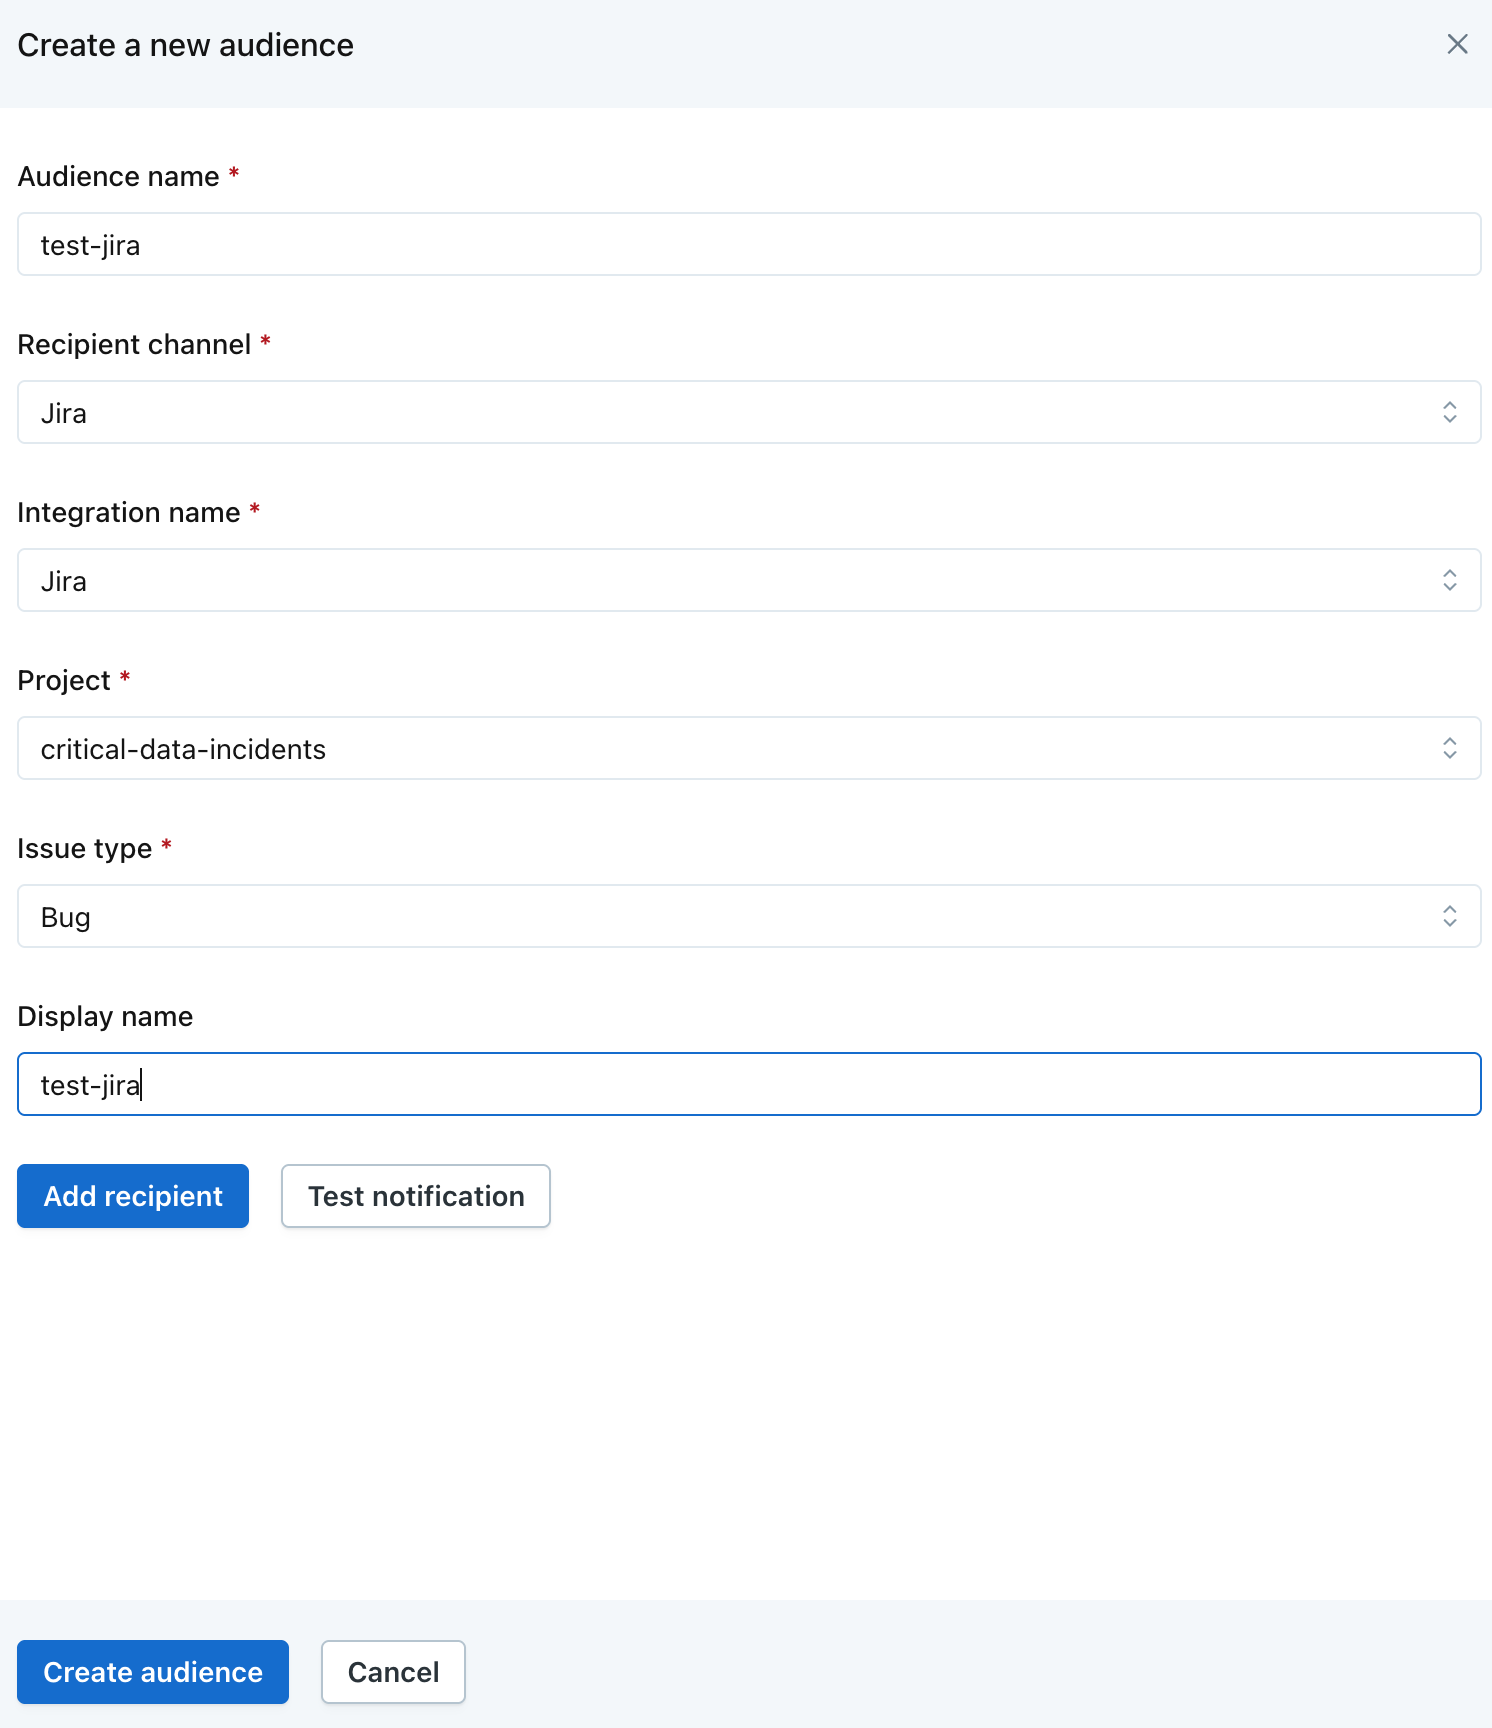
Once your audience is created, go to 'Other Notifications' and click the "+" icon to add a new notification setting to the audience. Select the alerts you'd like to automatically generate Jira tickets for and click "Create notification" to save your settings.
Jira Issues with Required Fields
This integration supports any additional or custom required fields that have been configured in Jira.
Some Jira projects and issue types may have additional required fields in order to create an Issue, beyond the defaults set by Jira. If these exist, they will be presented to the user from within Monte Carlo.
Updated about 2 months ago
