Azure: Data Store Deployment
How-to create and register
Prerequisites
- You are an admin in Azure (for step 2).
- You are an Account Owner (for steps 1 and 3).
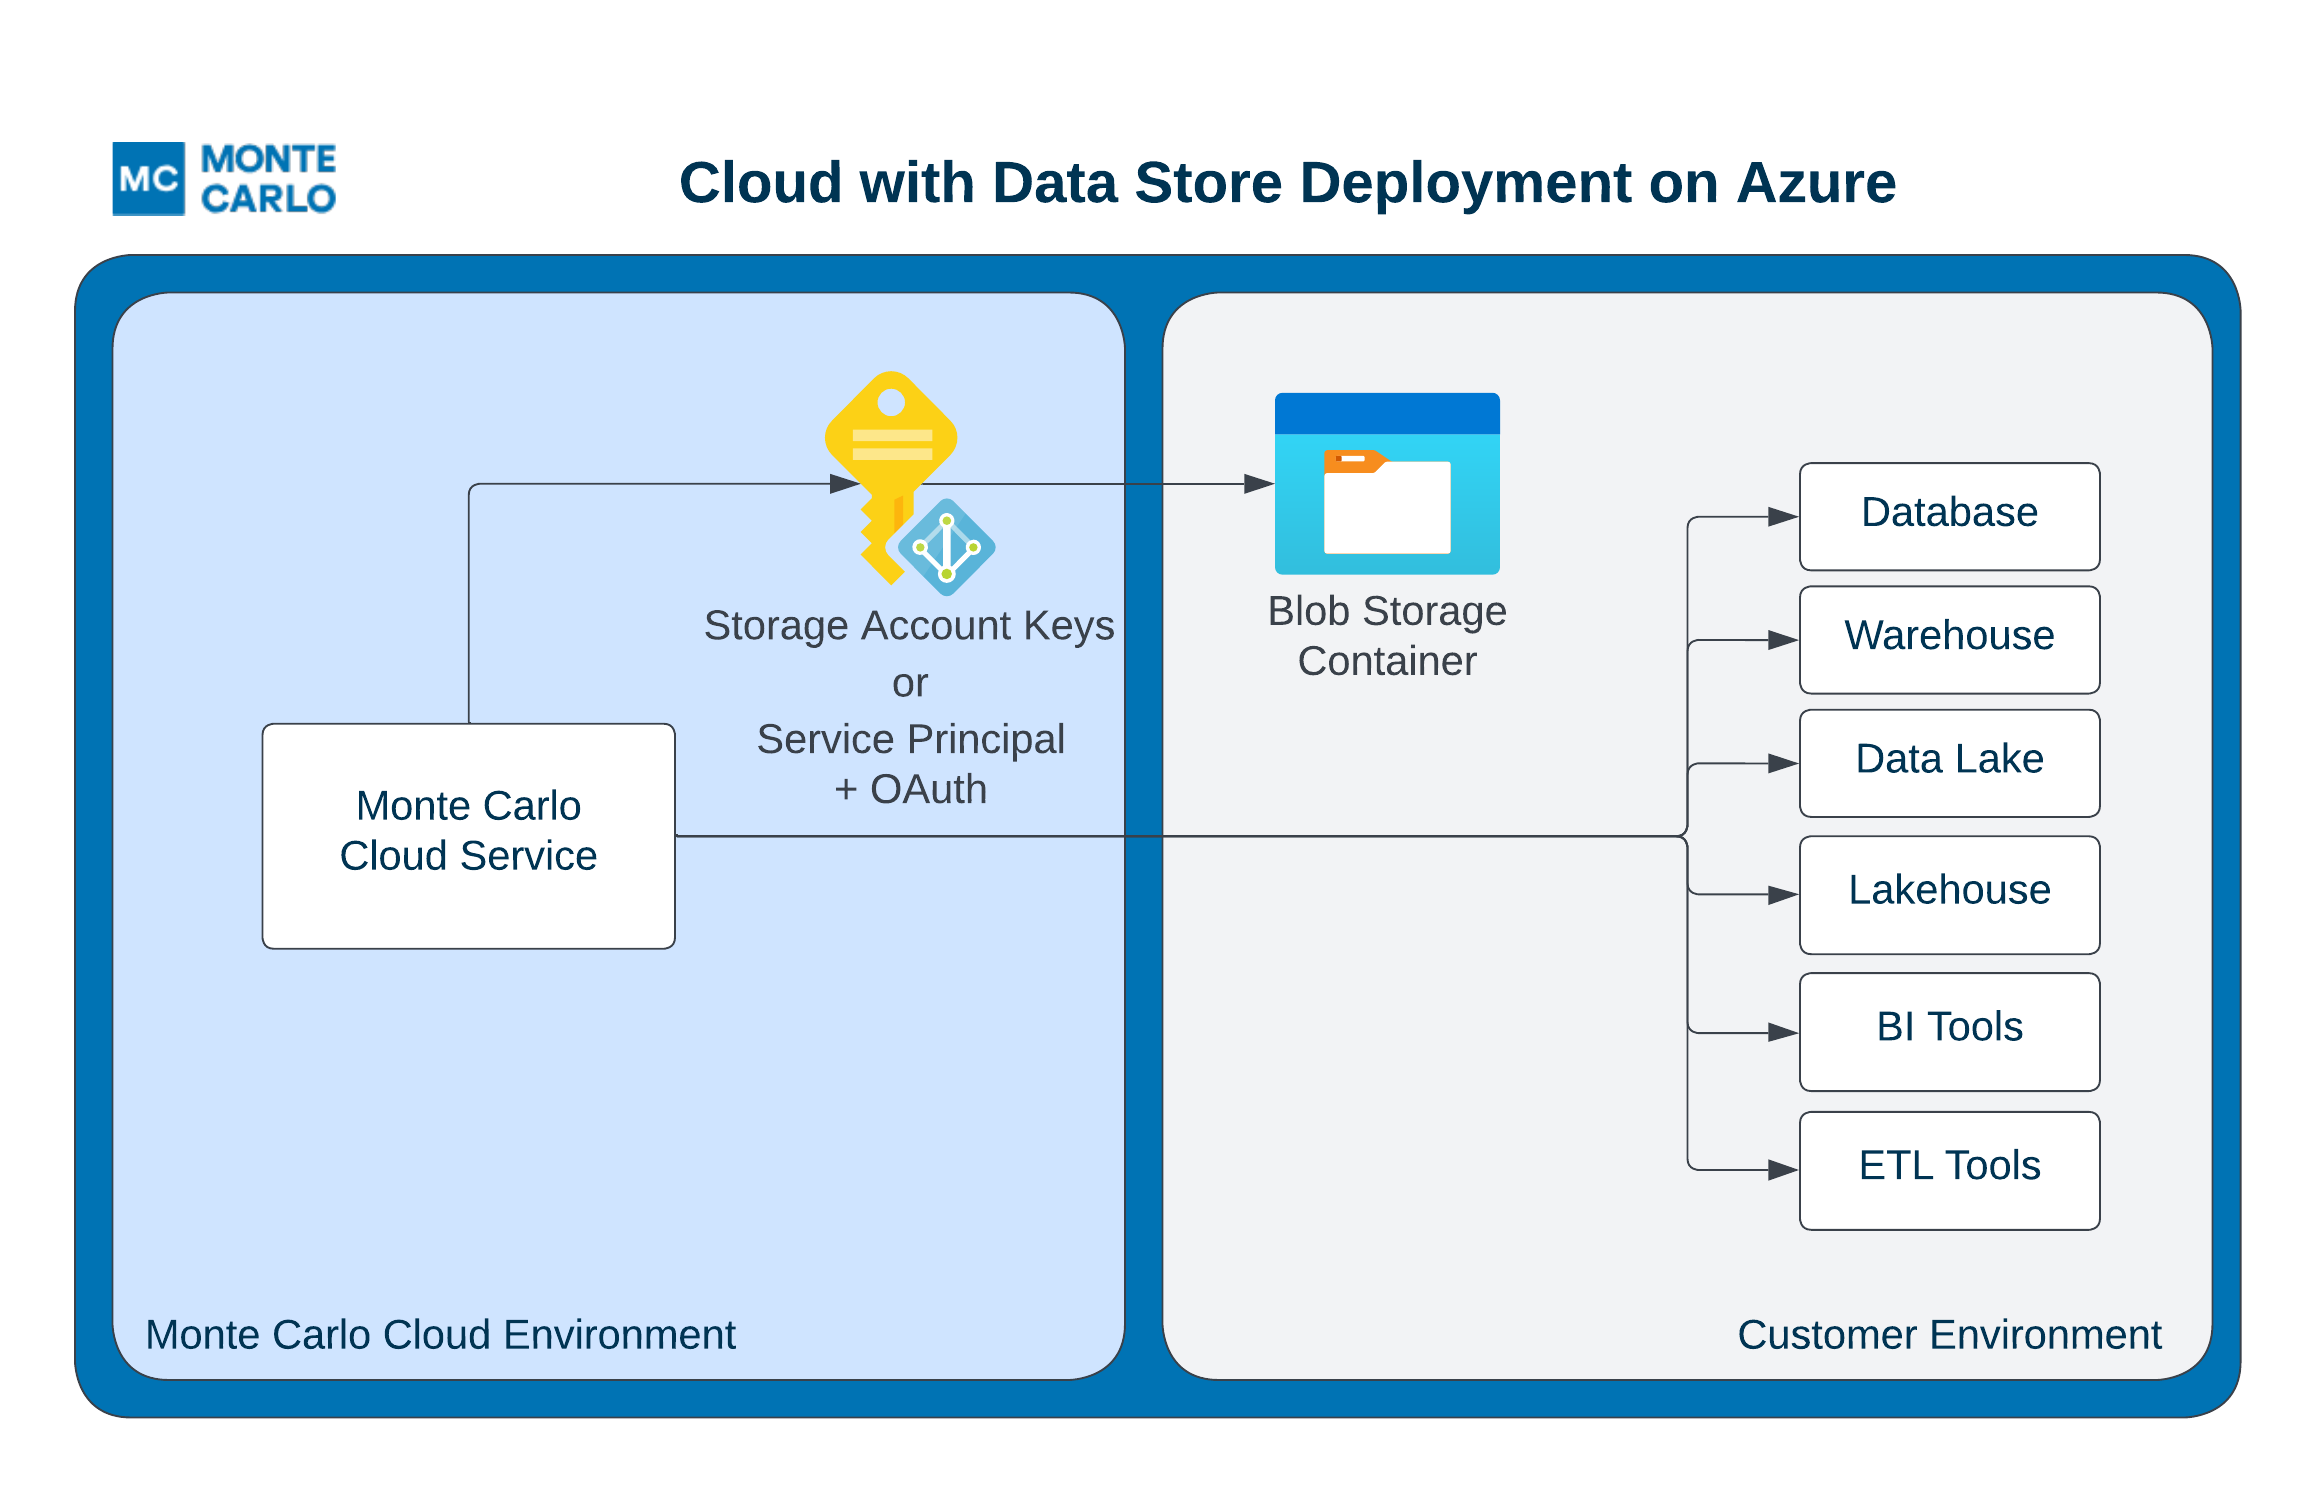
This guide outlines how to setup a Data Store for storing troubleshooting (sampling) and temporary data in your Azure cloud. Monte Carlo supports two authentication methods for the data store:
- Storage Account Key — authenticate with a connection string containing the account key.
- OAuth (Service Principal) — authenticate with an Azure AD service principal using a client ID, client secret, and tenant ID.
Both methods work with standard and private endpoint configurations. Choose whichever fits your organization's security posture.
Steps
1. Provision the Data Store in Monte Carlo
Before creating any Azure resources, register the data store in Monte Carlo. The backend records the registration and auto-provisions the collection service that this data store will pair with; you'll complete registration in step 3 after the Azure resources are up.
UI
Navigate to settings/deployments and click Add. Choose the "Azure" Platform and "Data store" type, supply a deployment name, then click Provision. Monte Carlo creates the data store and routes you to the Edit page, which you'll return to in step 3.
CLI
The CLI registers an Azure data store in a single command — there's no separate provision step. After creating the storage account and container in step 2, you'll run register-azure-blob-store once in step 3 with the appropriate credentials.
2. Create a Storage Account and Container
-
Use the Azure Portal, CLI or favorite IaC tool to create a new Storage account in your Azure account with no public access. Note that registration (step 3) will fail if the bucket is publicly accessible.
We strongly recommend you do not use an existing storage account or share with other jobs as Monte Carlo might overwrite existing data. And we also recommend the following settings:
- Requiring secure transfer for REST API operations and enabling encryption.
- Setting Expiration lifecycles. 90 days or less for all objects in the following prefixes:
custom-sql-output-samples/ rca idempotent -
Then under Data storage for the Storage Account you created in step #1, select "Containers" and create a private Container.
-
Prepare credentials for the authentication method you chose:
Option A — Storage Account Key: Under Security + networking for the Storage Account you created in step #1, select "Access keys" and retrieve the "Connection string" for either key. Please keep this safe. You will use it during registration.
Option B — OAuth (Service Principal): Follow the steps in Create a Service Principal for OAuth below, then note the Tenant ID, Client ID, Client secret, and Storage account URL (e.g.
https://<account-name>.blob.core.windows.net). You will use these during registration.
Create a Service Principal for OAuth
Skip this section if you are using a Storage Account Key.
-
Register an application in Azure AD. In the Azure Portal, navigate to Azure Active Directory > App registrations and click New registration. Give it a descriptive name (e.g.
monte-carlo-data-store) and register it. Note the Application (client) ID and Directory (tenant) ID from the overview page. -
Create a client secret. On the app registration, go to Certificates & secrets > Client secrets and click New client secret. Set an expiration that matches your rotation policy and copy the Value — this is the client secret and is only shown once.
-
Assign Storage Blob permissions. The service principal needs the ability to read, write, and delete blobs in the storage account. You can either assign the built-in Storage Blob Data Contributor role or create a custom role with only the minimum permissions:
Minimum permissions:
Microsoft.Storage/storageAccounts/blobServices/containers/blobs/readMicrosoft.Storage/storageAccounts/blobServices/containers/blobs/writeMicrosoft.Storage/storageAccounts/blobServices/containers/blobs/delete
Optional permissions
Microsoft.Storage/storageAccounts/blobServices/generateUserDelegationKey/action- Needed to generate pre-signed URLs (required for CSV downloads in the Data Profiler and breach result exports)
To assign a role, navigate to the Storage Account, go to Access Control (IAM) > Add role assignment, and grant it to the service principal.
Summary of required inputs for OAuth registration:
Field Where to find it Tenant ID Azure AD > App registrations > your app > Overview > Directory (tenant) ID Client ID Azure AD > App registrations > your app > Overview > Application (client) ID Client secret Azure AD > App registrations > your app > Certificates & secrets Storage account URL Storage Account > Overview > Blob service URL (e.g. https://<account>.blob.core.windows.net)
3. Complete Registration
After creating the storage account and container, complete registration by supplying the required credentials for your chosen authentication method. Monte Carlo auto-enables the data store on successful completion.
After this step is complete all integrations that you add to this deployment will automatically use this container for storing troubleshooting and temporary data. You can add these integrations as you normally would using Monte Carlo's UI wizard or CLI.
UI
If you are onboarding a new account, you can also register by following the steps on the onboarding screen
-
Open the data store's Edit page (Monte Carlo will have routed you there after step 1; you can also navigate from settings/deployments).
-
Select your authentication method:
Storage Account Key: Fill in the Container name and Connection string (from step 2), then click Enable.
OAuth (Service Principal): Fill in the Container name, Storage account URL, Tenant ID, Client ID, and Client secret (from step 2), then click Enable.
Monte Carlo validates the configuration and enables the data store.
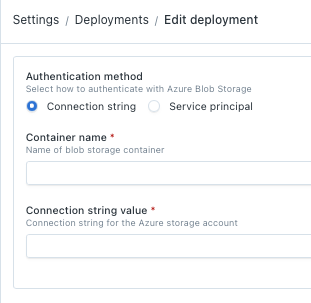
Azure Data Store Connection string wizard
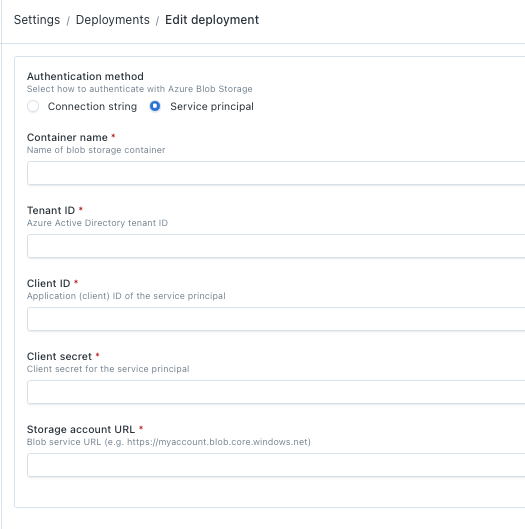
Azure Data Store Service Principal wizard
CLI
Register the data store with the credentials from step 2.
Storage Account Key:
montecarlo agents register-azure-blob-store \
  --container-name <name> \
  --connection-string "DefaultEndpointsProtocol=https;AccountName=...;AccountKey=..."
OAuth (Service Principal):
montecarlo agents register-azure-blob-store \
  --container-name <name> \
  --storage-account-url "https://<account-name>.blob.core.windows.net" \
  --tenant-id <tenant-id> \
  --client-id <client-id> \
  --client-secret <client-secret>
For reference on this command please see here. And see here for how to install and configure the CLI.
FAQs
Why am I seeing an "account limit reached" error when I click Provision?
Monte Carlo applies a per-account limit on the number of provisioned deployments to prevent runaway resource allocation. If you hit it, the Provision action fails with an error like:
Could not register deployment
Cannot allocate new resources for a <platform> agent, account limit reached. Please contact support.
If you need to provision more deployments, reach out via our Support Agent or contact your account representative and we'll raise the limit.
What is the difference between Storage Account Key and OAuth authentication?
With Storage Account Key authentication, Monte Carlo uses a connection string that contains the account key. This provides full access to the storage account and is the simplest setup.
With OAuth (Service Principal) authentication, Monte Carlo uses Azure AD credentials (tenant ID, client ID, and client secret) scoped to specific roles. This gives you finer-grained access control and avoids sharing account-level keys.
Do pre-signed URLs work with OAuth?
Pre-signed URLs (used for CSV downloads in the Data Profiler and breach result exports) require the generateUserDelegationKey permission (included in the Storage Blob Delegator role) at the Storage Account scope. If this permission is not granted, pre-signed URL features will be disabled for this data store — everything else works normally.
When using private endpoints, pre-signed URLs are not supported regardless of the authentication method.
Can I further constraint access to this Data Store (Azure Storage Account)?
Absolutely! Access can be restricted via the connection string or service principal roles. You can also further restrict requests via an IP allowlist. For instance you can:
- Please refer to the documentation for the list of IP addresses that need to be allowlisted for your platform version.
- Create a Storage Account and Container. You can do this by following the steps here.
- Navigate to the Storage Account created in step #2 and select "Networking".
- Update the Public network access option to "Enabled from selected virtual networks and IP addresses" and under Firewall add the IP address from step #1 alongside any other IP addresses you want to allow. Select "Save" when you're done.
- Continue with registration.
Note that this constraint will prevent the use of certain features and functionality that rely on pre-signed URLs unless you also include the client IPs.
You also have the option to use private endpoints if you prefer.
For more information on connectivity, please refer to our Network Connectivity documentation.
Can I use private endpoints to configure inbound access (ingress) to the data store?
Yes, please refer to the documentation for more details.
How do I check the reachability between Monte Carlo and the Data Store?
Reachability is automatically validated during registration, but you can also use this CLI command or "test" button on the UI to test anytime.
Updated 22 days ago