Databricks Workflows
Databricks Workflows is Databricks' managed orchestration services, which enables users to easily create and manage multitask workflows for ETL, analytics and machine learning pipelines.
Integrating MC with Databricks Workflows allows you to quickly determine which Databricks workflow potentially caused an anomaly downstream, accelerating your time to resolution. You will also be able to manage your workflow failure alerts along with all other data quality alerts in Monte Carlo, so you have centralized incident triage, notification routing, and data quality reporting across all your data and system issues.
The following docs will walk through
1) Databricks Workflows on Lineage and as Assets
Databricks Job on Lineage
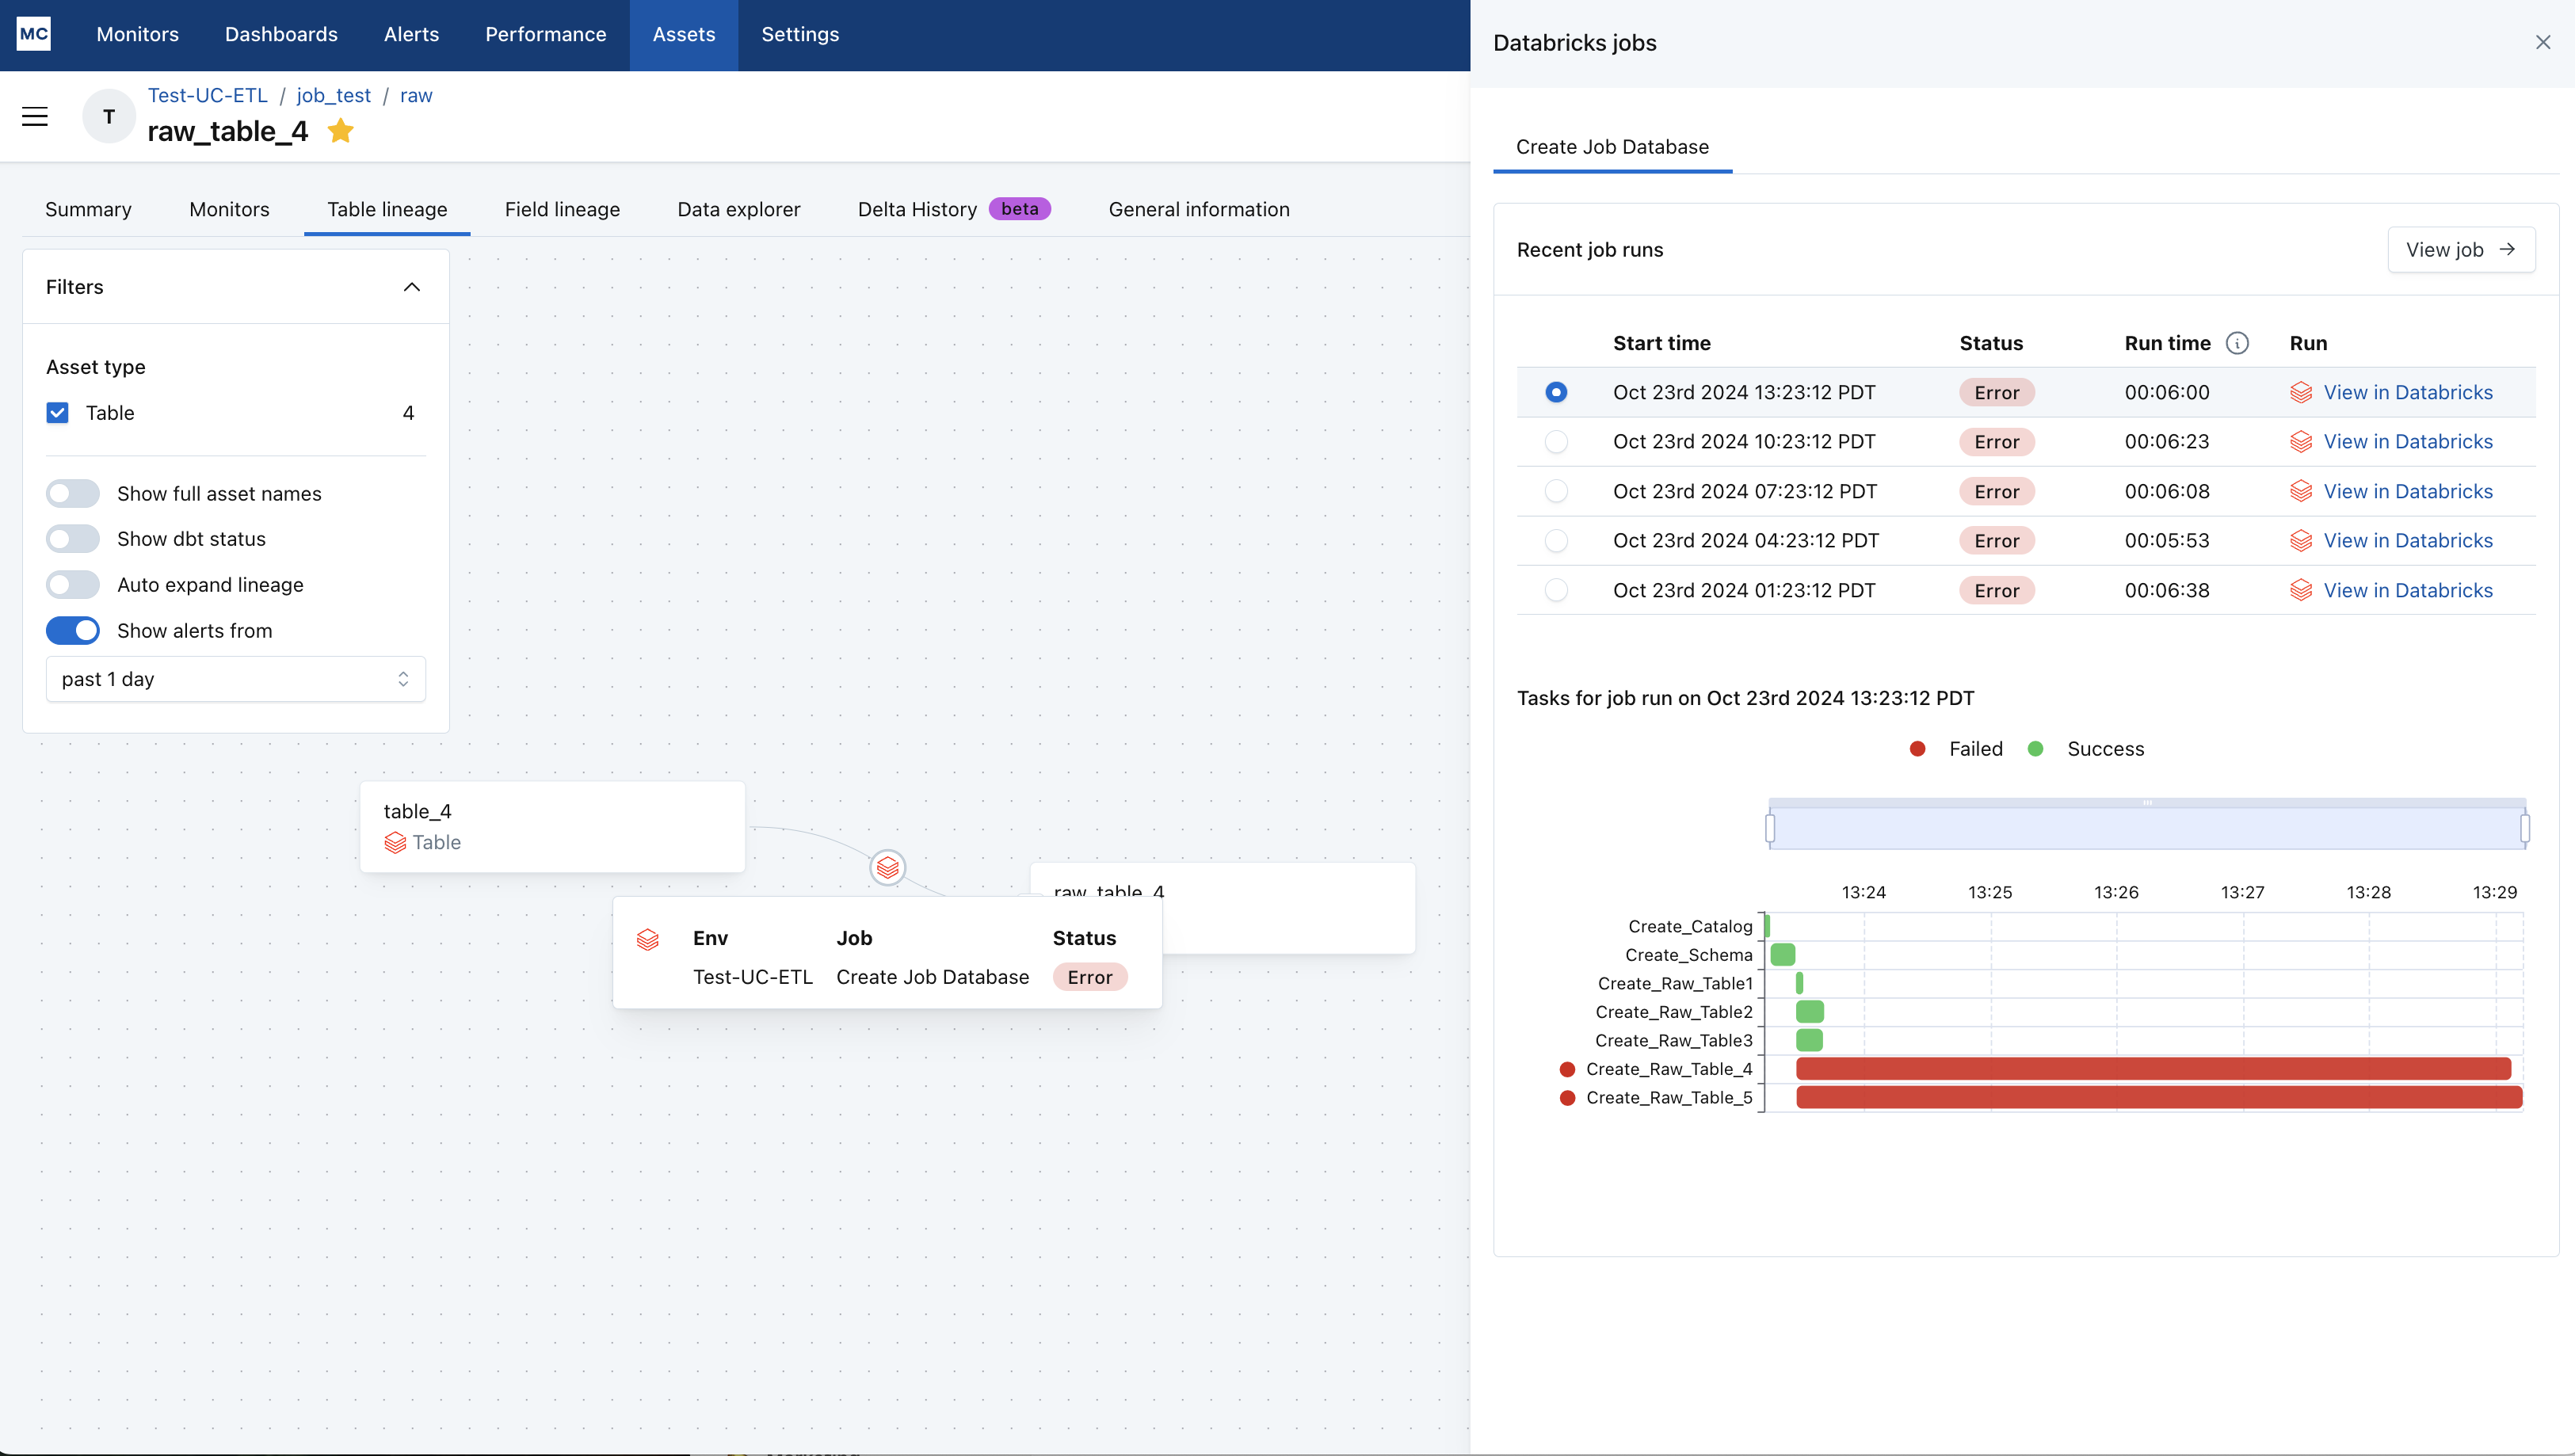
Understand which Databricks Workflows jobs creates the lineage between two tables in your Databricks environment.
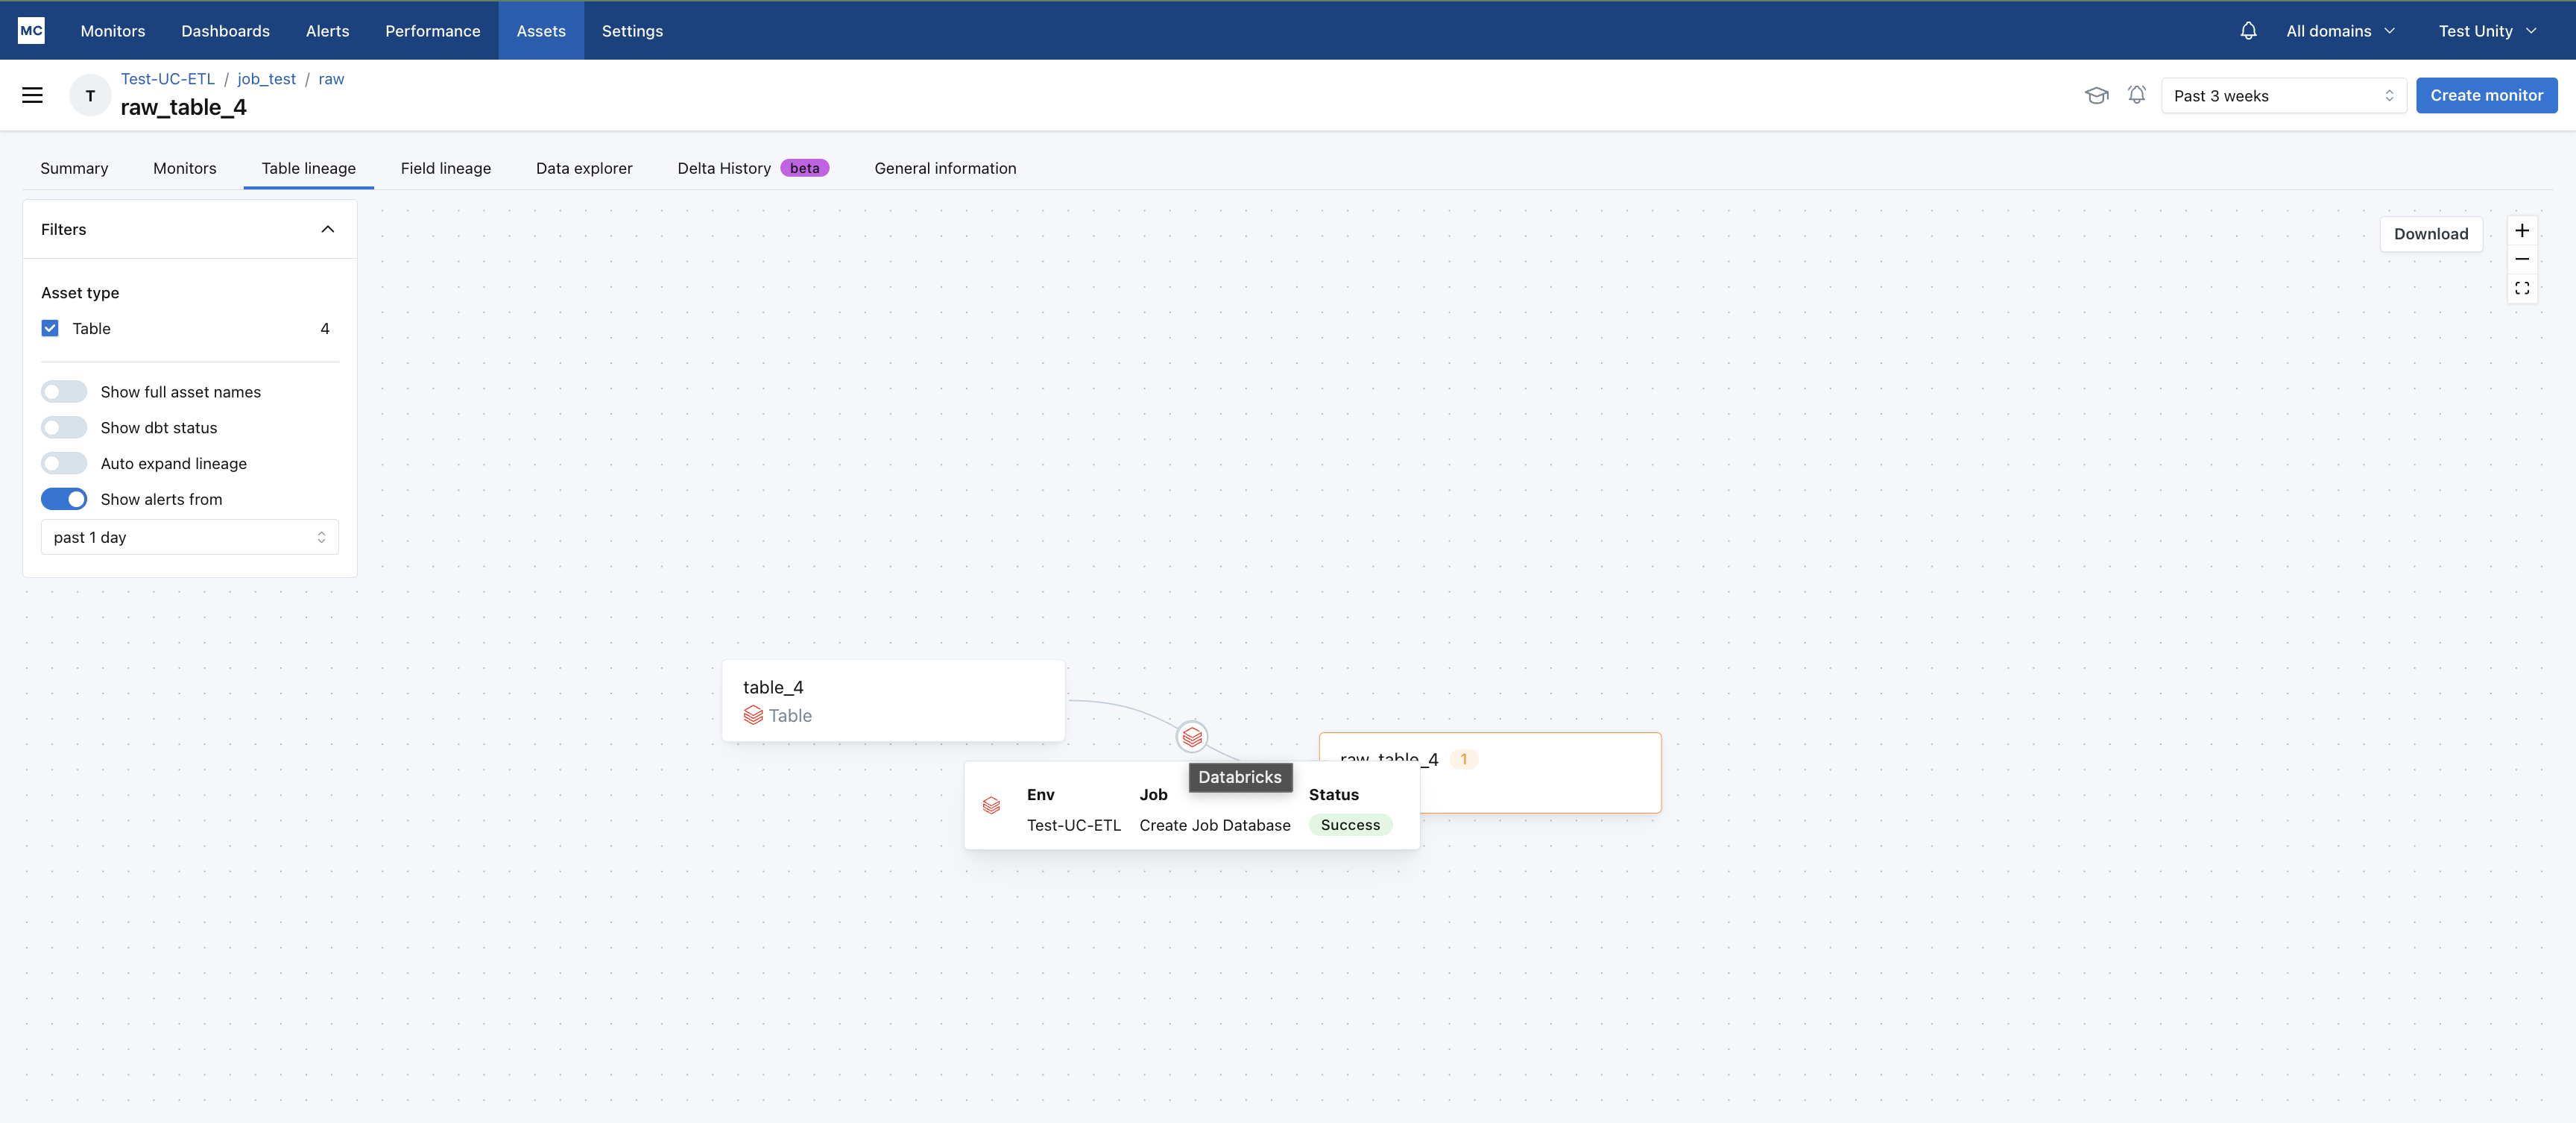
Click into the Databricks icon to see recent job runs for this lineage edge.
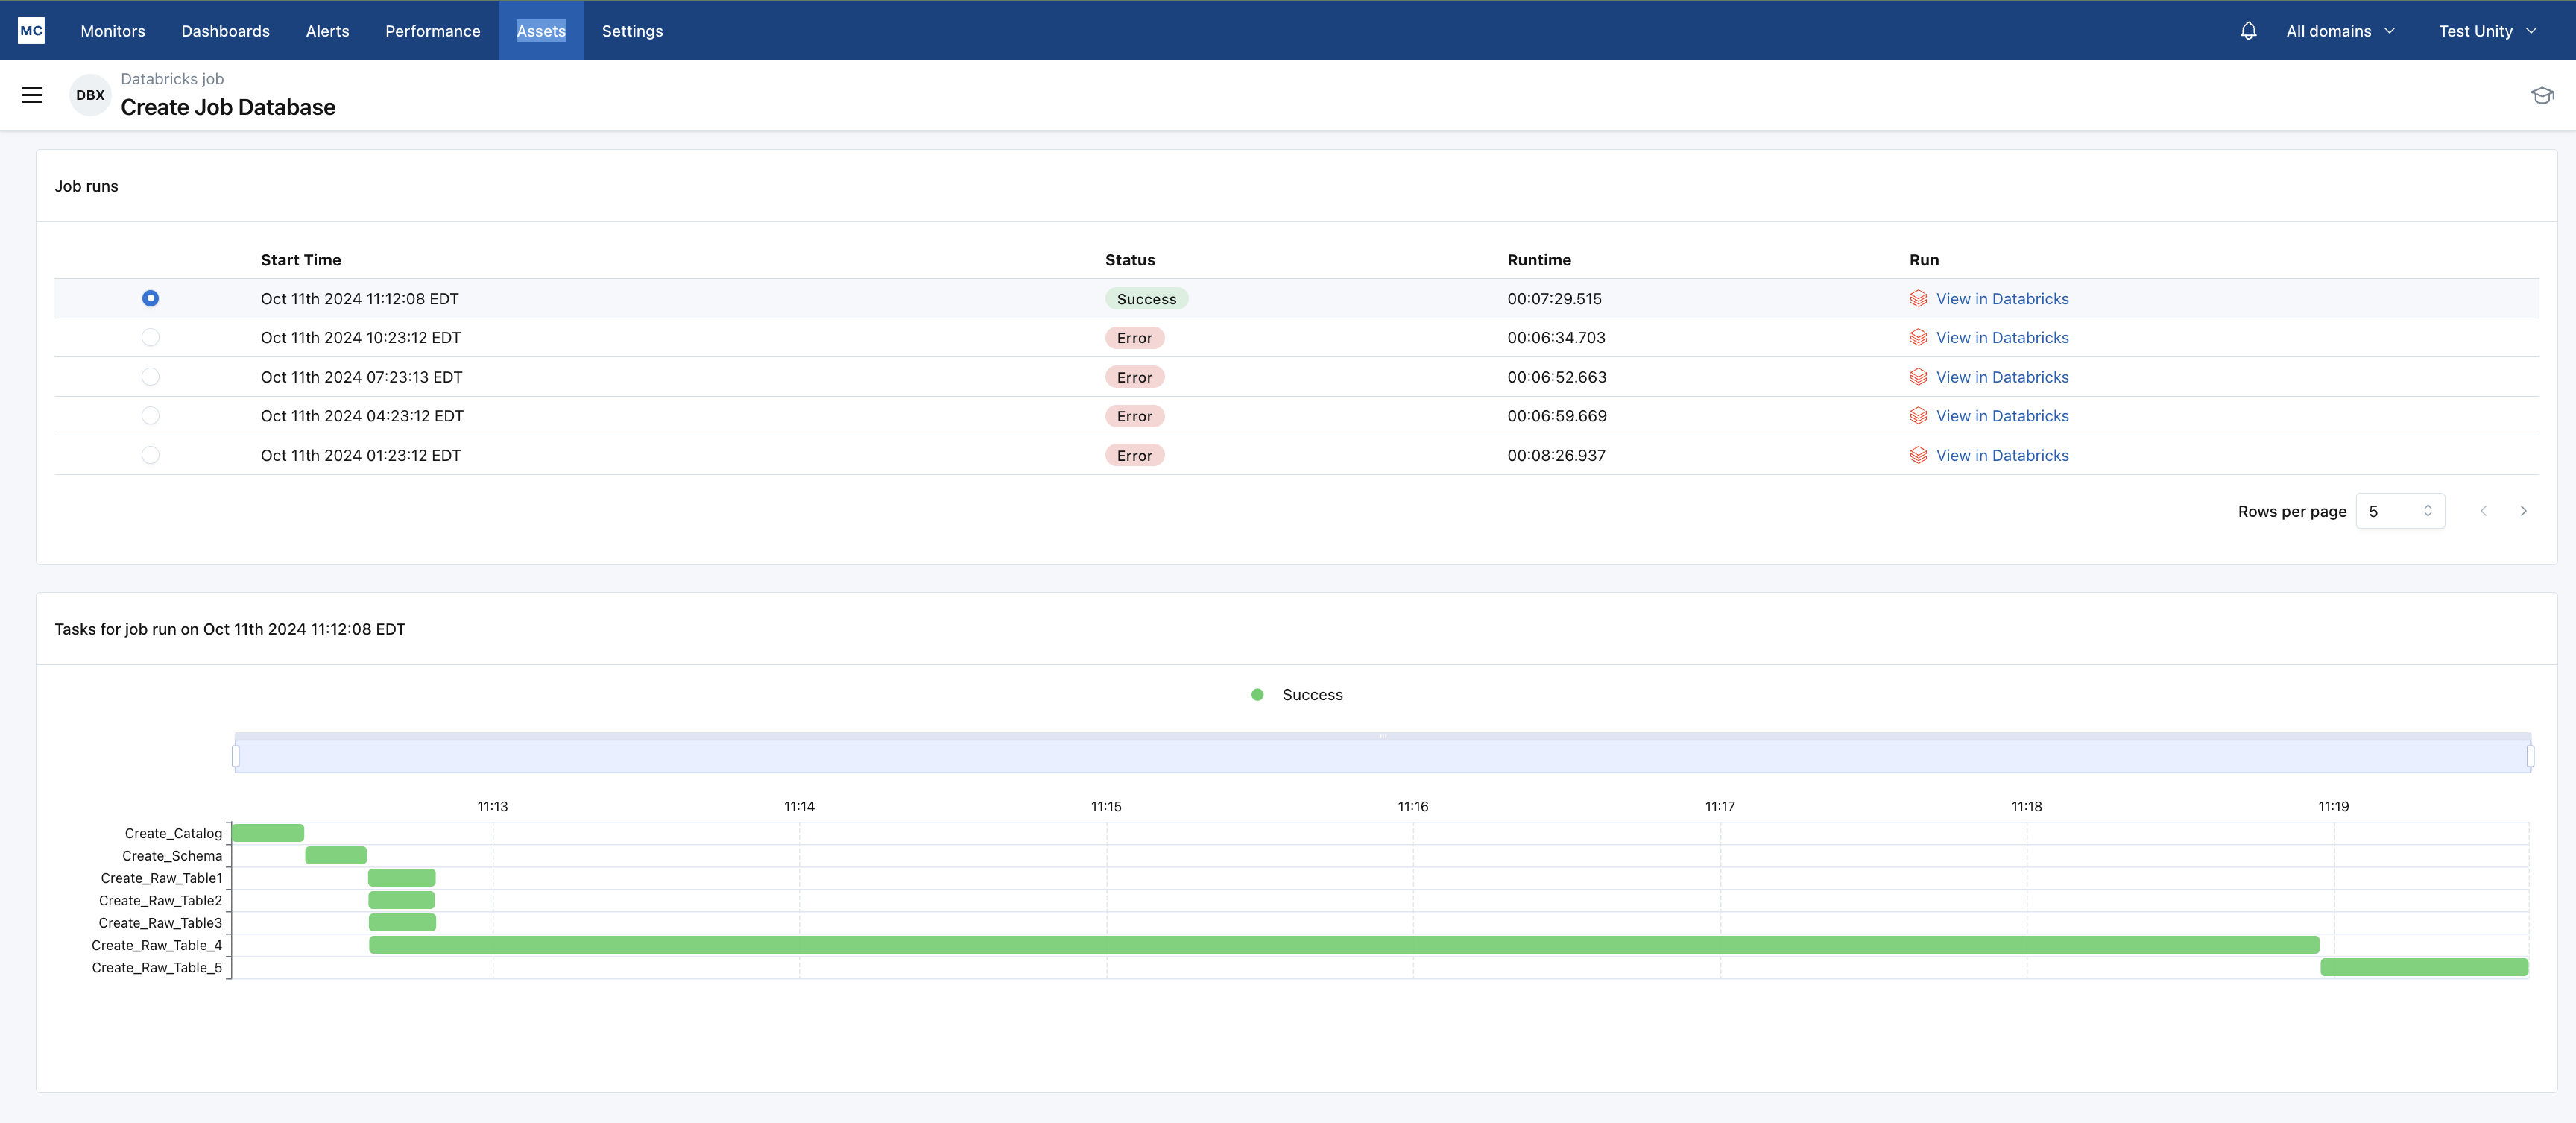
Databricks Jobs As Assets
Use Monte Carlo as a single pane of glass for all data quality context for each table, including Databricks Job runs. Check the status and duration of recent Databricks job runs relevant to a table of interest.
Setup and Getting Started
If you have set up the MC-Databricks integration after 10/1/2024 following the latest documentation or if you already get the described features above, there should be no additional configuration needed and you can proceed to part 2. If not, you need to ensure the following two conditions:
i. Have a working MC-Databricks connection, following instructions step 1 through step 6 here, and
ii. Make sure permissions to job-related system tables below are granted to the Service Principal. These are also covered in docs here:
GRANT SELECT ON system.lakeflow.jobs TO <monte_carlo_service_principal>;
GRANT SELECT ON system.lakeflow.job_tasks TO <monte_carlo_service_principal>;
GRANT SELECT ON system.lakeflow.job_run_timeline TO <monte_carlo_service_principal>;
GRANT SELECT ON system.lakeflow.job_task_run_timeline TO <monte_carlo_service_principal>;
Then Monte Carlo will automatically start collecting Databricks Workflow Job information.
2. Databricks Workflows Failures as MC Alerts
Additional setup is required to receive Databricks Workflows failures in MC.
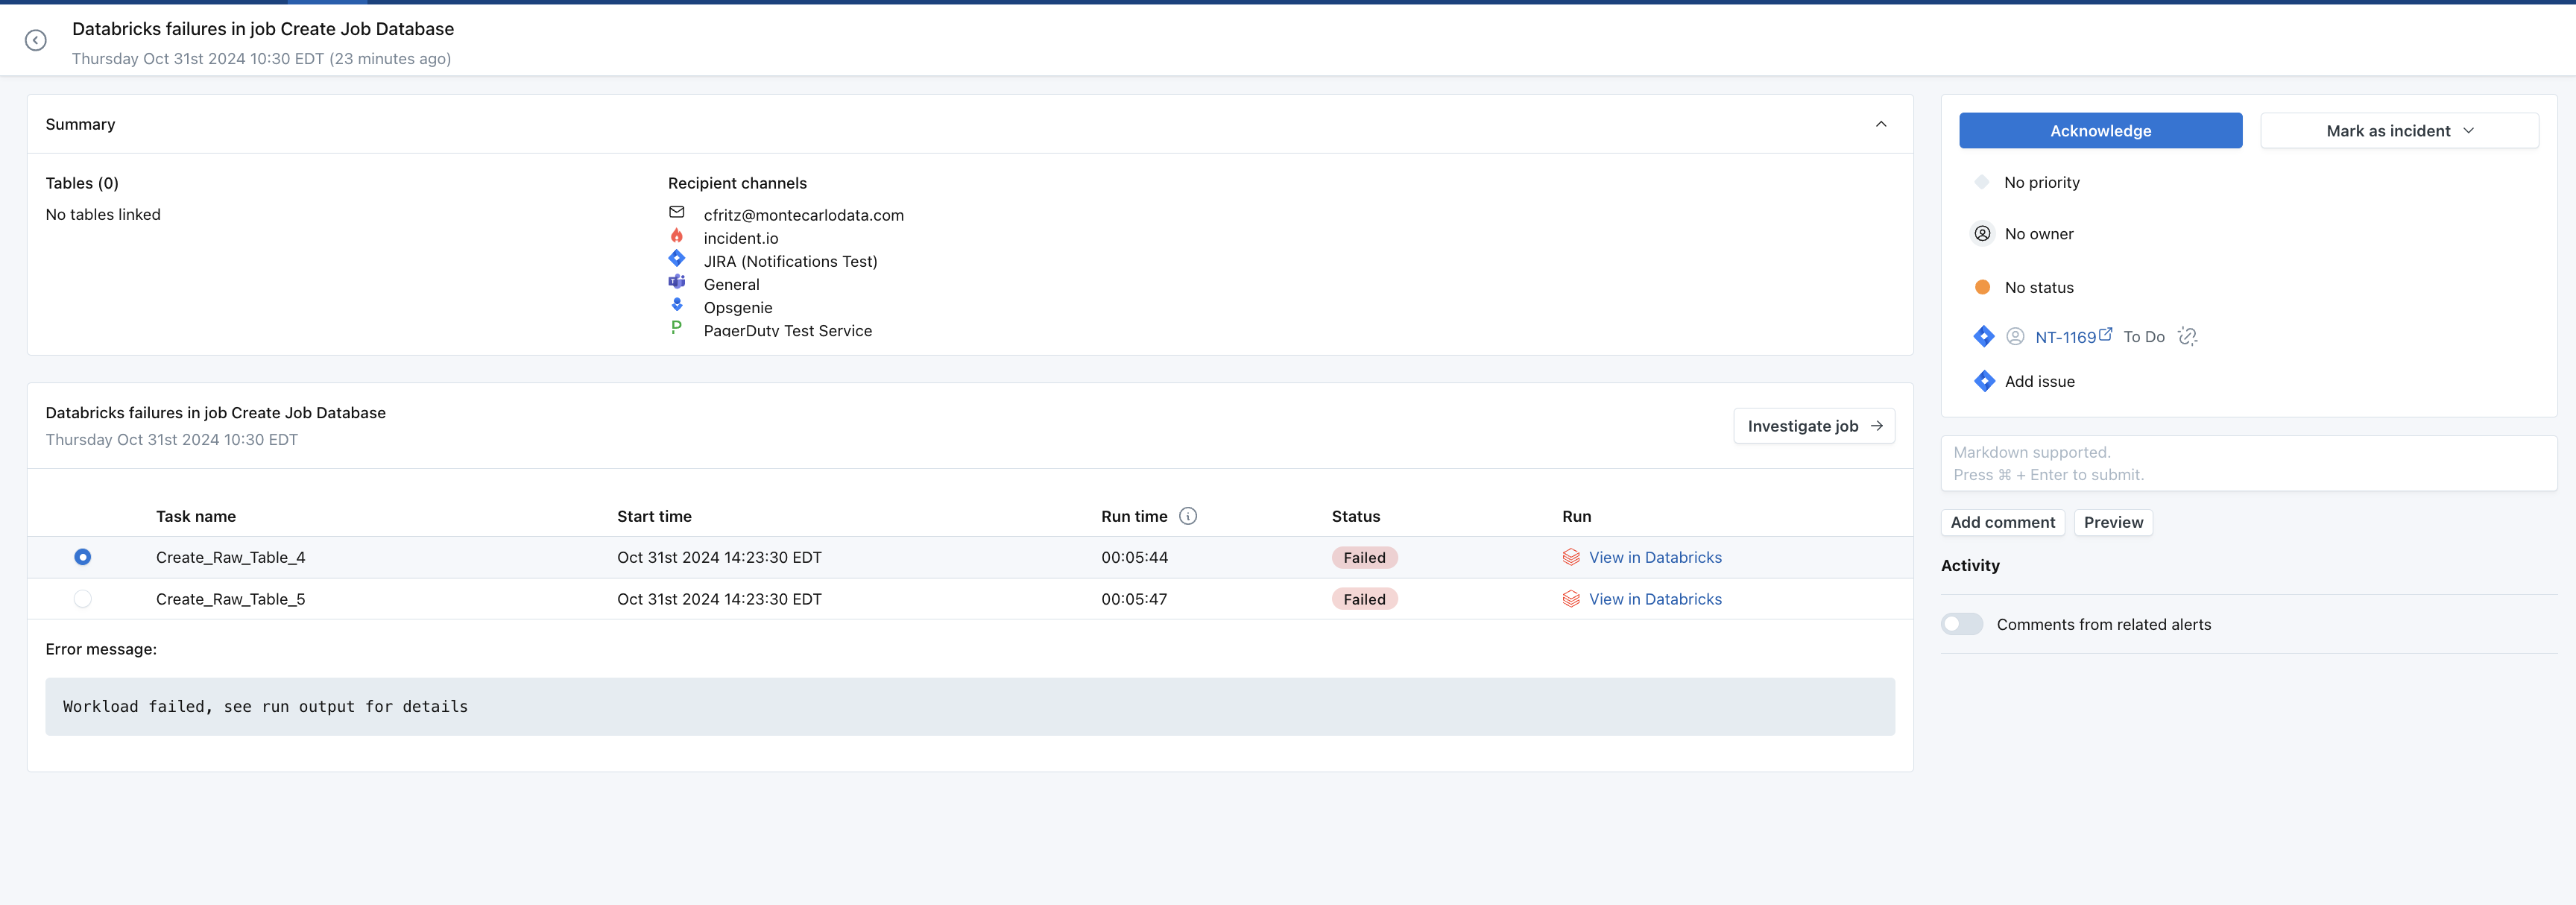
Databricks Job Alerts in MC
Receive alerts on Databricks Workflows failures in Monte Carlo, so you can centrally manage and report on such issues along with all your other data incidents. More info on how alerts work in MC here
Setup
1. Create Webhook Key and Secret in Monte Carlo
Create via UI
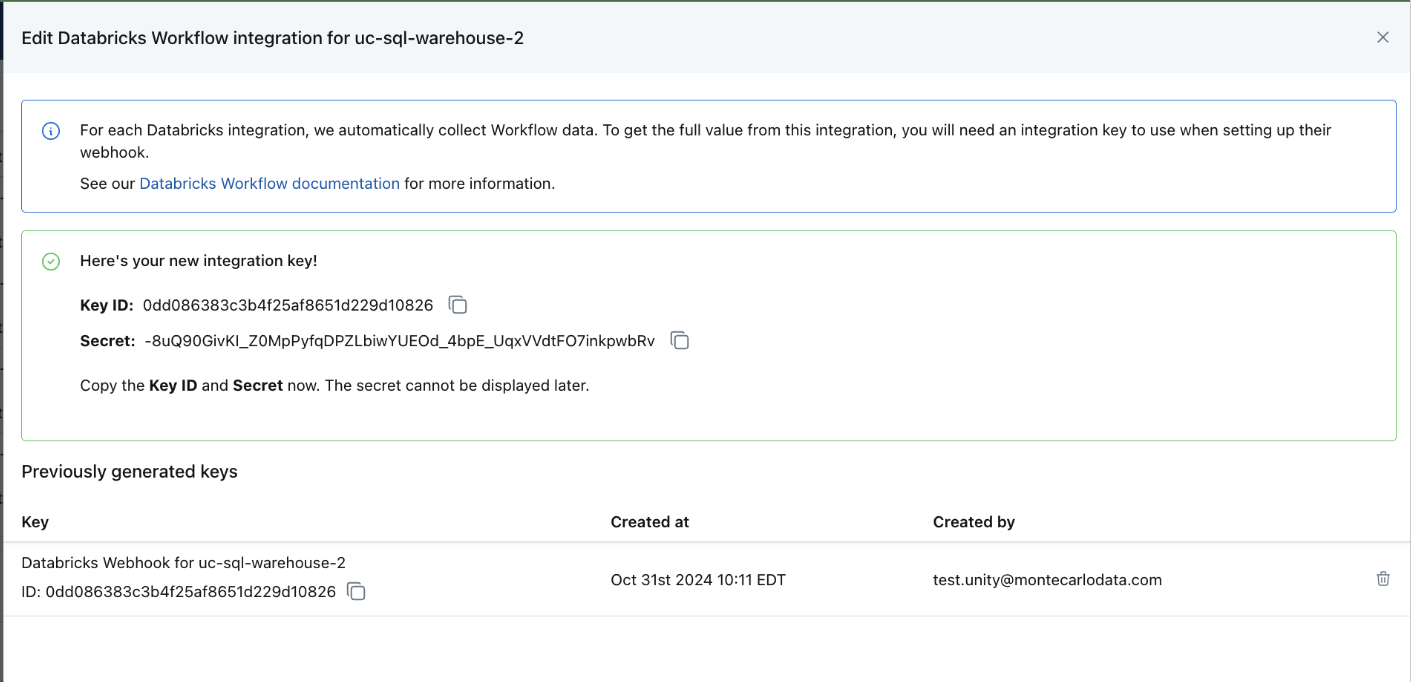
You can use the Monte Carlo UI to create a databricks webhook integration key. On the Integrations page, under your Databricks integration, you will see a Databricks Workflows connection. Click on the three dots at the end of the line for the connection, select Manage Keys to create a key. You will use this key to create the webhook notification in Databricks.

Click on the "Generate integration key" button, then you will see an integration key generated below.
Create via CLI
Alternatively, you can use the Monte Carlo CLI to create a databricks webhook integration key. Follow script below.
% montecarlo integrations create-databricks-webhook-key --help
Usage: montecarlo integrations create-databricks-webhook-key
           [OPTIONS]

  Create an integration key for a Databricks webhook

Options:
  --integration-name TEXT  Name of associated Databricks metastore integration
                           (required if you have more than one)
  --option-file FILE       Read configuration from FILE.
  --help                   Show this message and exit.
2. Add Webhook notification in Databricks
Note: This must be done by a workspace admin in Databricks.
Create a notification destination pointing to the Monte Carlo Databricks Webhook endpoint below.
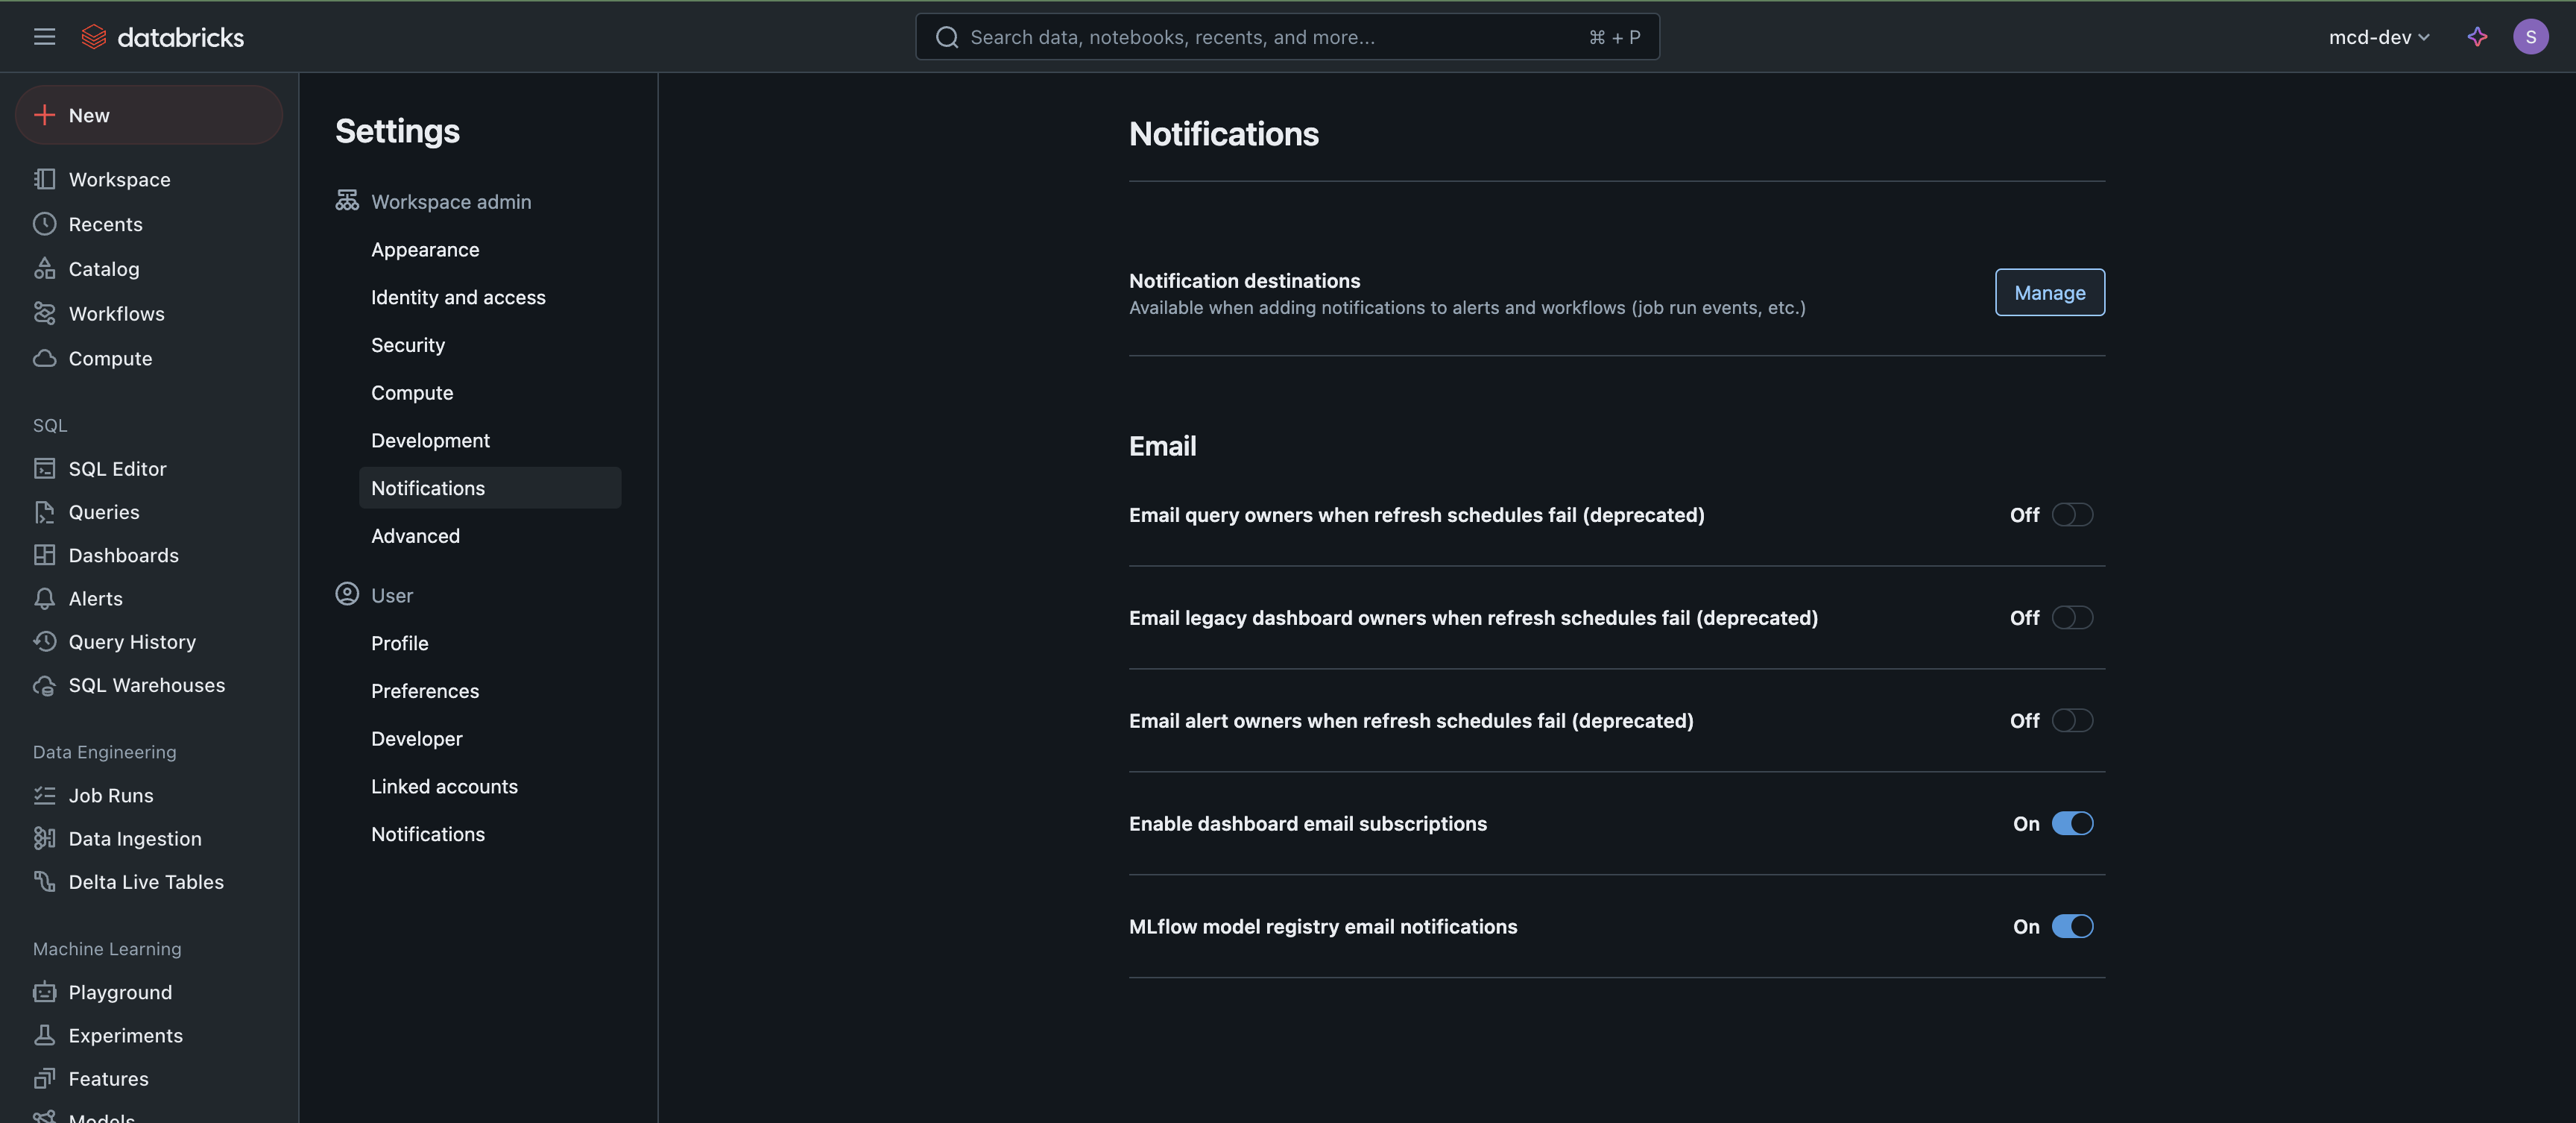
https://integrations.getmontecarlo.com/webhooks/databricksGo to Databricks UI, under Settings, navigate to tab Notifications, click on "Manage" to create a new notification destination.
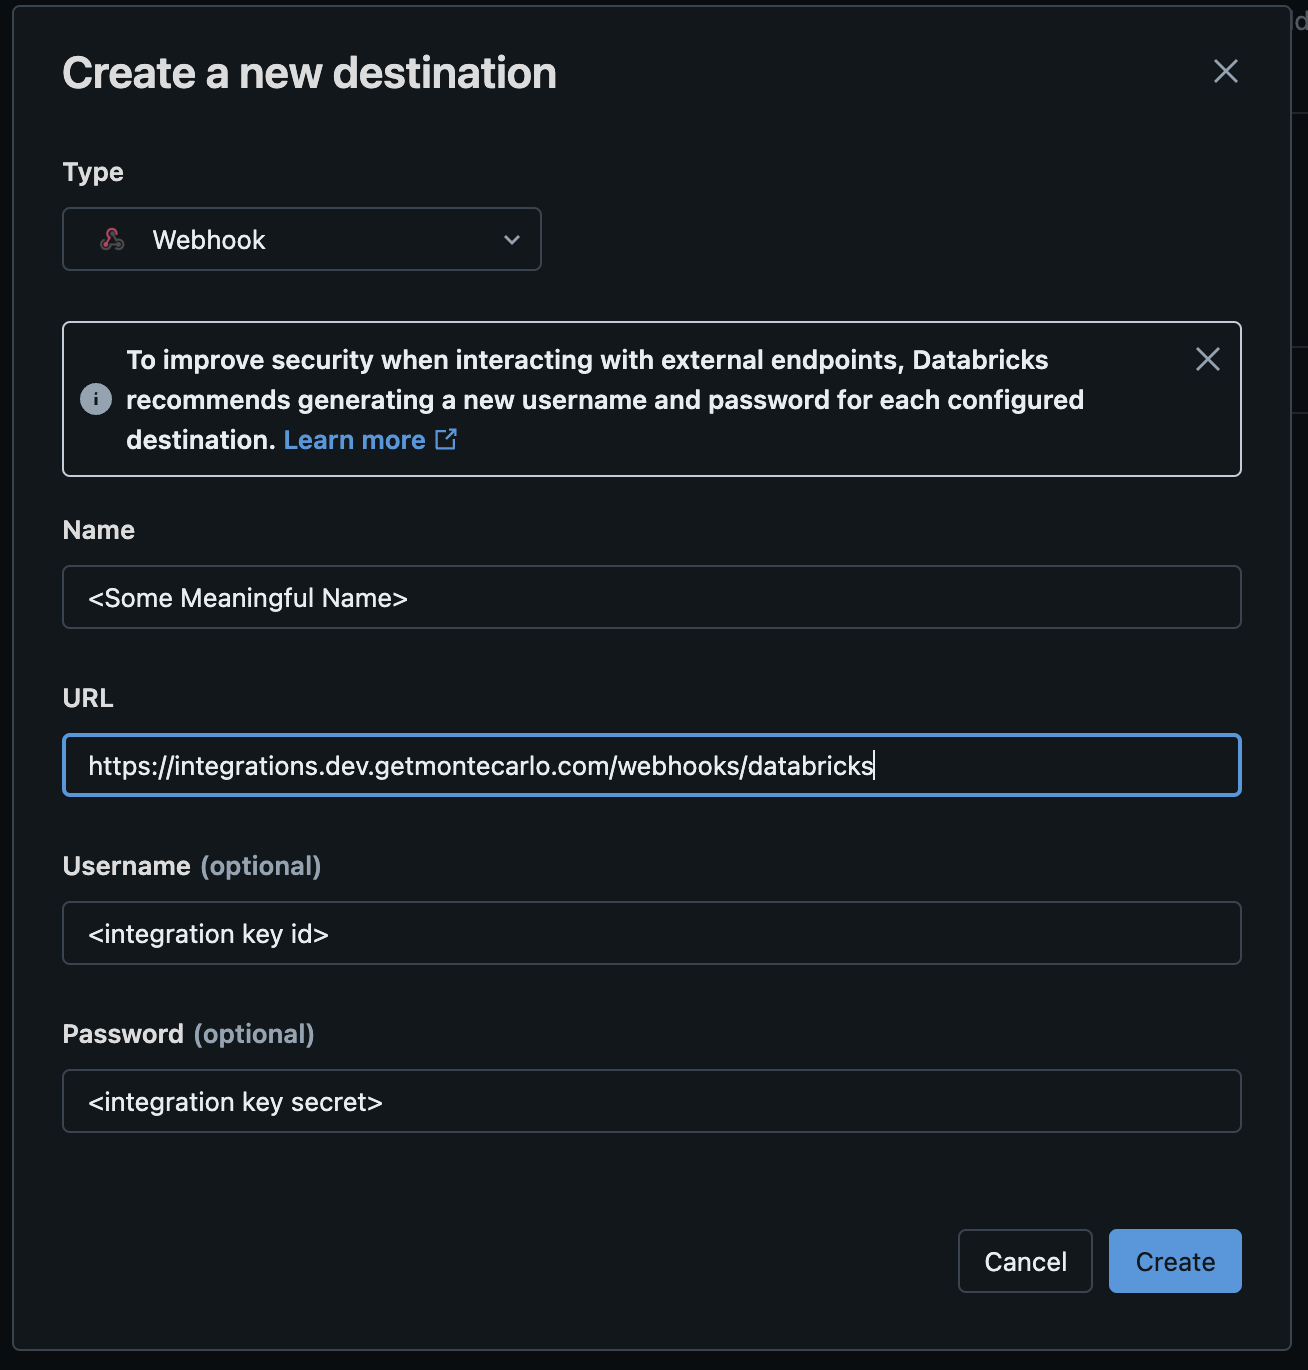
In the Create New Destination screen, select type "Webhook", give it a name, and copy the webhook endpoint URL from above in the form.
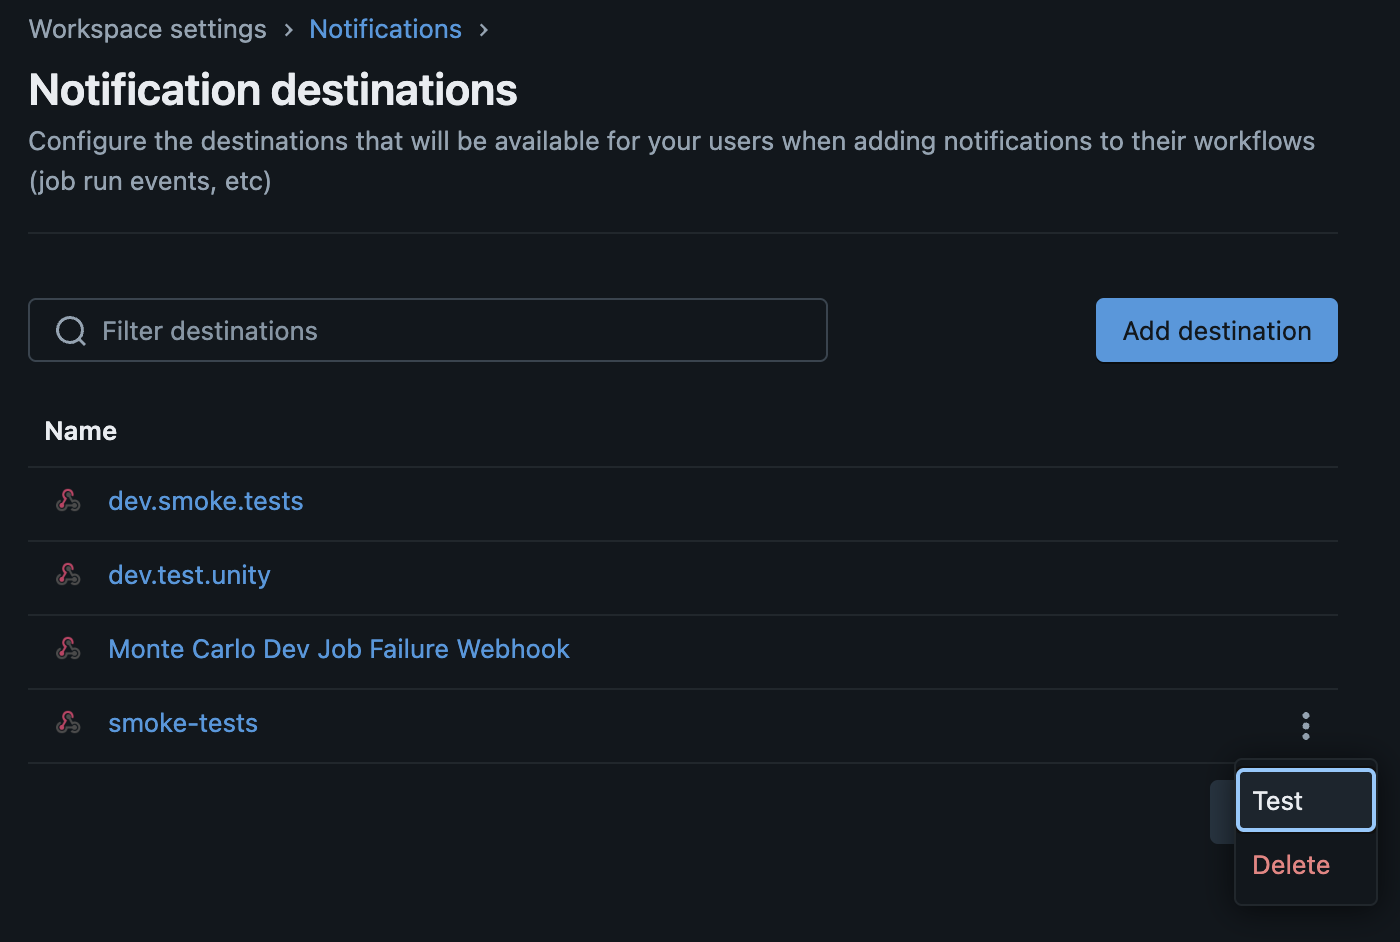
You can test that the notification is configured correctly using the "test" feature of the notification:
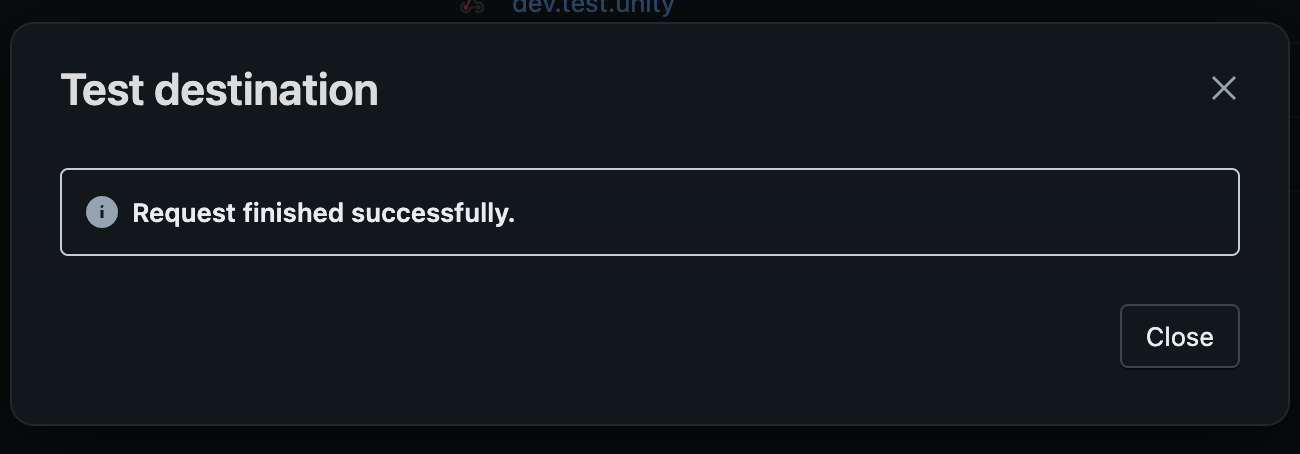
For more details on creating notification destination in Databricks, see Databricks Documentation .
3. Add Notifications and Permissions to Databricks Jobs
Next you will set up the notification and permission for each Databricks job you want alerts routed to MC for. You can do it via the Databricks UI for each job one by one, or you can use a script provided below to configure all jobs in bulk. We recommend configuring for all jobs in bulk via script given i) it is fast to set up, ii) you can still enable or disable alert generation for each job in MC settings per step 4 below.
via Databricks UI
For each job you want to send failures to Monte Carlo for, go to that job's page in Databricks UI. On the right-hand-side panel under Job Notifications, click on "Edit notifications". Add a new notification, add the Webhook destination you created in the previous step, and check Failure then save the notification.
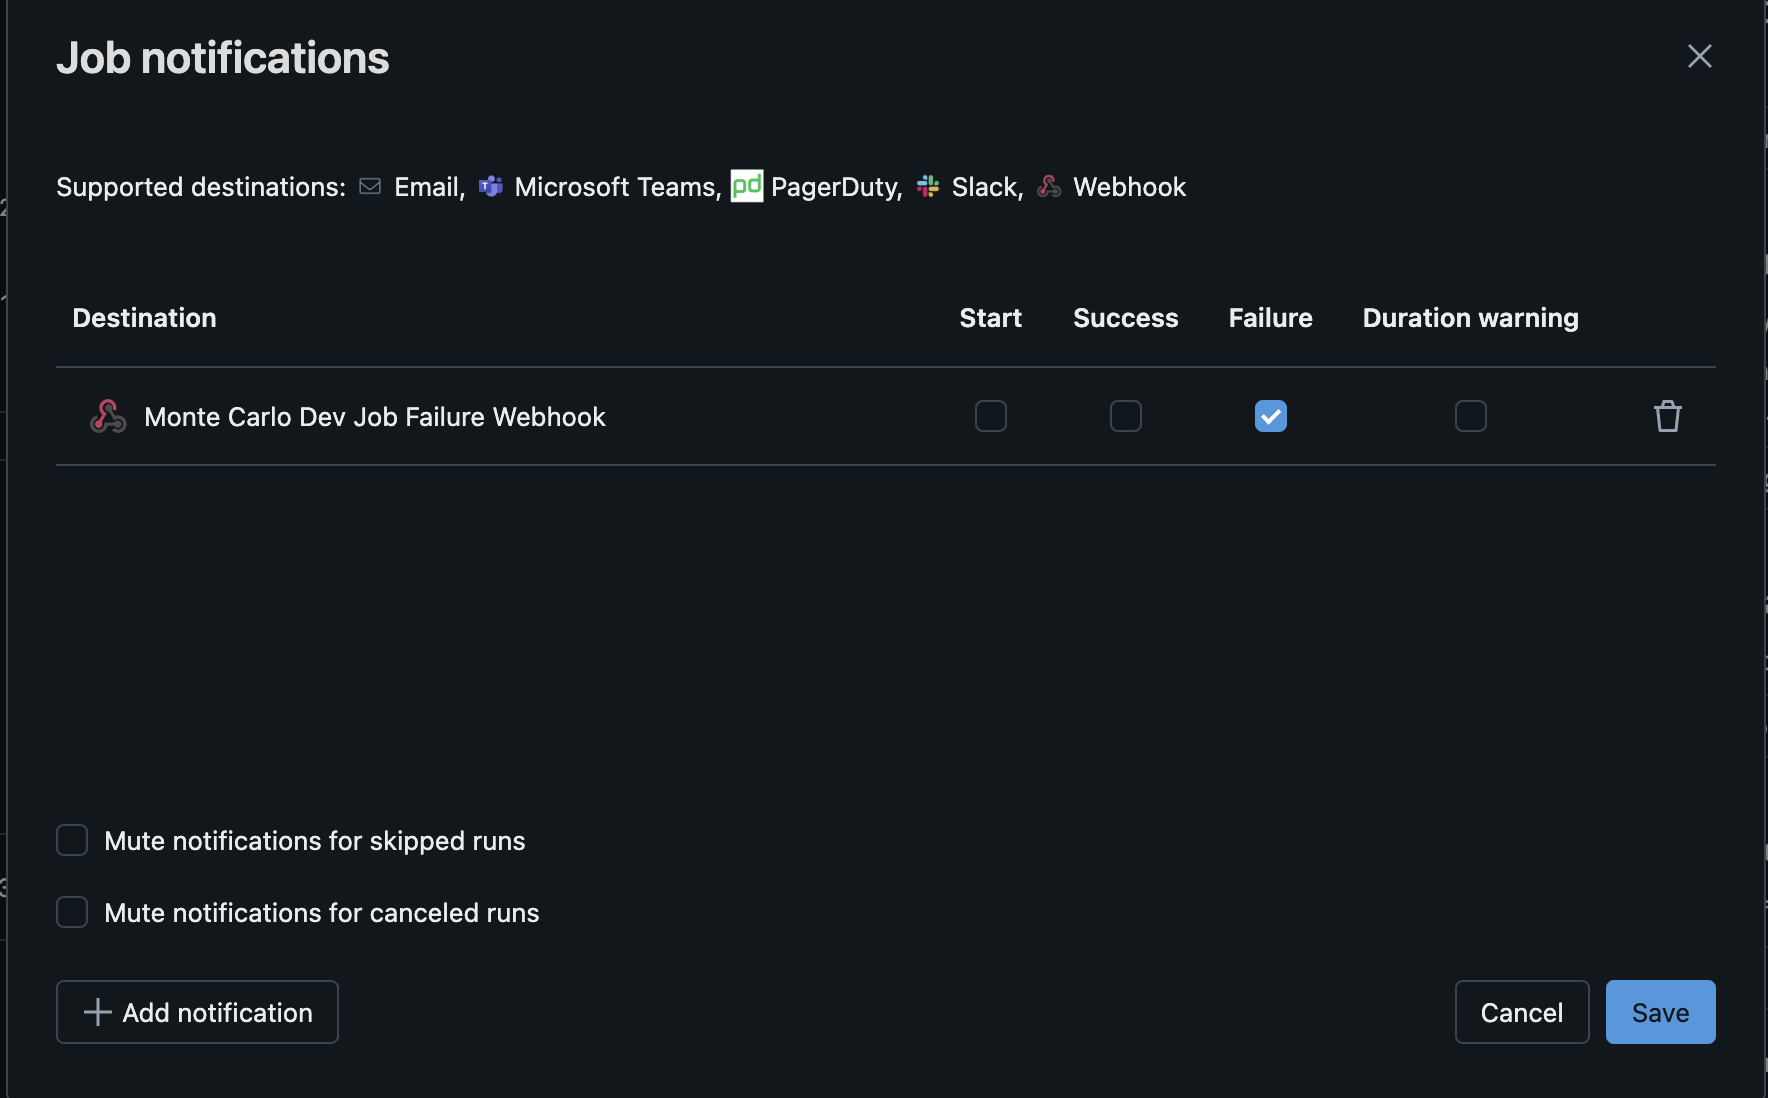
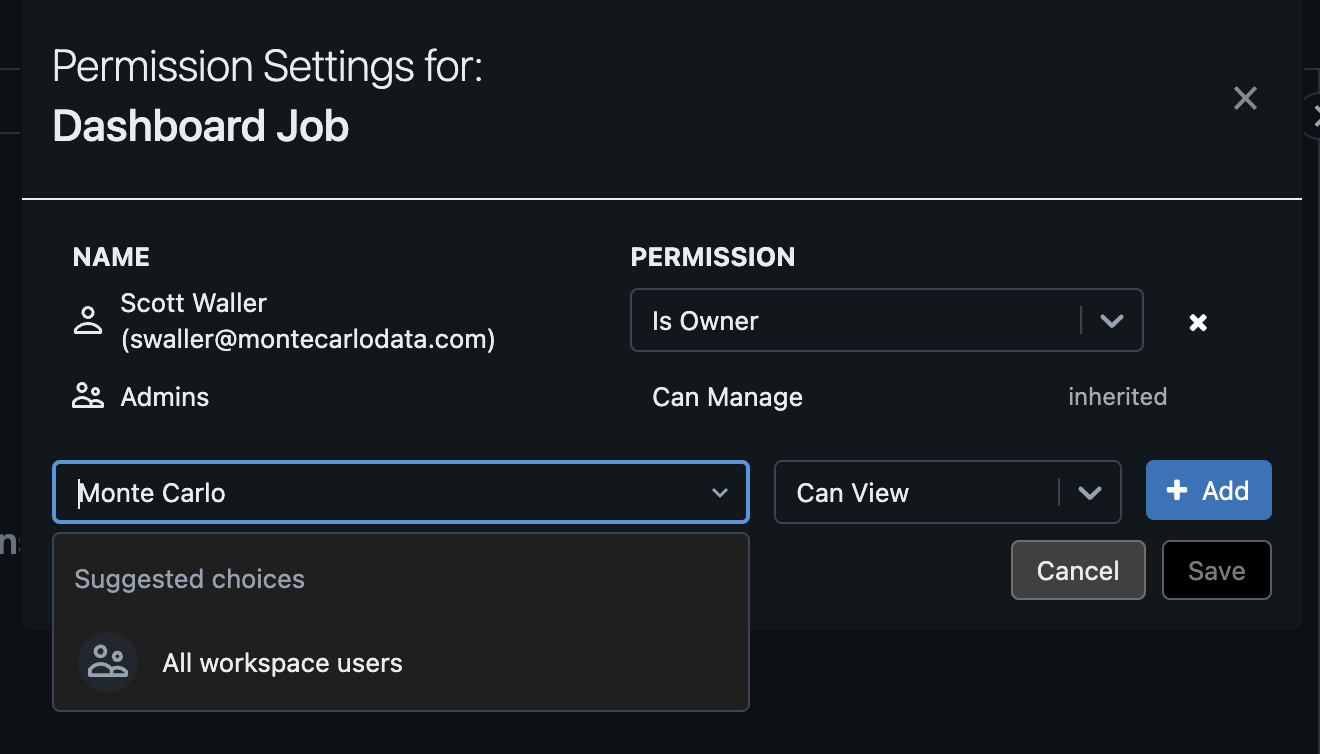
As part of the failure alerting workflow, Monte Carlo will use the Databricks Jobs API to gather more information to provide context for the alert, which requires the Can View permission for those jobs. To grant that permission, go back to the job's page in Databricks and navigate to the Permissions section on the right hand side, click on "edit permission".
In the Permission Settings screen, grant your Monte Carlo service principal the Can View permission.
--
via Script (bulk option available)[Recommended]
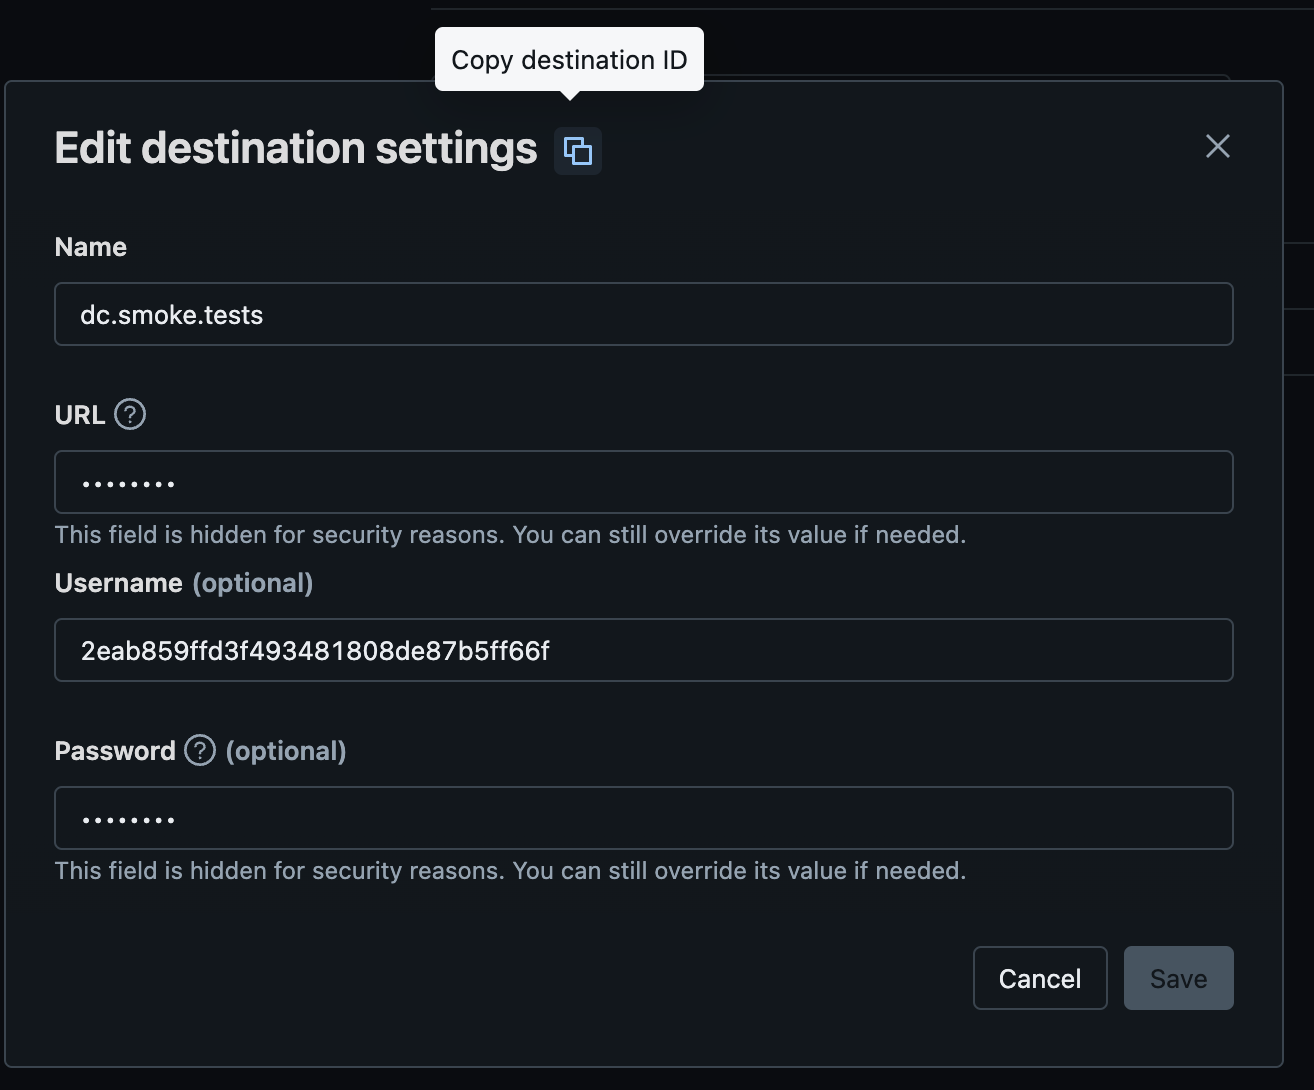
Get the UUID of the Monte Carlo notification destination you created before via Databricks UI -> Settings -> Notifications. Click on the copy button next to "Edit destination settings" to copy destination ID as the UUID.
Then get the Application ID of the Service Principal used to allow Monte Carlo Access. You can find this at https://<your-databricks-workspace>/settings/workspace/identity-and-access/service-principals

You will use the notification destination UUID and the Application ID for MC Service Principal in the script located here
You can choose to enable alerts for all jobs, or specify which jobs to enable alerts for by using the --databricks-job-name option.
Usage: enable_monte_carlo_databricks_job_incidents.py [OPTIONS]

  Enable Monte Carlo incidents for Databricks jobs

Options:
  --mcd-notification-id TEXT      UUID of the existing Databricks Notification
                                  pointing to the MC Webhook endpoint.
                                  [required]
  --mcd-service-principal-name TEXT
                                  Application ID of the existing Monte Carlo
                                  service principal in Databricks.  [required]
  --databricks-job-name TEXT      Databricks Job Name to enable MC incidents
                                  for. Can be used multiple times. If not
                                  specified, enable MC incidents for all jobs.
  --help                          Show this message and exit.
Example:
python enable_monte_carlo_databricks_job_incidents.py --mcd-notification-id '<mcd-notification-uuid>' --mcd-service-principal-name '<mcd-service-principal-application-id>' --databricks-job-name <job 1> --databricks-job-name <job 2>4. Enable Alerts for desired jobs in Monte Carlo
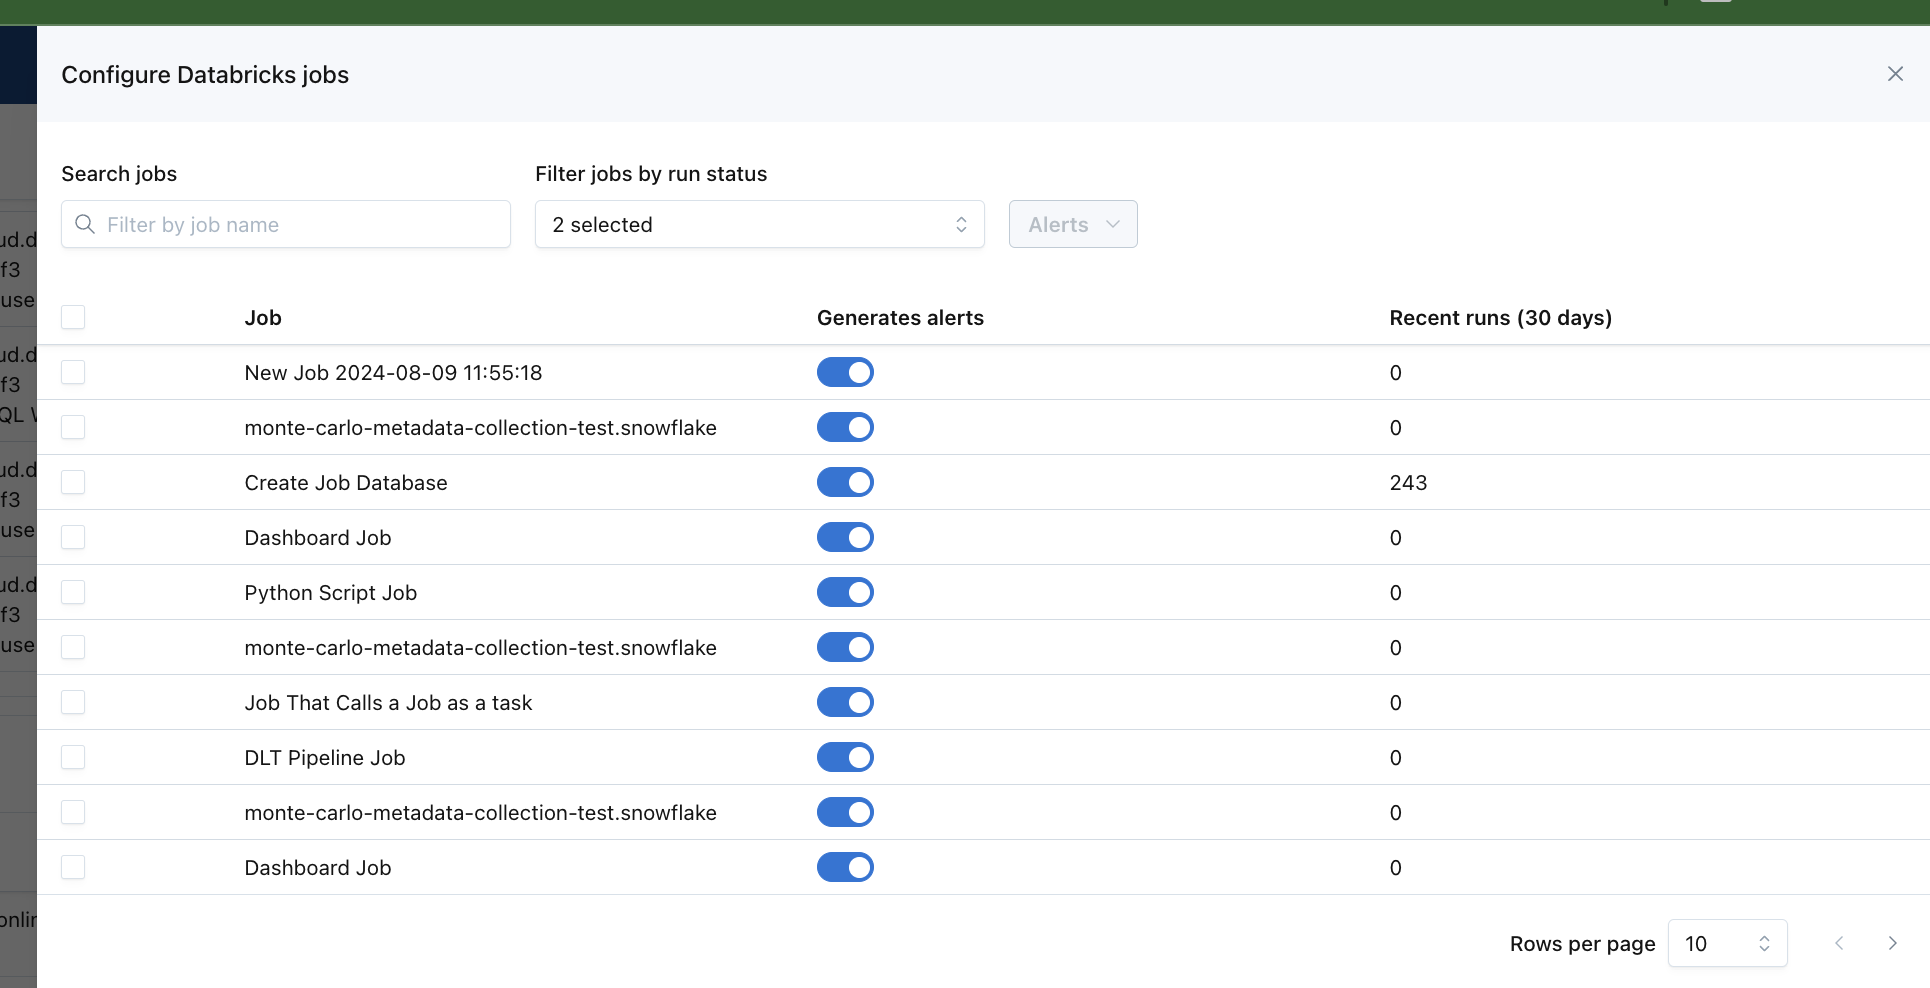
On the same connection where you created the Webhook Key, under the three dot menu, select the Configure Jobs option.


Here you can choose which jobs to generate alerts for. By default, alerts for jobs are disabled. To bulk enable/disable jobs, click on the checkboxes on the left for all jobs you want to alert on, then click on the "Alerts" button highlighted in blue, then you can either enable or disable alerts for all selected jobs.
5. Set up audience
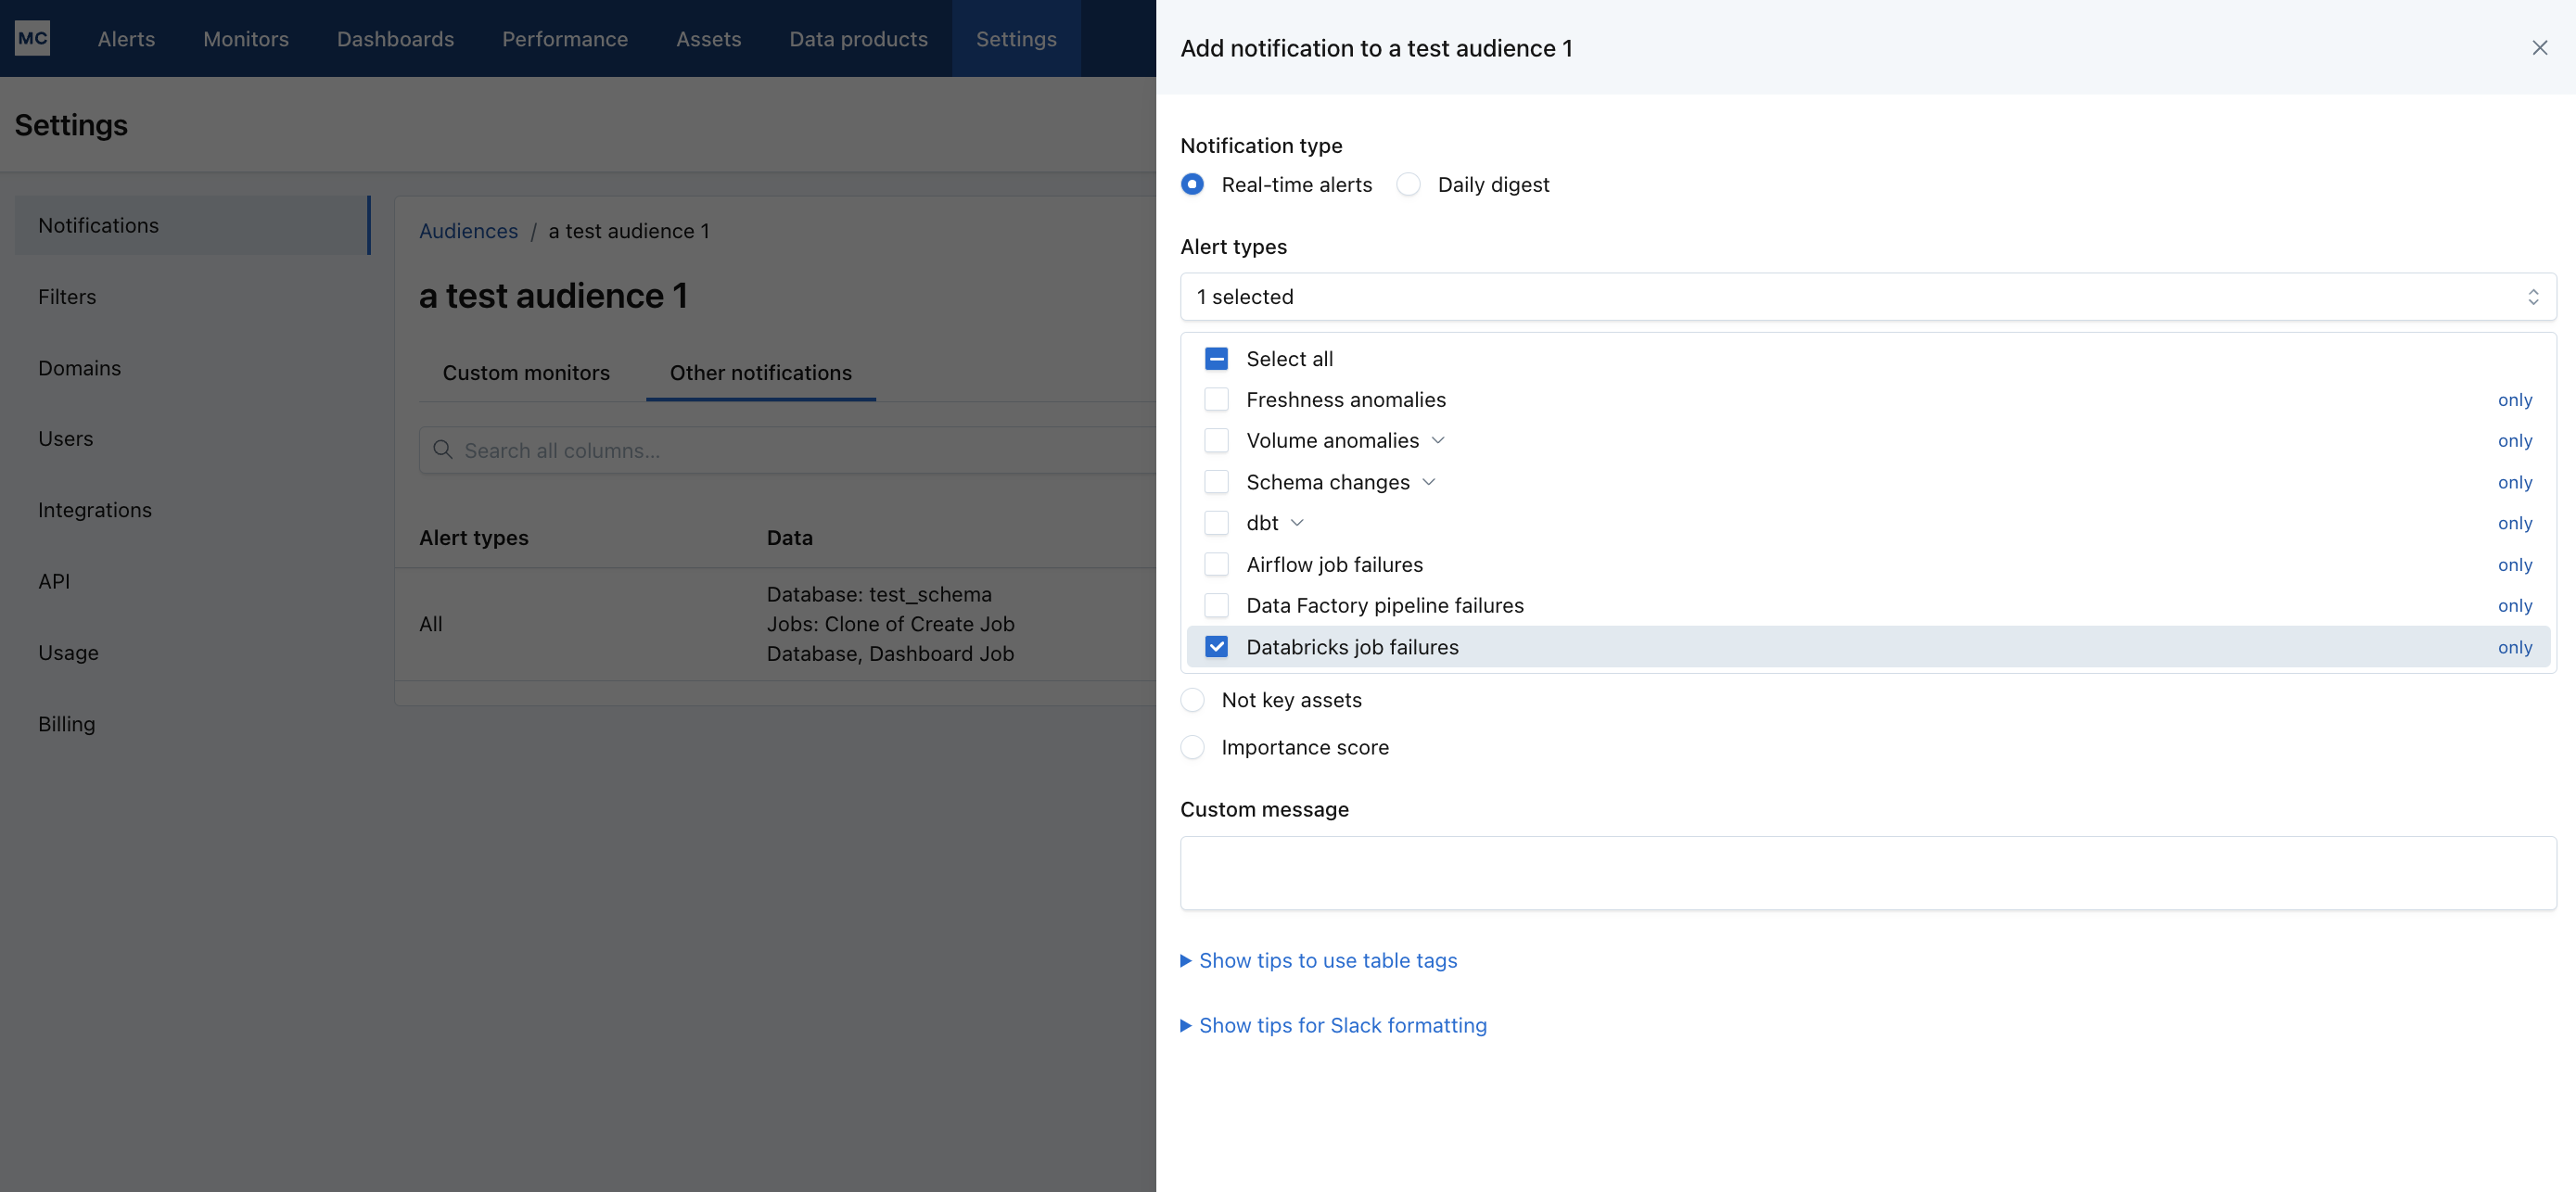
Finally, make sure to set up an audience in MC to route your Databricks workflow failures. You can do that by going to MC UI, Settings -> Notifications, then either create a new audience or edit an existing audience to include your Databricks workflow failures.
You can send failures for all Databricks Workflows to an audience by selecting Databricks job failures in Alert Type and All for Affected Data.
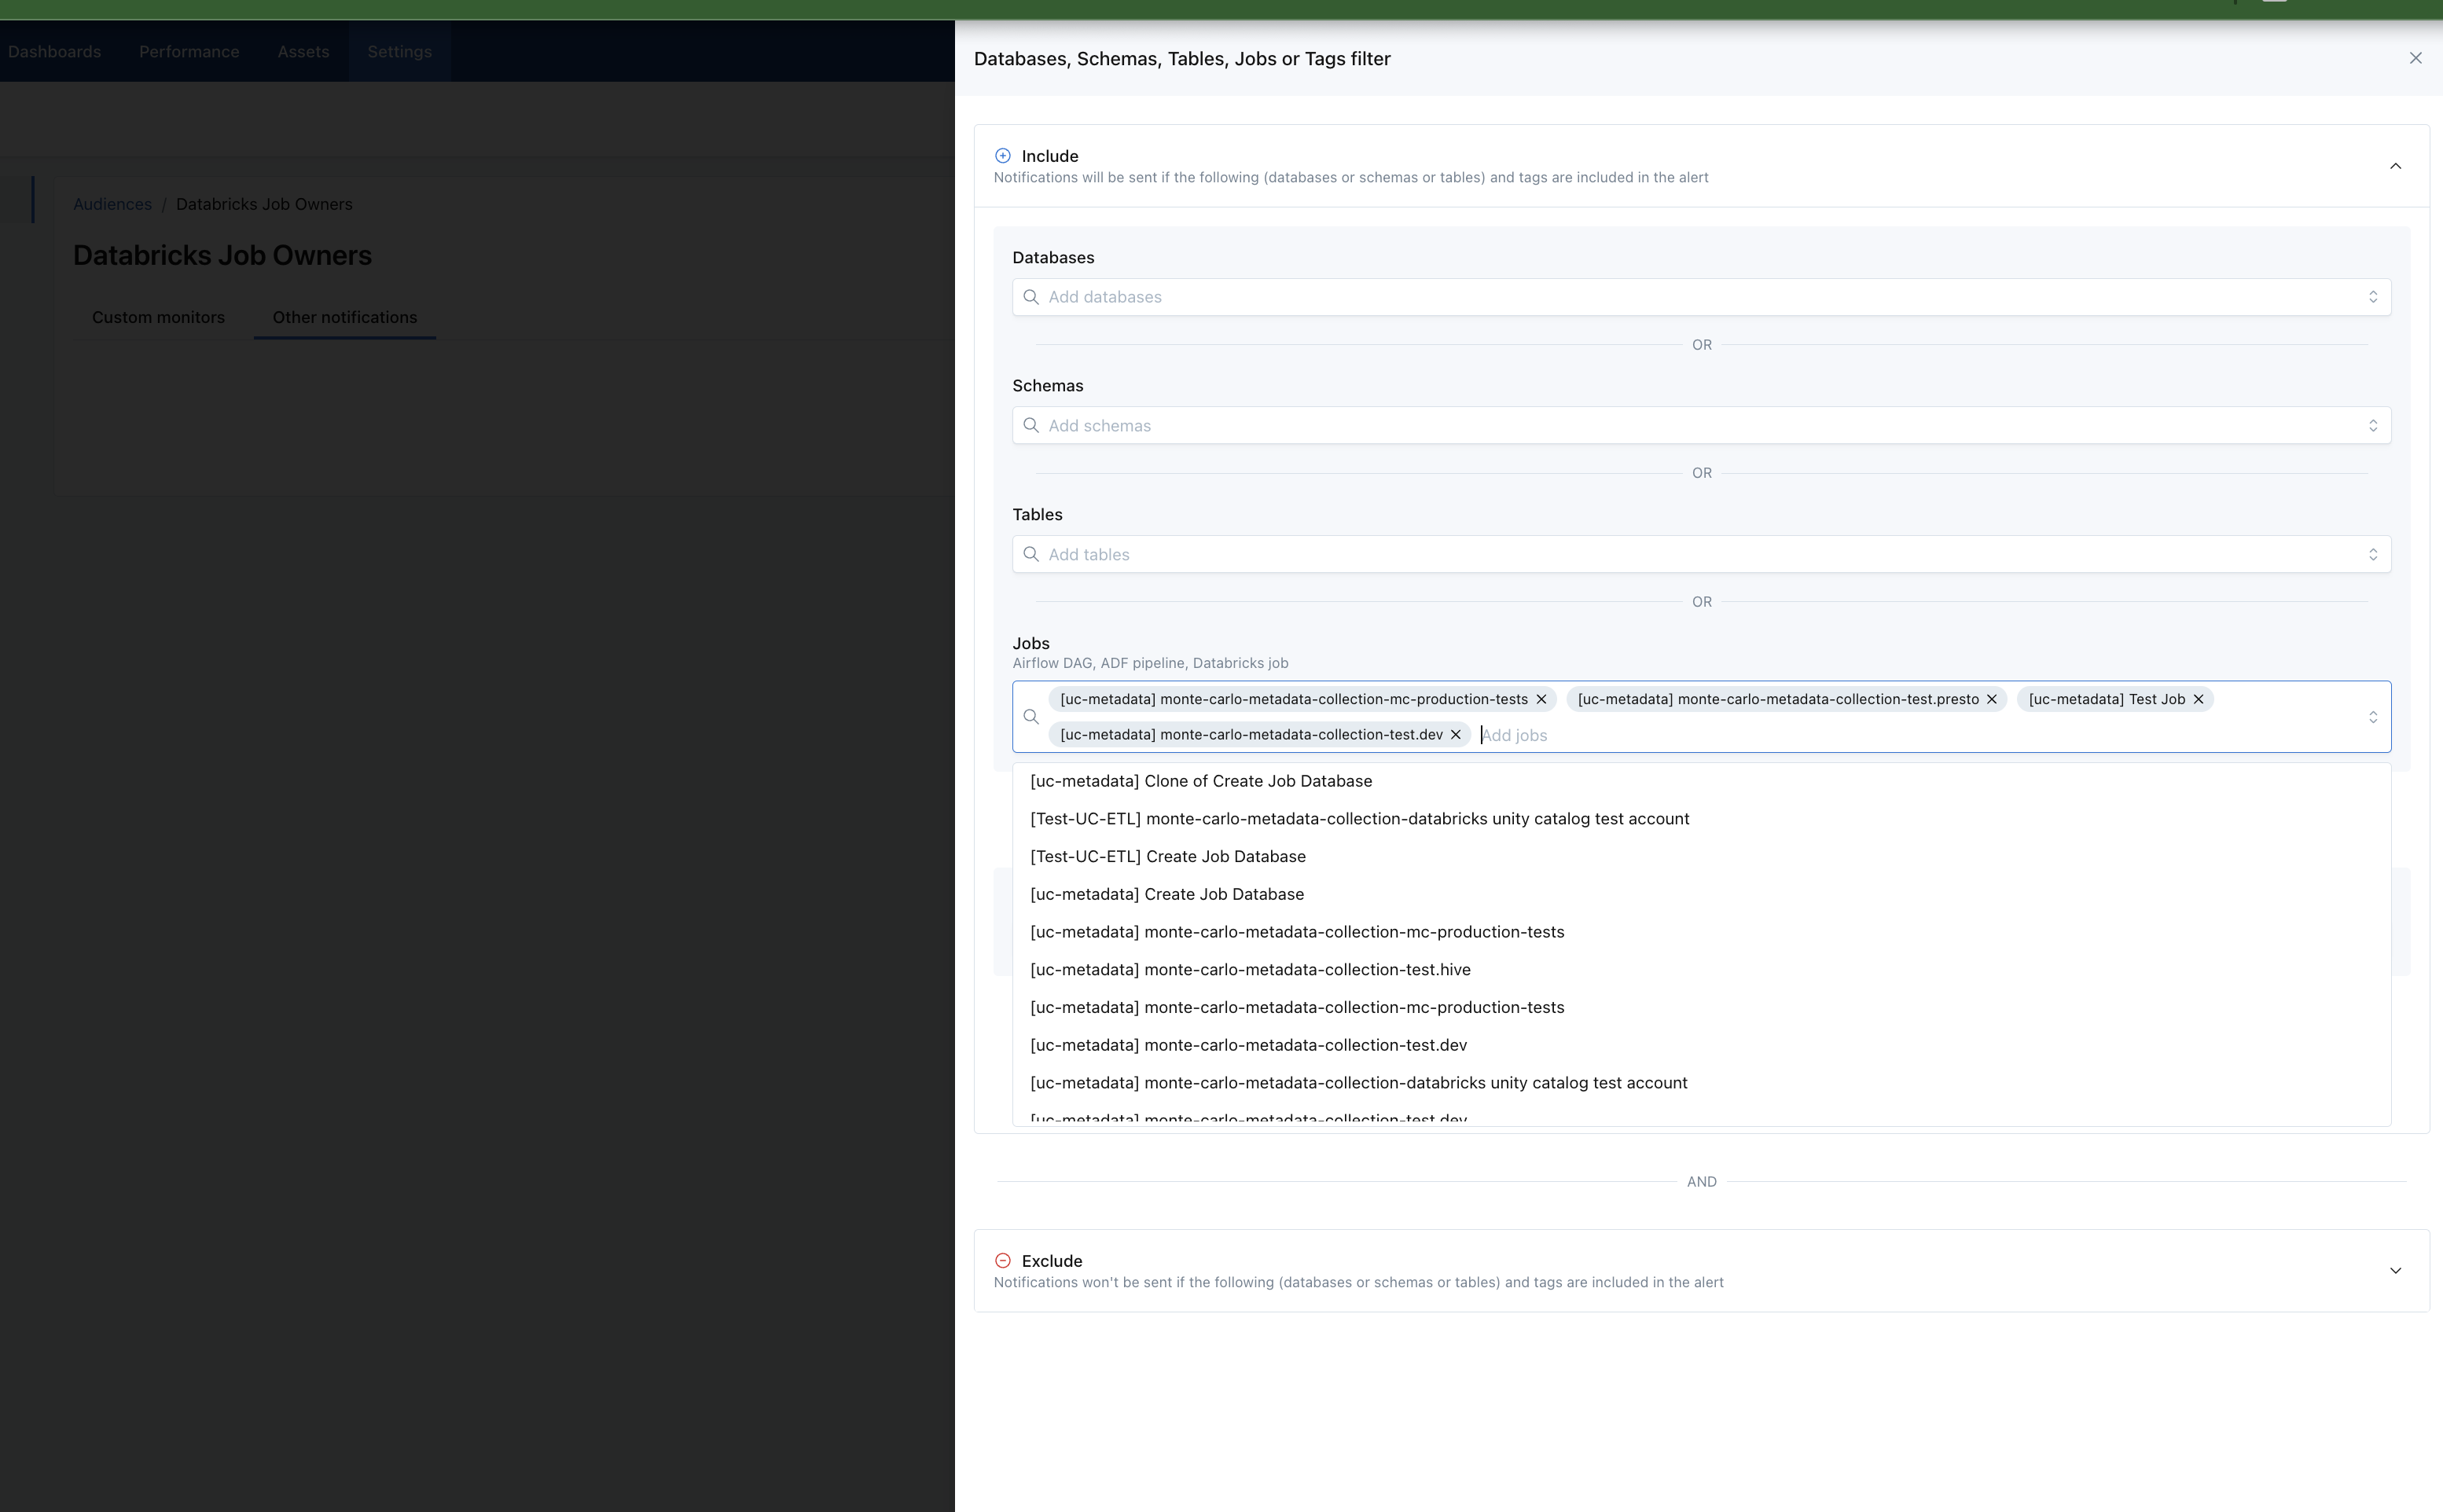
Or you can route only a subset of Databricks jobs for an audience by selecting Databases, schemas, tables, jobs, and tags for Affected Data, then adding the jobs you want to include.
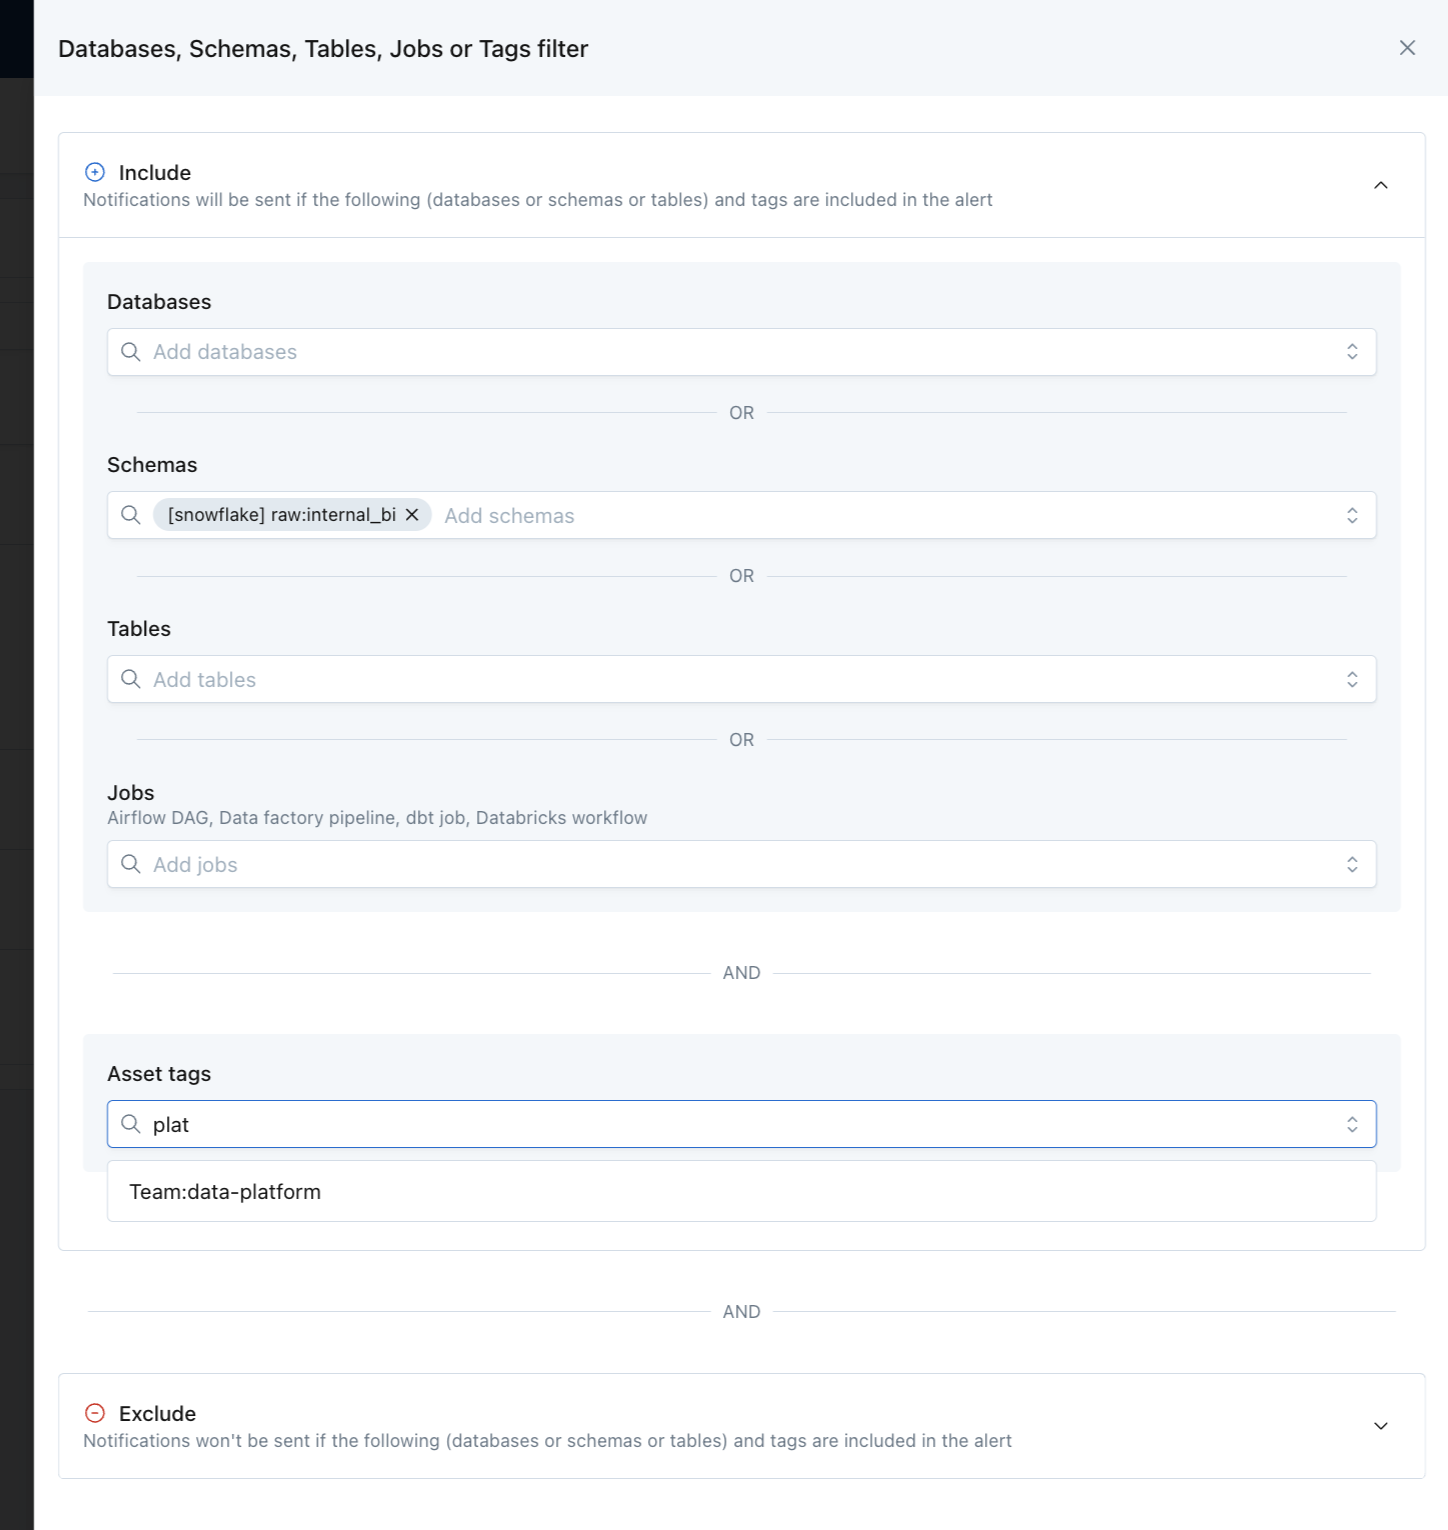
Or use tags to include all databricks workflows jobs under a certain tag, i.e. team: data-platform. Tags from Databricks are imported automatically into MC.
For more information on MC Audiences, see Audiences
Now you should start receiving Databricks workflow failure alerts in the desired audience!
Network Access Control
You can restrict access to the Databricks webhook and metadata endpoints by IP address using Network Access Control Lists. See Network Access Control for setup and configuration details.
Updated 8 days ago
