AWS Endpoint Services
Creating an endpoint service
PrerequisitesMake sure you have reviewed the AWS PrivateLink documentation first and that you meet the requirements for using PrivateLink.
About
For AWS resources (e.g., EC2 instances, load balancers, etc.) that are not publicly accessible and/or that you would like to connect to privately from the Monte Carlo Platform as if they were in the same VPC, you can create an endpoint service powered by AWS PrivateLink. See details here.
Steps
You can follow the example below to get started with creating an endpoint service via the AWS console. If you prefer, you can also use the AWS API, CLI, or any other tool of your choice to manage and update any configuration.
Check the region of your resource!Endpoint services are only available within an AWS region, so make sure you are in the correct region and that it is supported by Monte Carlo before getting started.
-
Create a Target Group
Navigate to the Target Groups subsection of the EC2 console and select "Create target group." Follow the wizard and then register the targets.- Target type - This depends on where your service (integration) is running. Select instance, IP address, or load balancer as applicable. This also defines what you will register
- Target group name - Give the group a name.
- Protocol : Port - This depends on the type.
- IP address type - IPv4
- VPC - Select either the VPC your resource is deployed in or another VPC that has connectivity to your resource.
-
Create a Network Load Balancer (NLB)
Navigate to the Load Balancers subsection of the EC2 console and select "Create load balancer." Choose Network Load Balancer and proceed with the creation. Then follow the wizard:- Load balancer name - Give the load balancer a name.
- Scheme - Internal.
- Load balancer IP address type - IPv4.
- VPC - Select the same VPC in which you deployed the target group from Step 1.
- Mappings - Select one or more private subnets.
- Security groups - Select a security group, if applicable. Generally, this group should be allowed access to the resource.
- Listeners - Select the target group, protocol, and port from Step 1.
-
Verify the target group is healthy
After the load balancer from Step 2 has finished creating (i.e., is active), navigate back to the target group created in Step 1. Select the target and review the health status. It should be listed as "Healthy."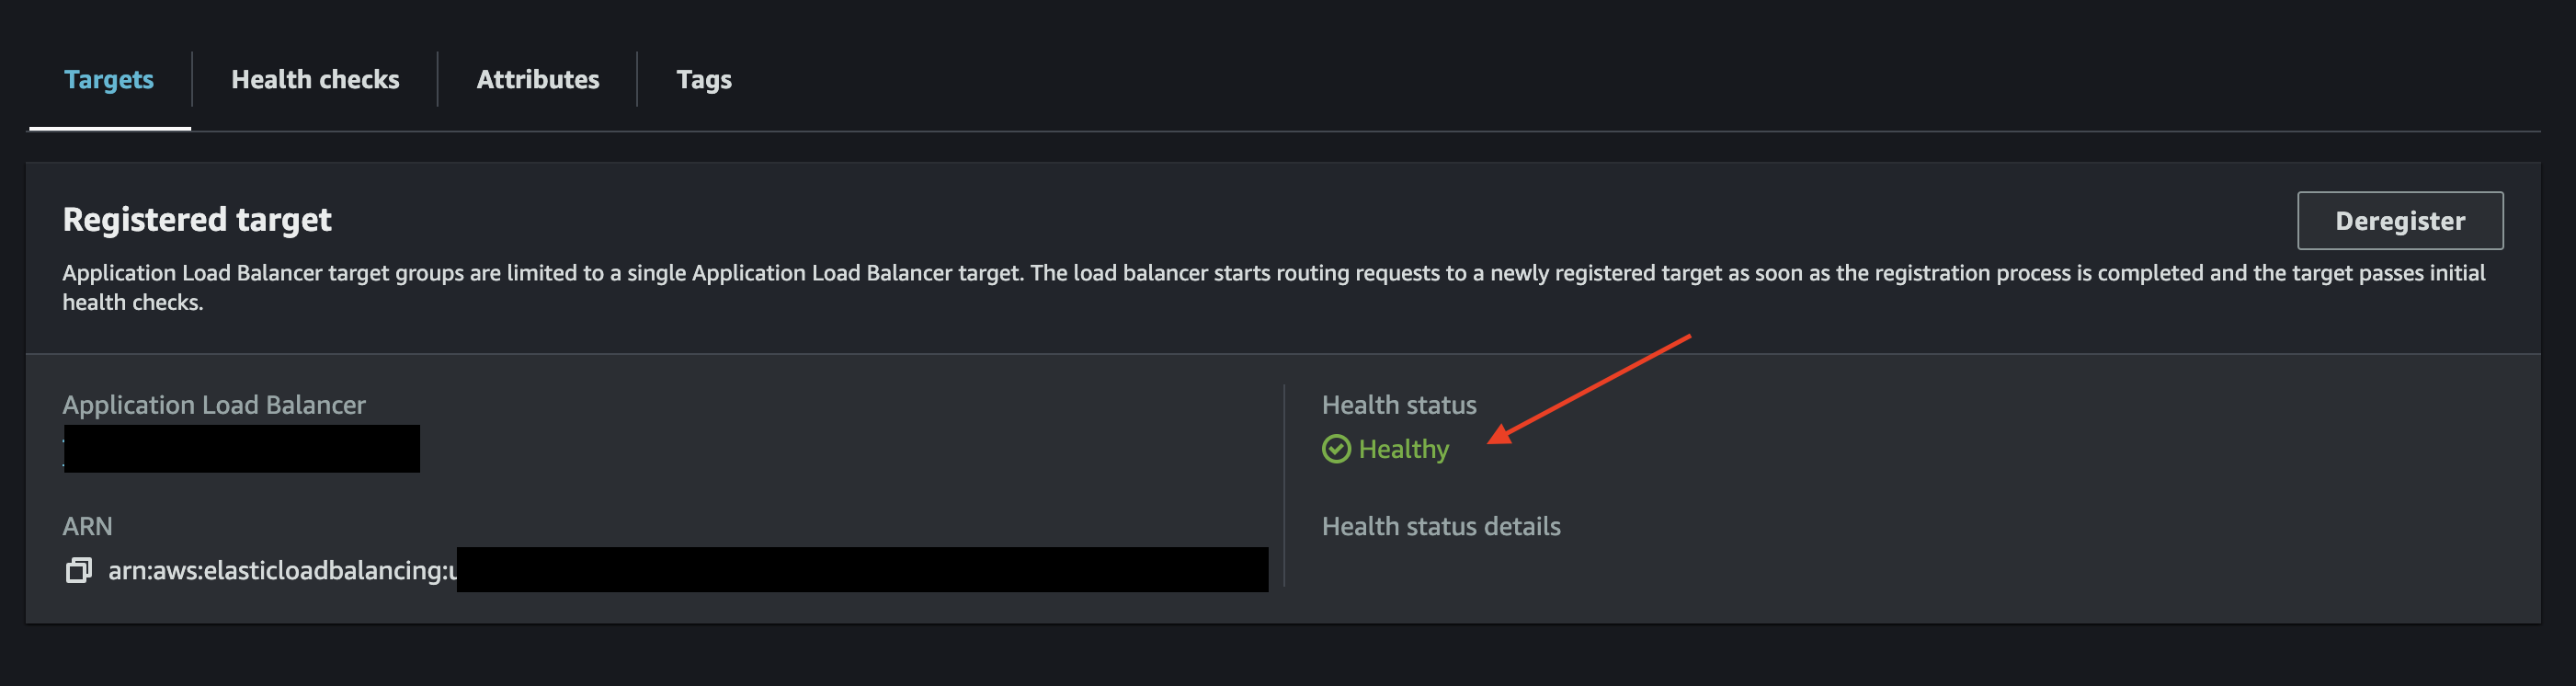
AWS Console Example
If your target is "Unhealthy," please ensure that the security group for your resource allows access from the NLB and that the health check is using the correct protocol and port. For additional status information, you can refer to this AWS documentation.
-
Enable cross-zone load balancing
If you selected more than one subnet (availability zone) when creating the NLB in Step 2, please navigate back to the Load Balancer, then select Actions -> Edit load balancer attributes. From this page, select "Enable cross-zone load balancing" and save your changes.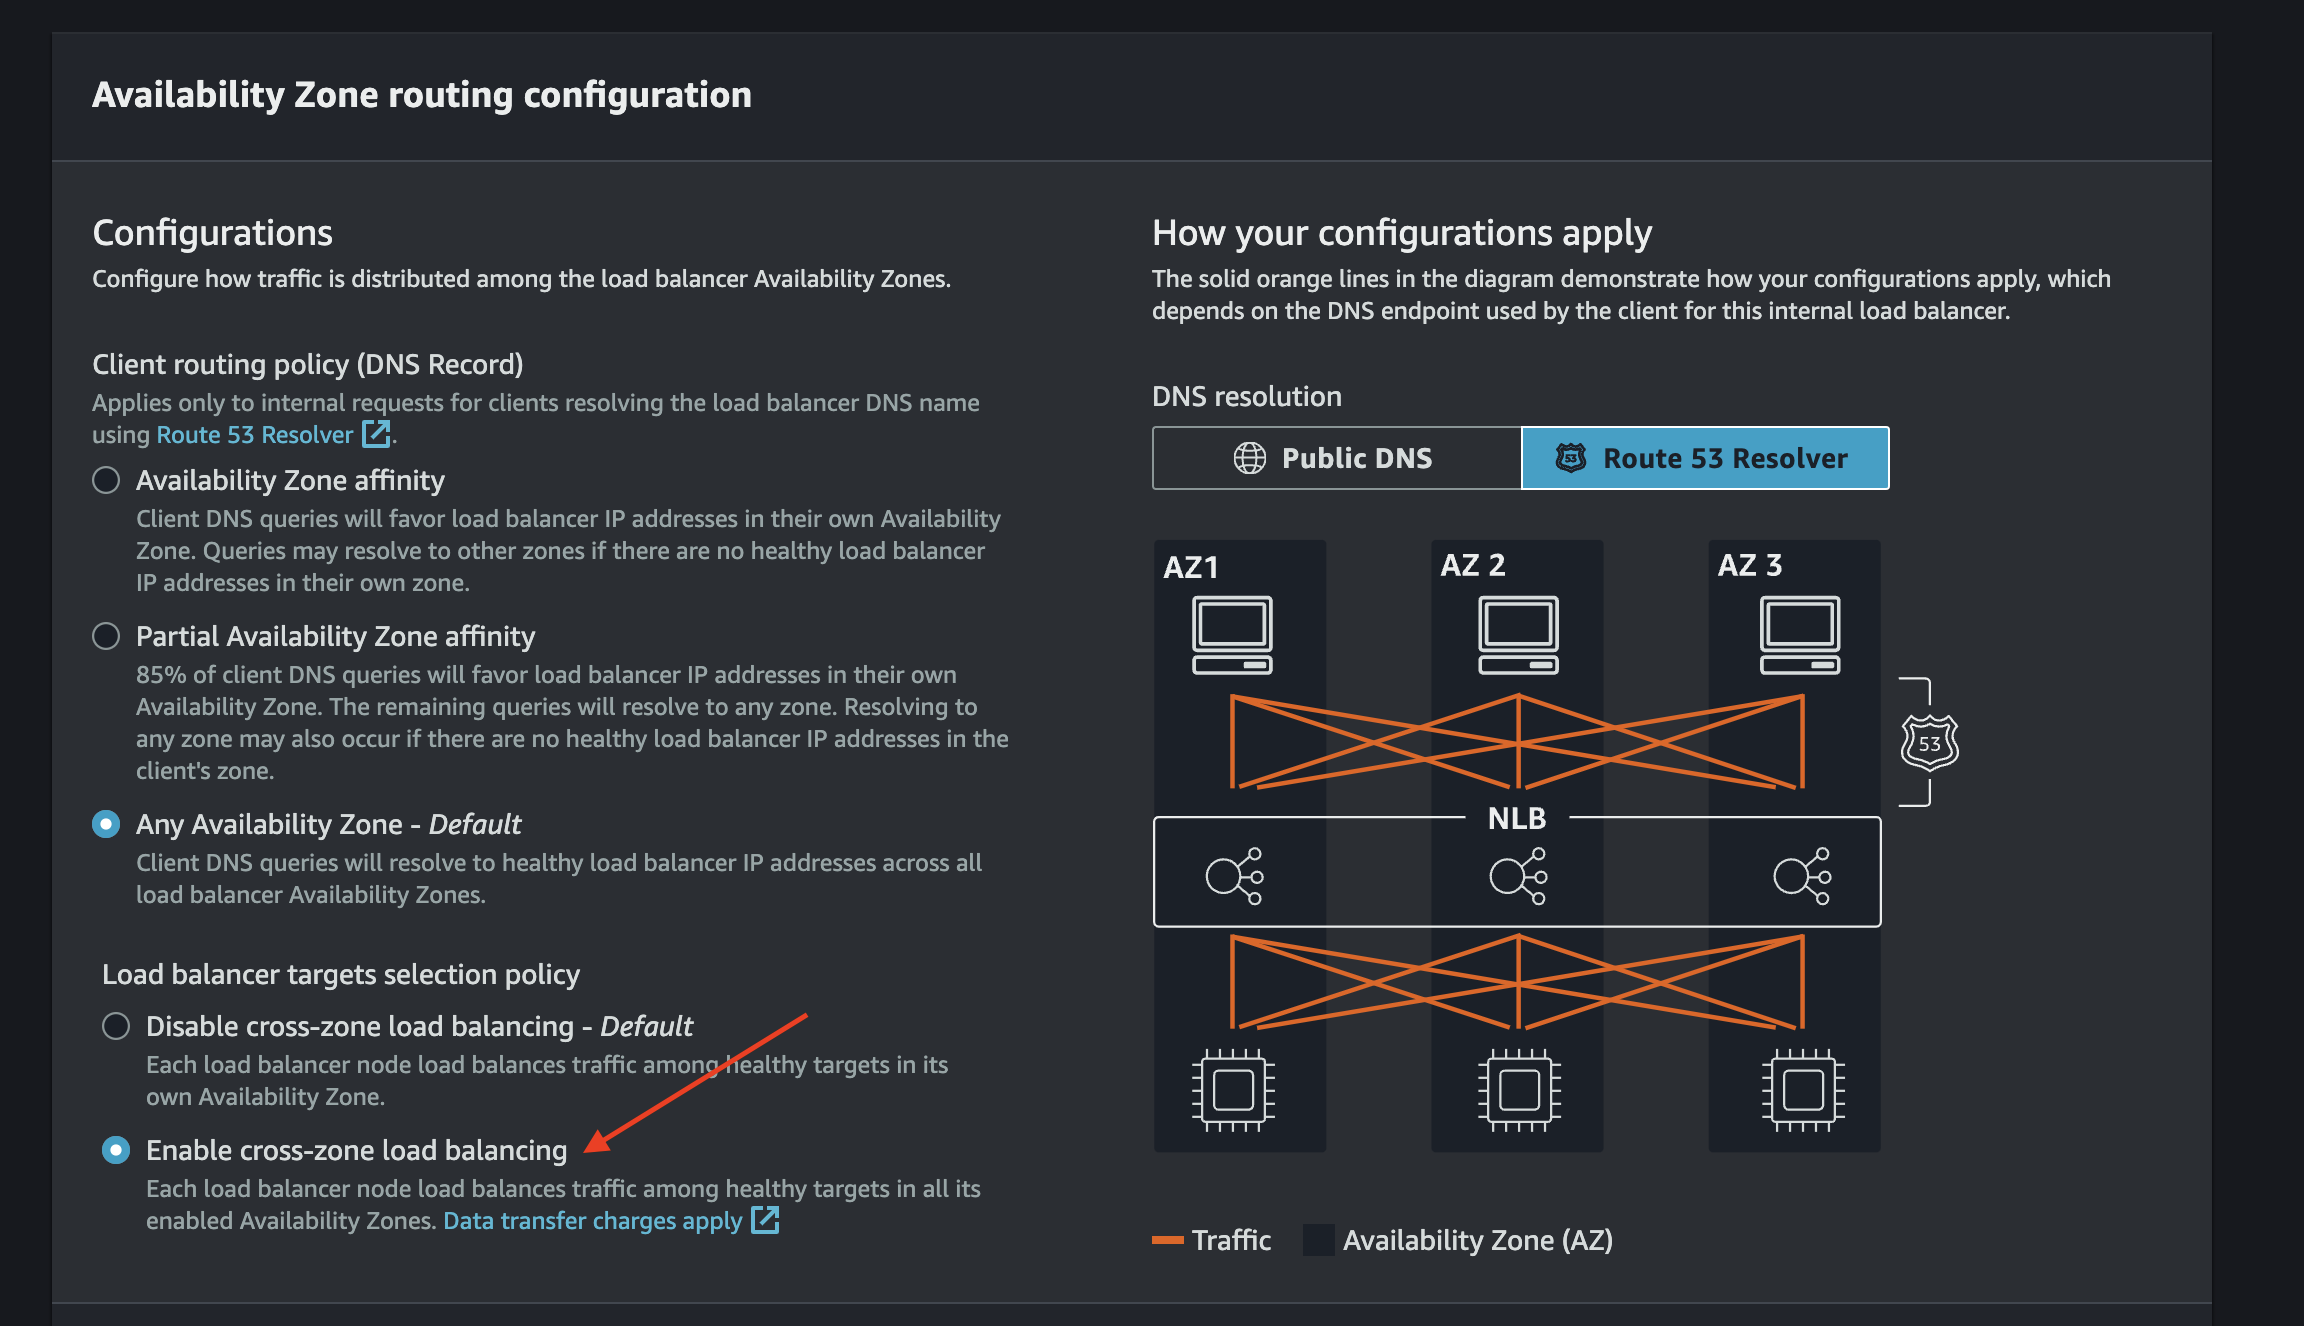
AWS Console Example
-
Create a VPC Endpoint Service
Navigate to the VPC console, select "Endpoint services," and choose "Create endpoint service." Then follow the wizard:- Name - Give the service a name.
- Load balancer type - Network.
- Available load balancers - Select the NLB created in Step 2.
- Require acceptance for endpoint - Yes (enable acceptance required).
- Enable private DNS name - No
- Supported IP address types - IPv4
-
Allow the Monte Carlo Principal
After the endpoint service finishes creating, navigate to the "Allow principals" section and select "Allow principals." Add the MCD principal provided in the Account information page.

AWS Console Example
-
Save VPC Endpoint Service Details
Navigate to the Details tab of the endpoint service created in Step 5 and save the "Service name" and the AWS Account ID/Region where the service is deployed. You can retrieve the region and account ID from the Network Load Balancer's ARN found in the same section. -
Request PrivateLink Establishment
Contact us at [email protected] to request the establishment of a VPC endpoint for AWS.
Be sure to include the following information in your message:- Monte Carlo Account ID (can be found here)
- Integration type (e.g., Redshift Serverless, Tableau, etc)
- VPC Endpoint service name
- Original host
- Port
- AWS Region
- AWS Account ID
Note: Do not proceed until you receive confirmation from Monte Carlo that the endpoint has been created.
Typically, you will receive a response within 24-48 hours (US business days).
-
Accept the Endpoint
Navigate back to the endpoint service created in Step 5. Select "Endpoint connections," then select the requested endpoint. Choose "Actions" and finally accept the applicable "endpoint connection request."The state should change from Pending to Available within 1-2 minutes.

AWS Console Example
-
Update the Security Group for the NLB
Navigate to the EC2 console and select the NLB you created in Step 2. On the Security tab for this NLB, select the relevant security group. Update the inbound settings to include the private IP addresses as the source. You can refer to this resource for instructions on retrieving and updating the IP addresses for your deployment. Additionally, the port should match what you specified when setting up the NLB/target group -
Contact Monte Carlo
Reply to your message from [email protected] to let us know that steps 9 and 10 have been completed. Monte Carlo will then notify you once the process is complete and when you can continue.
Note: Do not proceed until you receive confirmation from Monte Carlo.
Typically, you will receive a response within 24-48 hours (US business days).
- Continue Onboarding
Refer back to your relevant guide to continue the onboarding process.
Updated 20 days ago