Creating IAM Roles
Prerequisites
- Permission to create IAM roles and policies in AWS
- The desired AWS permission policy (in JSON format)
To allow Monte Carlo to securely access AWS resources on your account, you will create one or more IAM roles. These IAM roles will:
- Allow narrow access to the precise resources and API calls you wish to grant to Monte Carlo.
- Allow Monte Carlo's data collector to assume them while making API calls to access your resources.
You may create IAM roles for Monte Carlo by either using the CLI, or by manually going through the wizards in the AWS console.
Generating a CloudFormation template using the MC CLI (Recommended)
You can use the CLI to generate a CloudFormation template with one or more IAM policies to create an IAM role.
To generate and deploy a template follow these steps -
1. Follow this guide to install and configure the CLI (requires >= 0.17.0).
0.17.0).2. Run the cf-role-gen command. For reference, see help below:
cf-role-gen command. For reference, see help below:$ montecarlo discovery cf-role-gen --help
Usage: montecarlo discovery cf-role-gen [OPTIONS]
Generate a CloudFormation template to create a resource access IAM role.
After review, this template can be deployed using CloudFormation. The Role
ARN and External ID for onboarding can be found in the stack outputs.
Options:
--policy-file FILENAME File containing an IAM policy to generate an IAM
role from. This option can be passed multiple times
for more than one policy. [required]
--collector-id UUID ID for the data collector. To disambiguate accounts
with multiple collectors.
--help Show this message and exit.3. Carefully review and then deploy the generated template either using the AWS console, AWS CLI or AWS SDK.
For instance using the MC and AWS CLIs,
$ montecarlo discovery cf-role-gen --policy-file samples/mcd_athena_policy.json --policy-file samples/mcd_glue_policy.json > samples/mcd_cf_template.json
Generating CloudFormation template for creating a role resource.
$ cat samples/mcd_cf_template.json  # Review template
...
$ aws cloudformation create-stack --stack-name mcd-resource-access --template-body file://samples/mcd_cf_template.json --capabilities CAPABILITY_IAM
After the stack deploy completes the role ARN and external ID can be retrieved from the Stack outputs. For instance,
$ aws cloudformation describe-stacks --stack-name mcd-resource-access --query 'Stacks[0].Outputs'
[
    {
        "OutputKey": "RoleExternalId",
        "OutputValue": "1234",
        "Description": "External ID for the generated role."
    },
    {
        "OutputKey": "RoleArn",
        "OutputValue": "arn:aws:iam::12345:role/mcd-athena-access-role-12345",
        "Description": "ARN for the generated role."
    }
]
Creating an IAM roles using the MC CLI
This command does not support accounts with more than one Data Collector
You can use the CLI to quickly create an IAM role with the desired policy.
To create the role using the CLI follow these steps -
1. Please follow this guide to install and configure the CLI.
2. Run the create-role command to directly create the role. For reference, see help below:
create-role command to directly create the role. For reference, see help below:$ montecarlo integrations create-role --help
Usage: montecarlo integrations create-role [OPTIONS] FILE
Create an IAM role from a policy FILE. The returned role ARN and external
id should be used for adding lake assets.
Options:
--aws-profile TEXT Override the AWS profile used by the CLI, which
determines where the role is created. This can be
helpful when the account that manages the asset is not
the same as the collector.
--help Show this message and exit.Creating IAM roles using the AWS console
This guide outlines instructions to:
1. Create a role that Monte Carlo's data collector can assume
2. Use an external ID to better secure the role [optional]
3. Limit which principals are able to assume the role [optional]
Creating a role for Monte Carlo's data collector
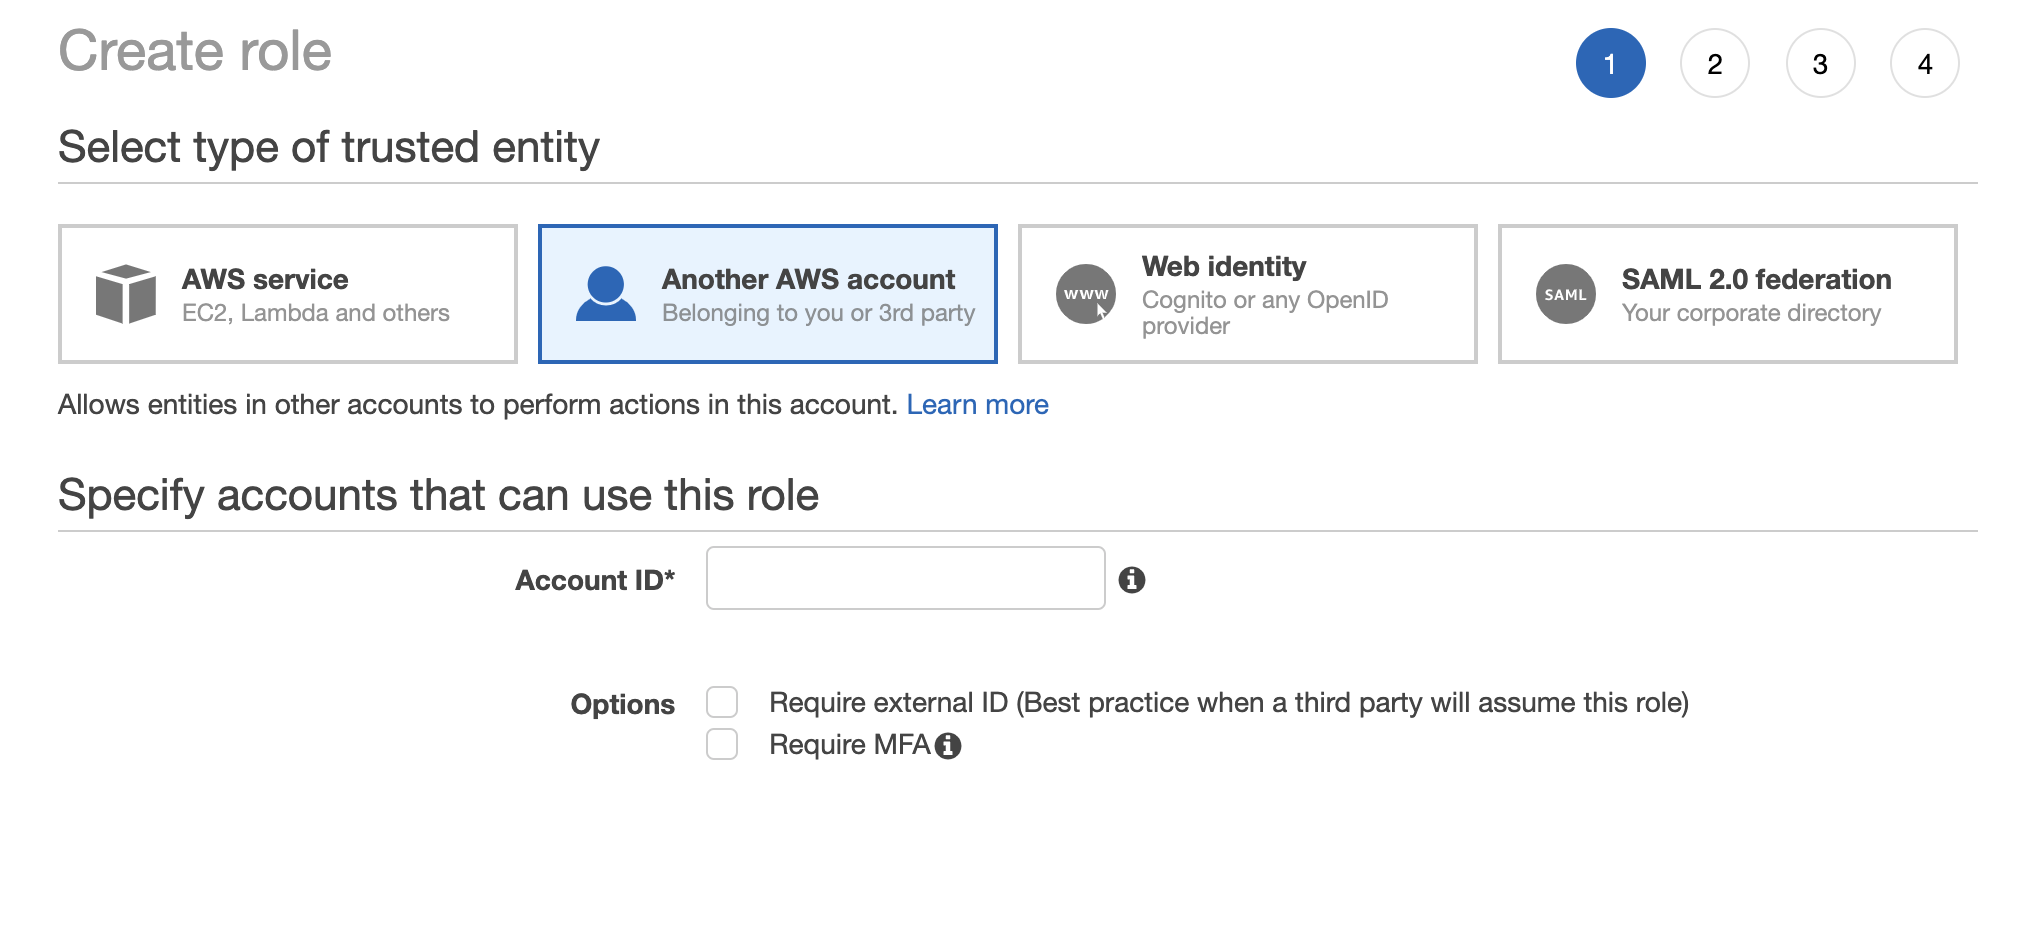
1. Go to IAM on your AWS console and navigate to roles. Click Create Role.

2. Select “Another AWS account” and specify the Account ID where Monte Carlo’s data collector stack is deployed. If managed by Monte Carlo please reach out to Monte Carlo for details on the Account ID.
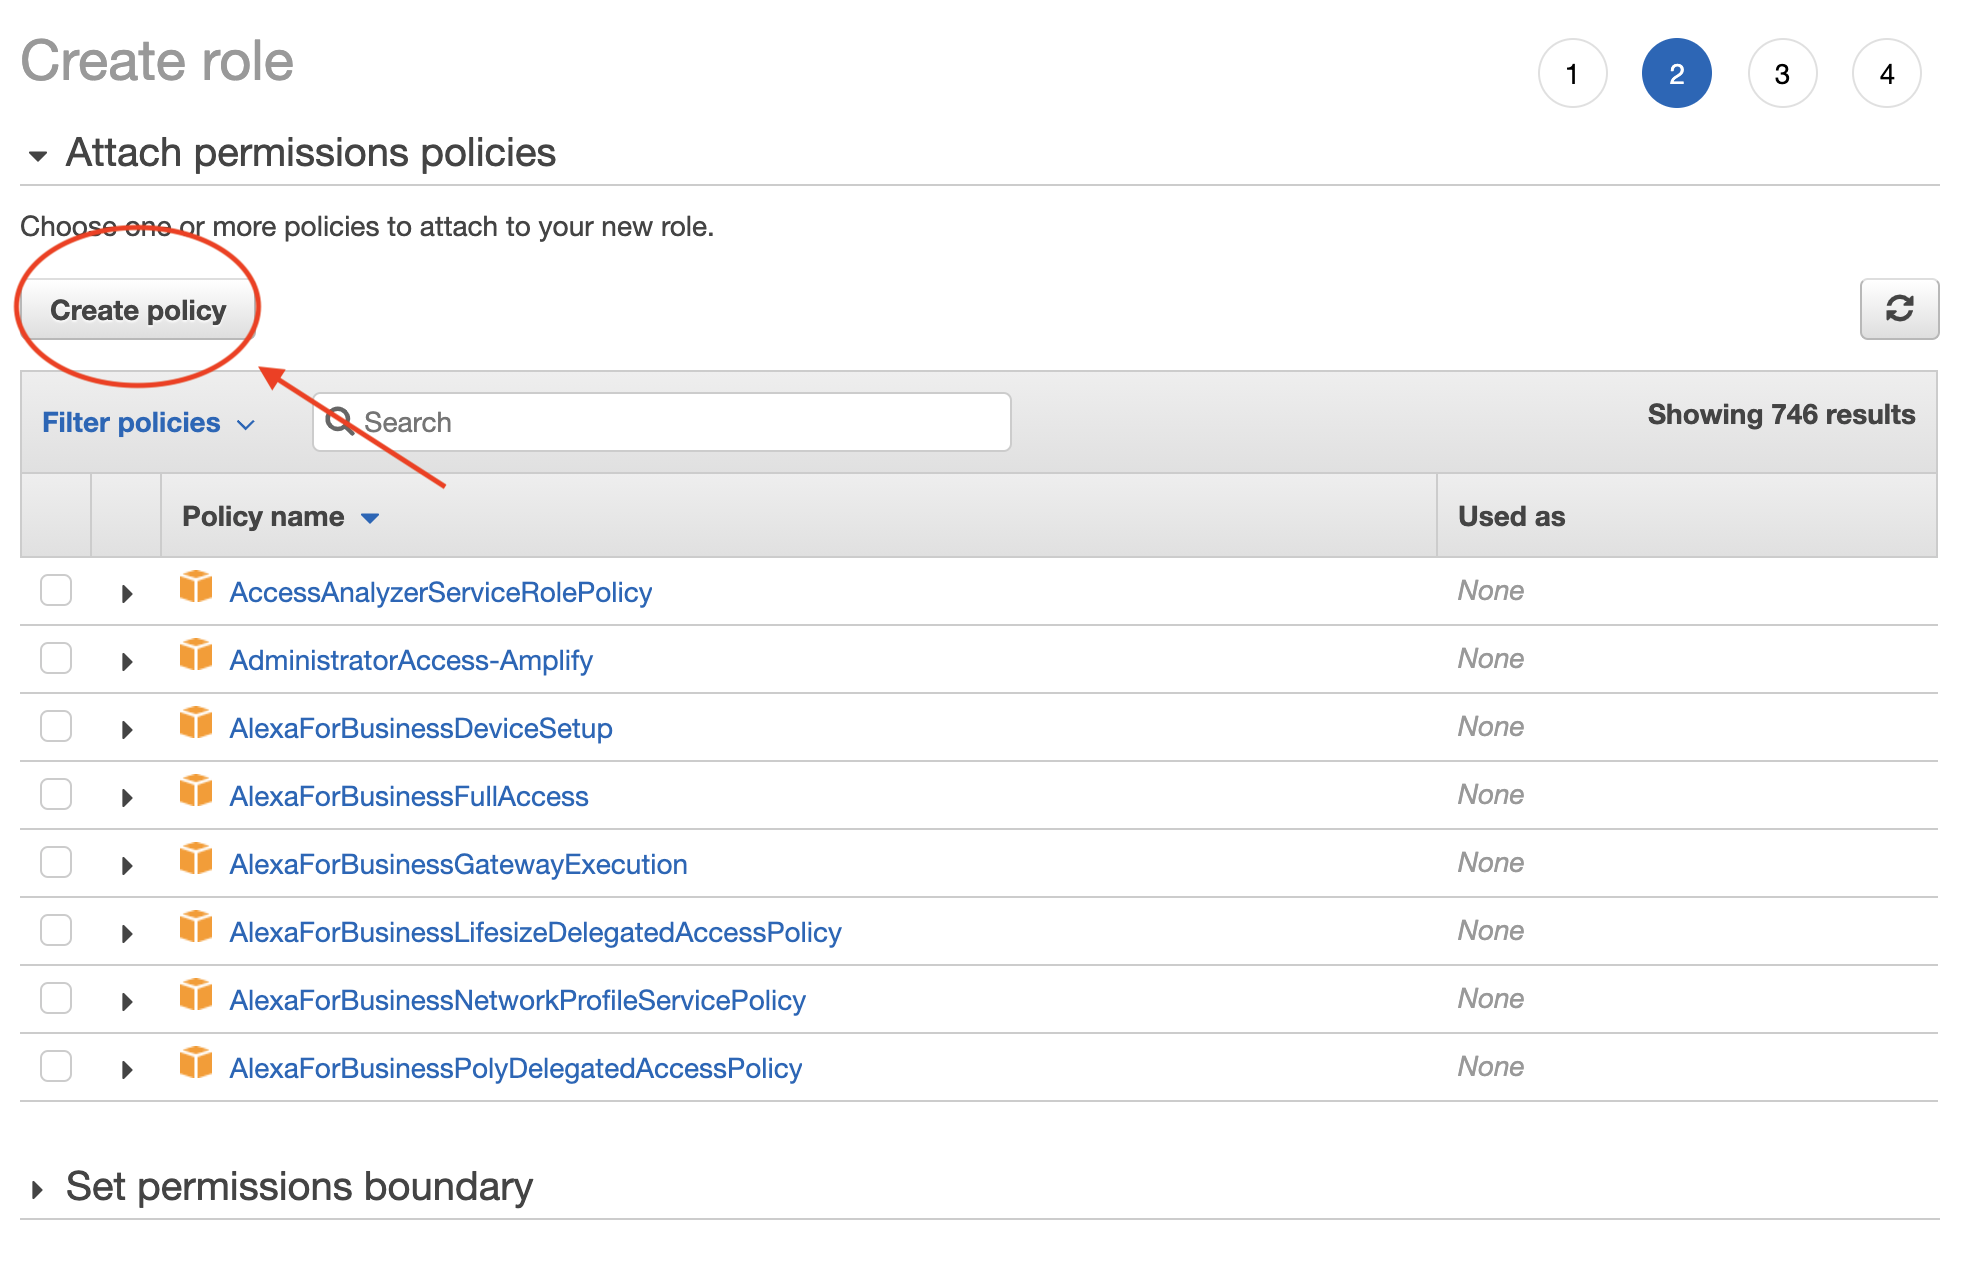
3. Click Create Policy. This should open a new tab or window.
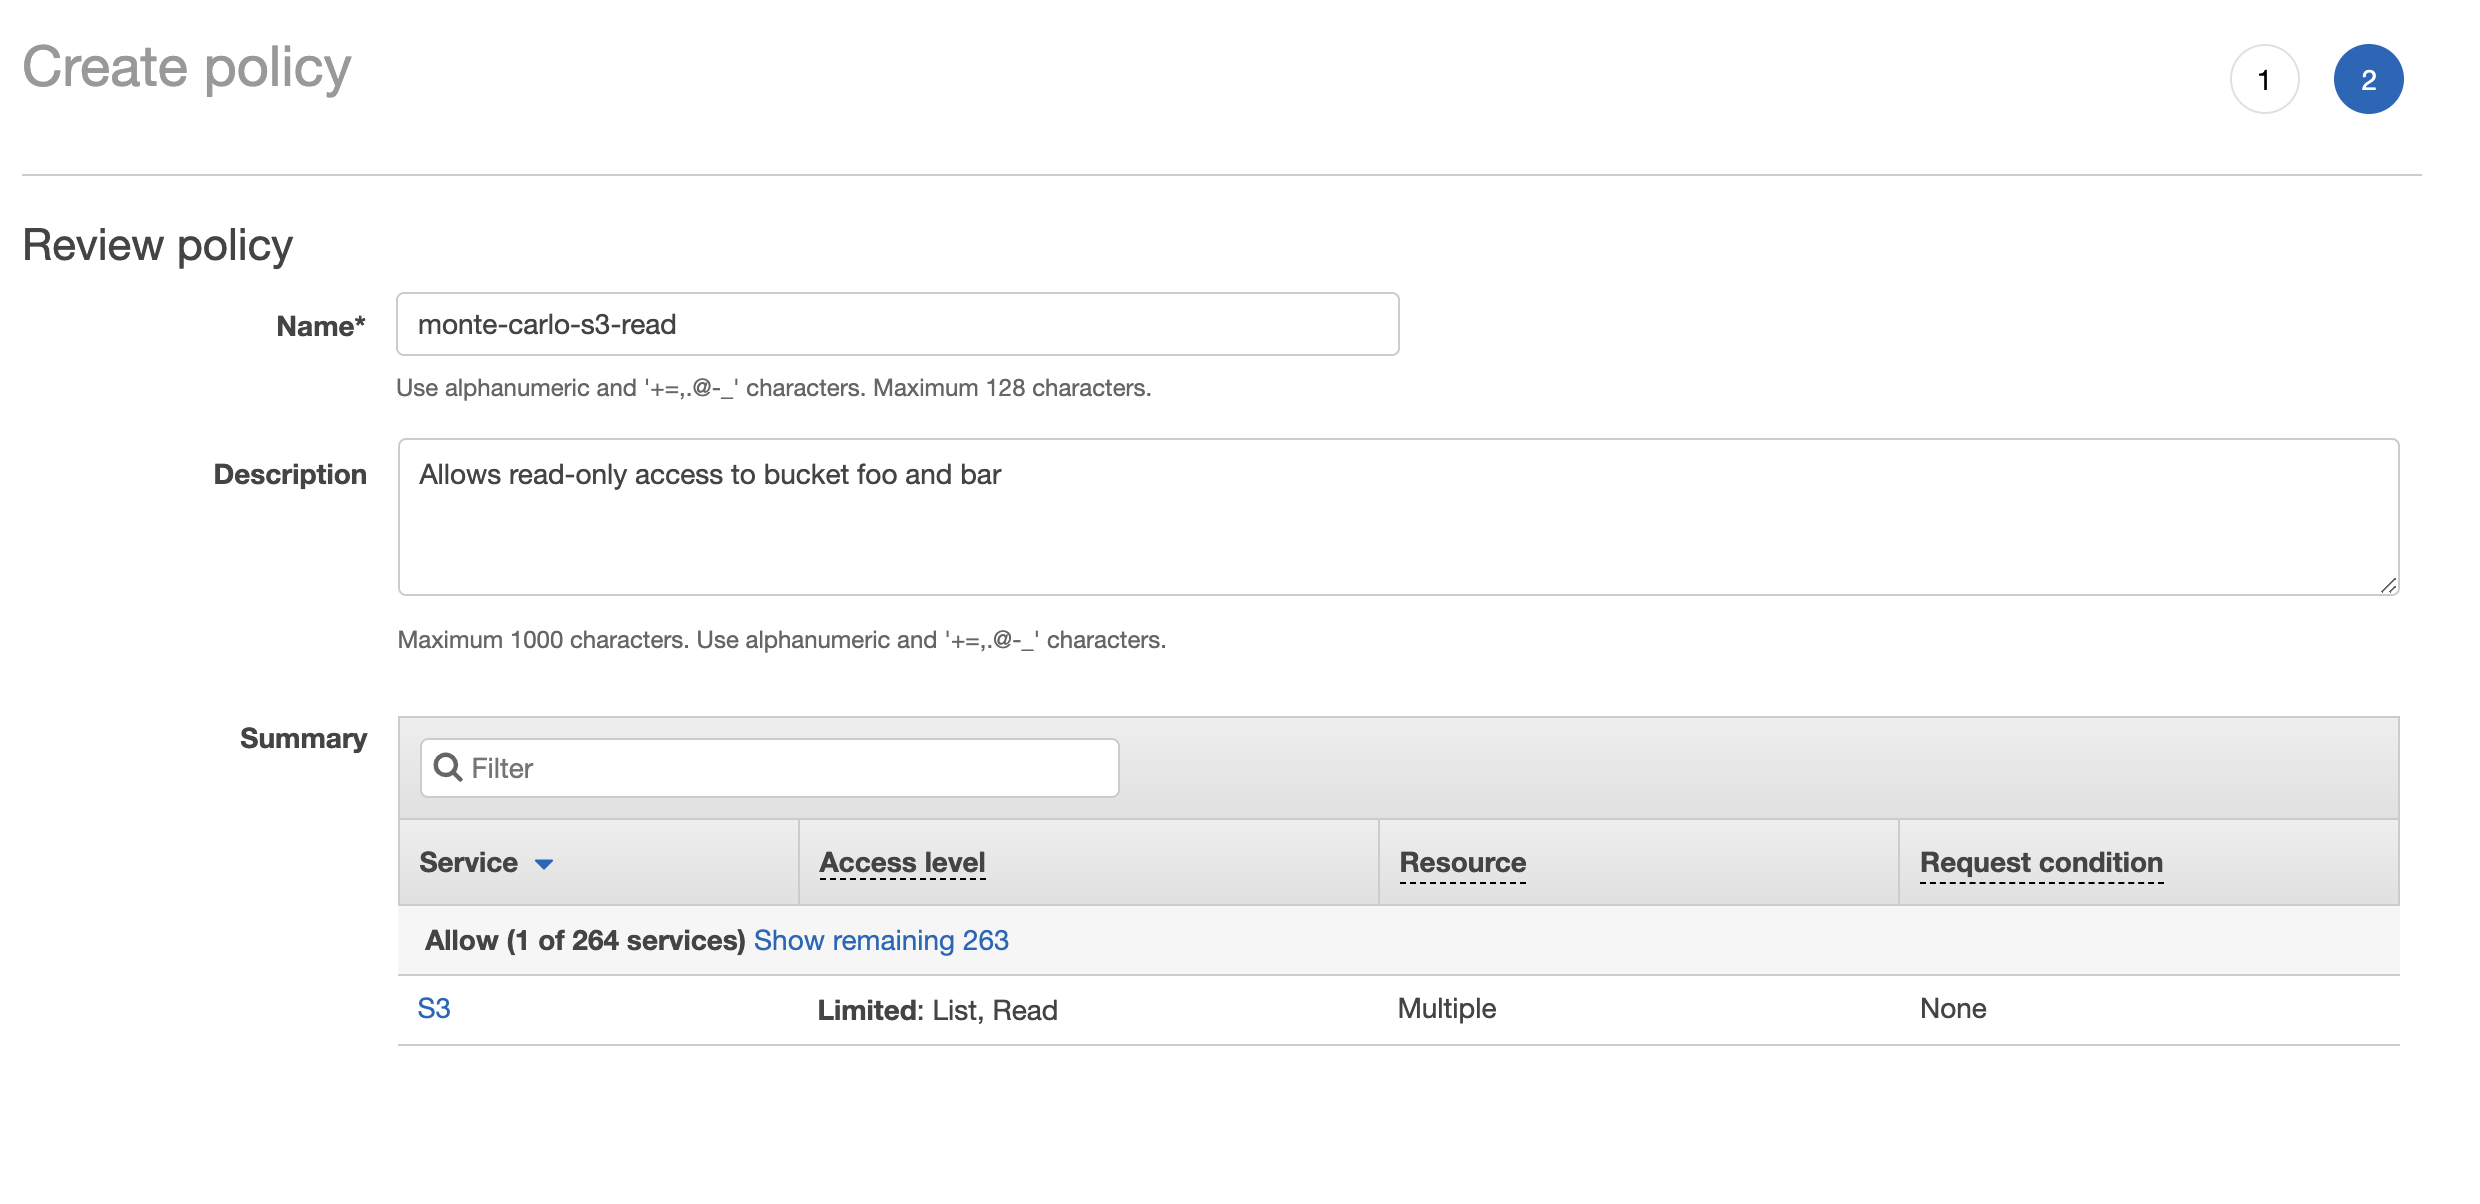
4. Select the JSON tab, and paste the JSON policy necessary for the integration you are setting up.
What policy should I use?The specific policy depends on the integration you are setting up – you will find suggested policy JSONs in various data lake integration guides
5. Click Review Policy, provide a meaningful name/description and click Create Policy.
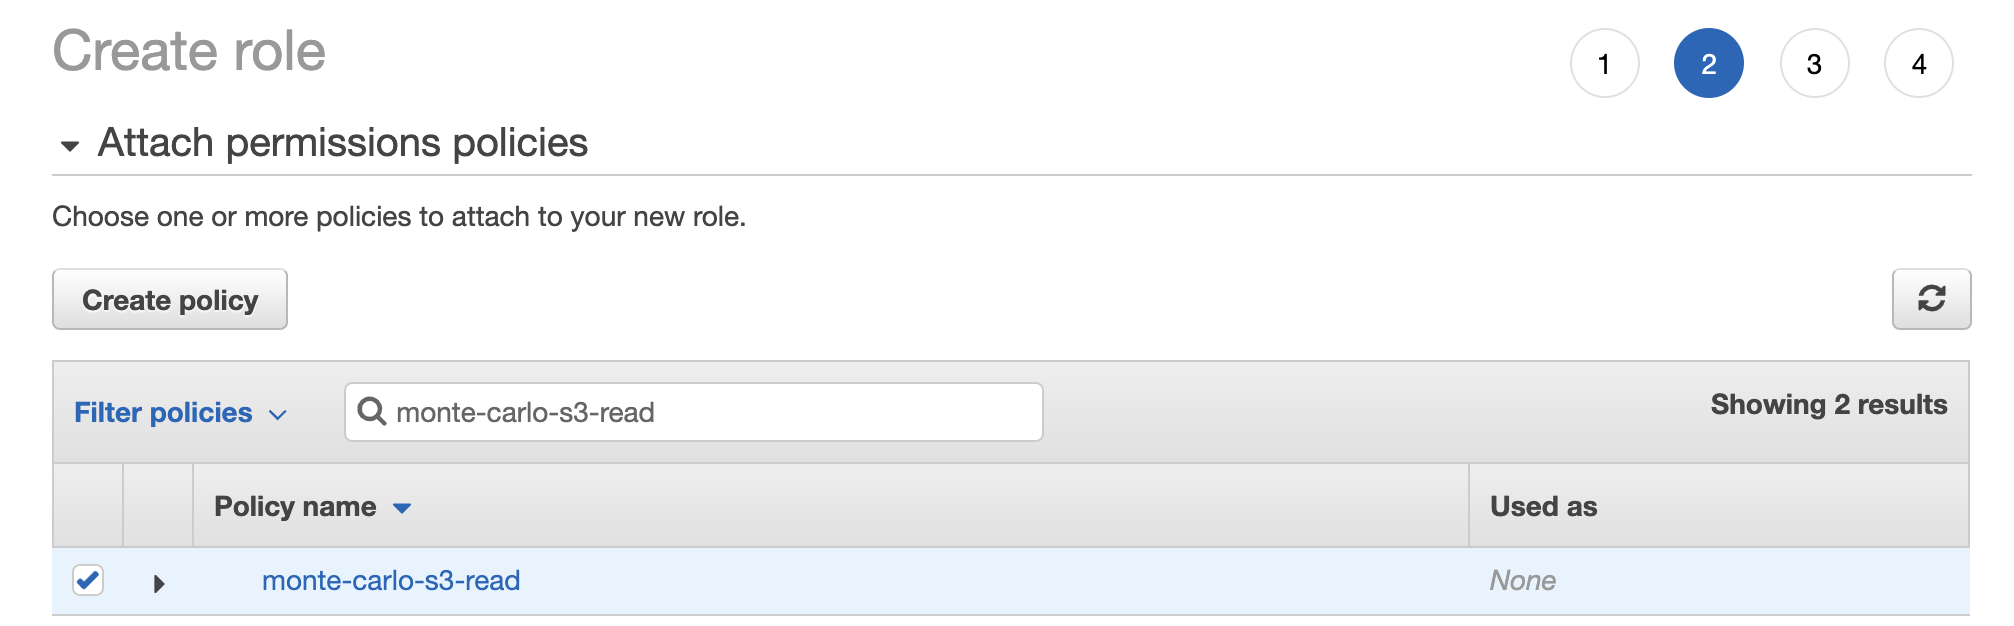
6. In the Create Policy wizard from step 3 refresh the policies and search for the policy you created in step 5. Review and click the checkbox next to this policy and click Next: Tags.
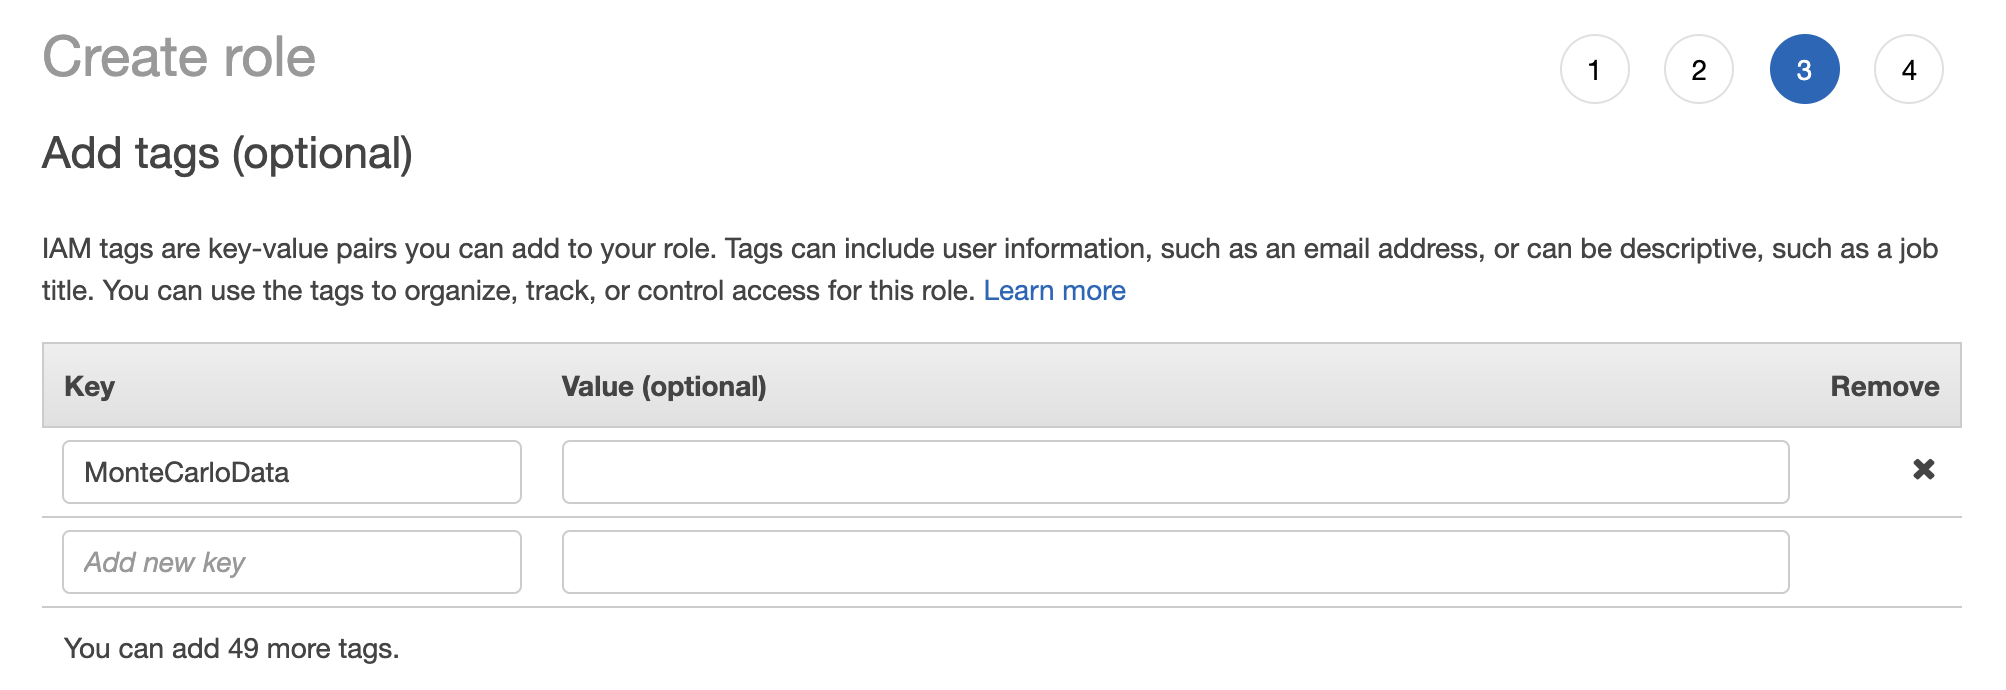
7. Add a tag with the key “MonteCarloData” and click Next: Review.
Do not skip this step!We need this tag on the role as our out-of-the-box collector is set up to have access to resources with the
MonteCarloDatatag on them. If you skip this, the execution roles in the stack will be unable to assume the role.
8. Give the role a meaningful name and description and click Create Role. It’s important to keep track of this name.
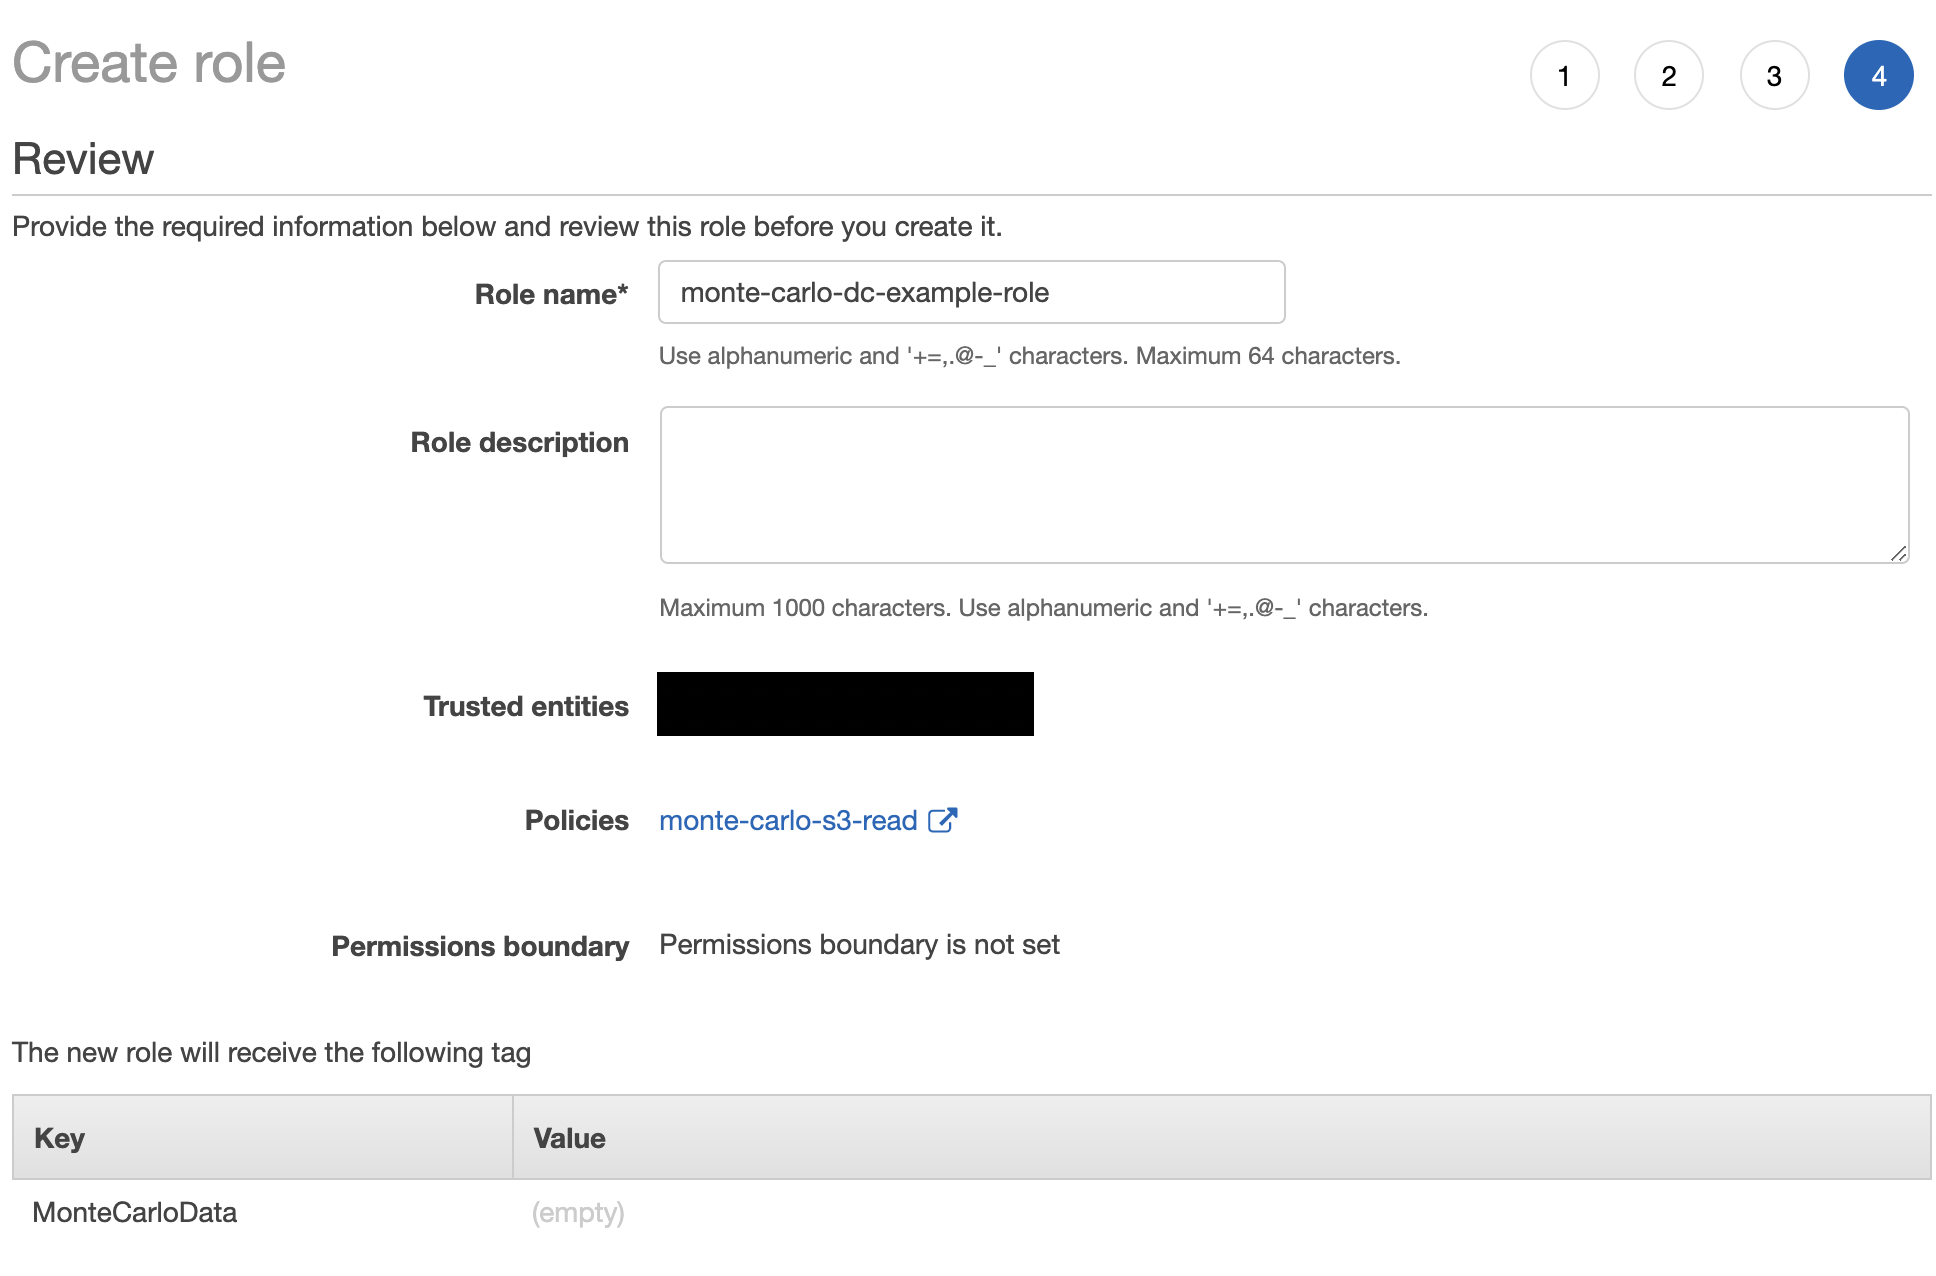
9. Search for the role created in step 8 and click when found. The format is as follows:
arn:aws:iam::<ACCOUNT>:role/<NAME>Save this ARN as it should be specified as part of the onboarding process.
Securing the role with an external ID
The following steps are optional, but are recommended if you want to limit the role by an external ID. See here for more details on an External ID.
1. Go to IAM on your AWS console and navigate to roles and search for the role created in step 8 of "Create an assumable rule". Click when found.

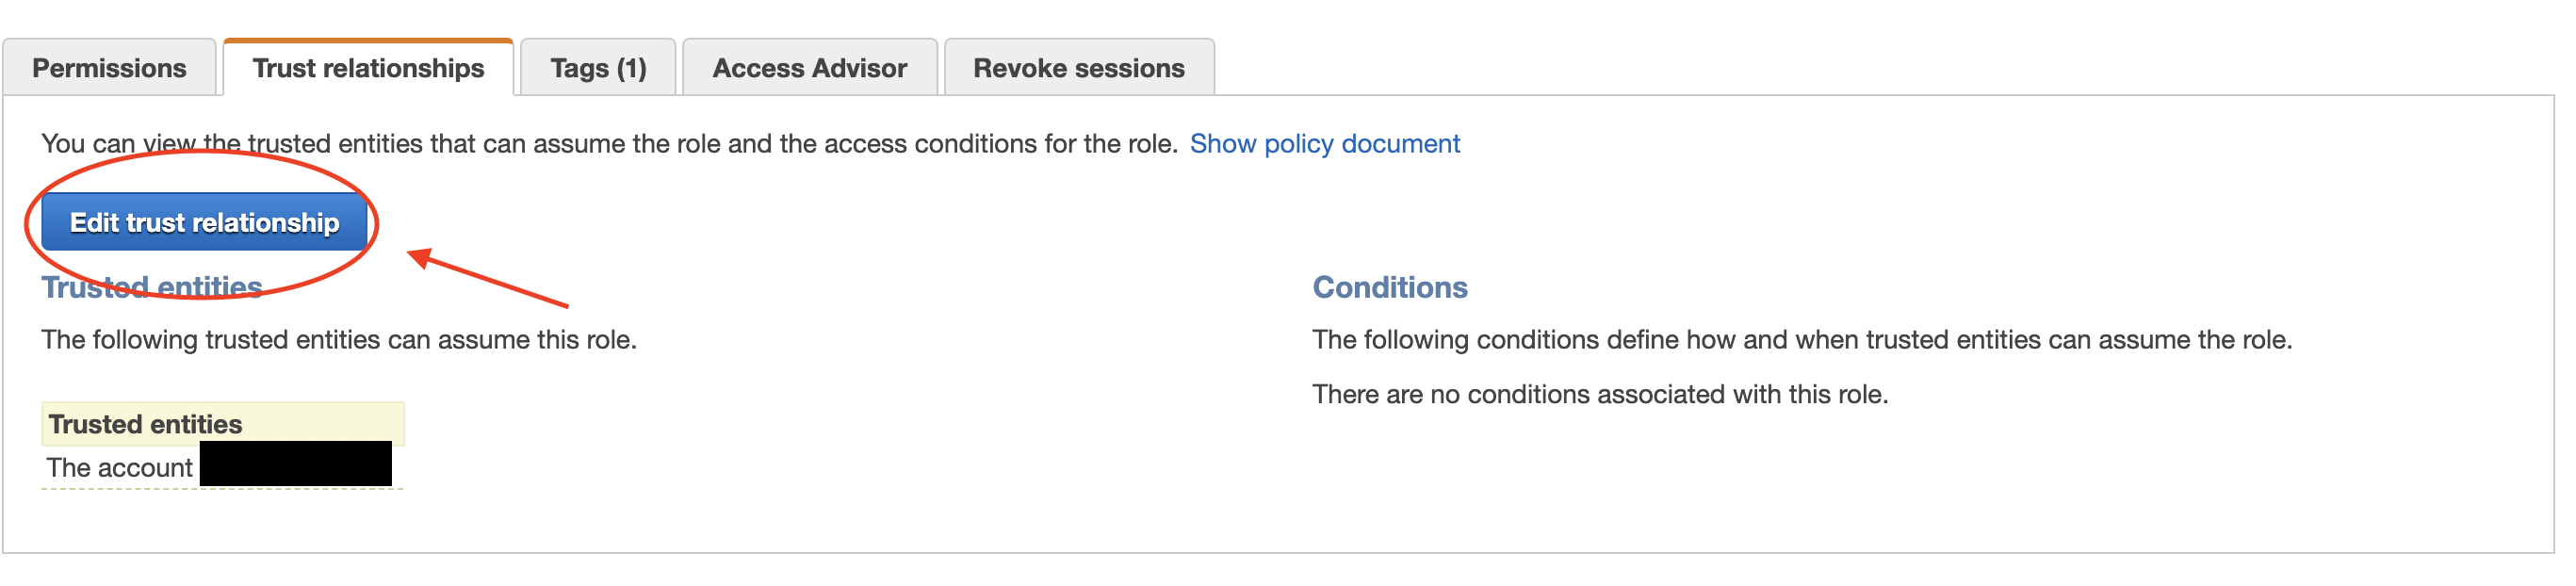
2. Click Trust Relationships and edit Edit Trust Relationship.

3. Replace the existing condition section with the following (specify any ID):
"Condition": {
        "StringEquals": {
          "sts:ExternalId": "ID"
        }
      }
Save this ID as it should be specified as part of the onboarding process.
Limiting principals that can access the role
The following steps are optional, but are recommended if you want to limit the role to the Data Collector's lambdas.
1. Go to CloudFormation on your AWS console and click Monte Carlo’s data collector stack (typically named “monte-carlo”).

2. Go into Resources and search for the term “LambdaExecutionRole”. There should be two entries. Click on the Physical ID and save the Role ARNs. If the Data Collector is managed by Monte Carlo please reach out to Monte Carlo for the ARNs.
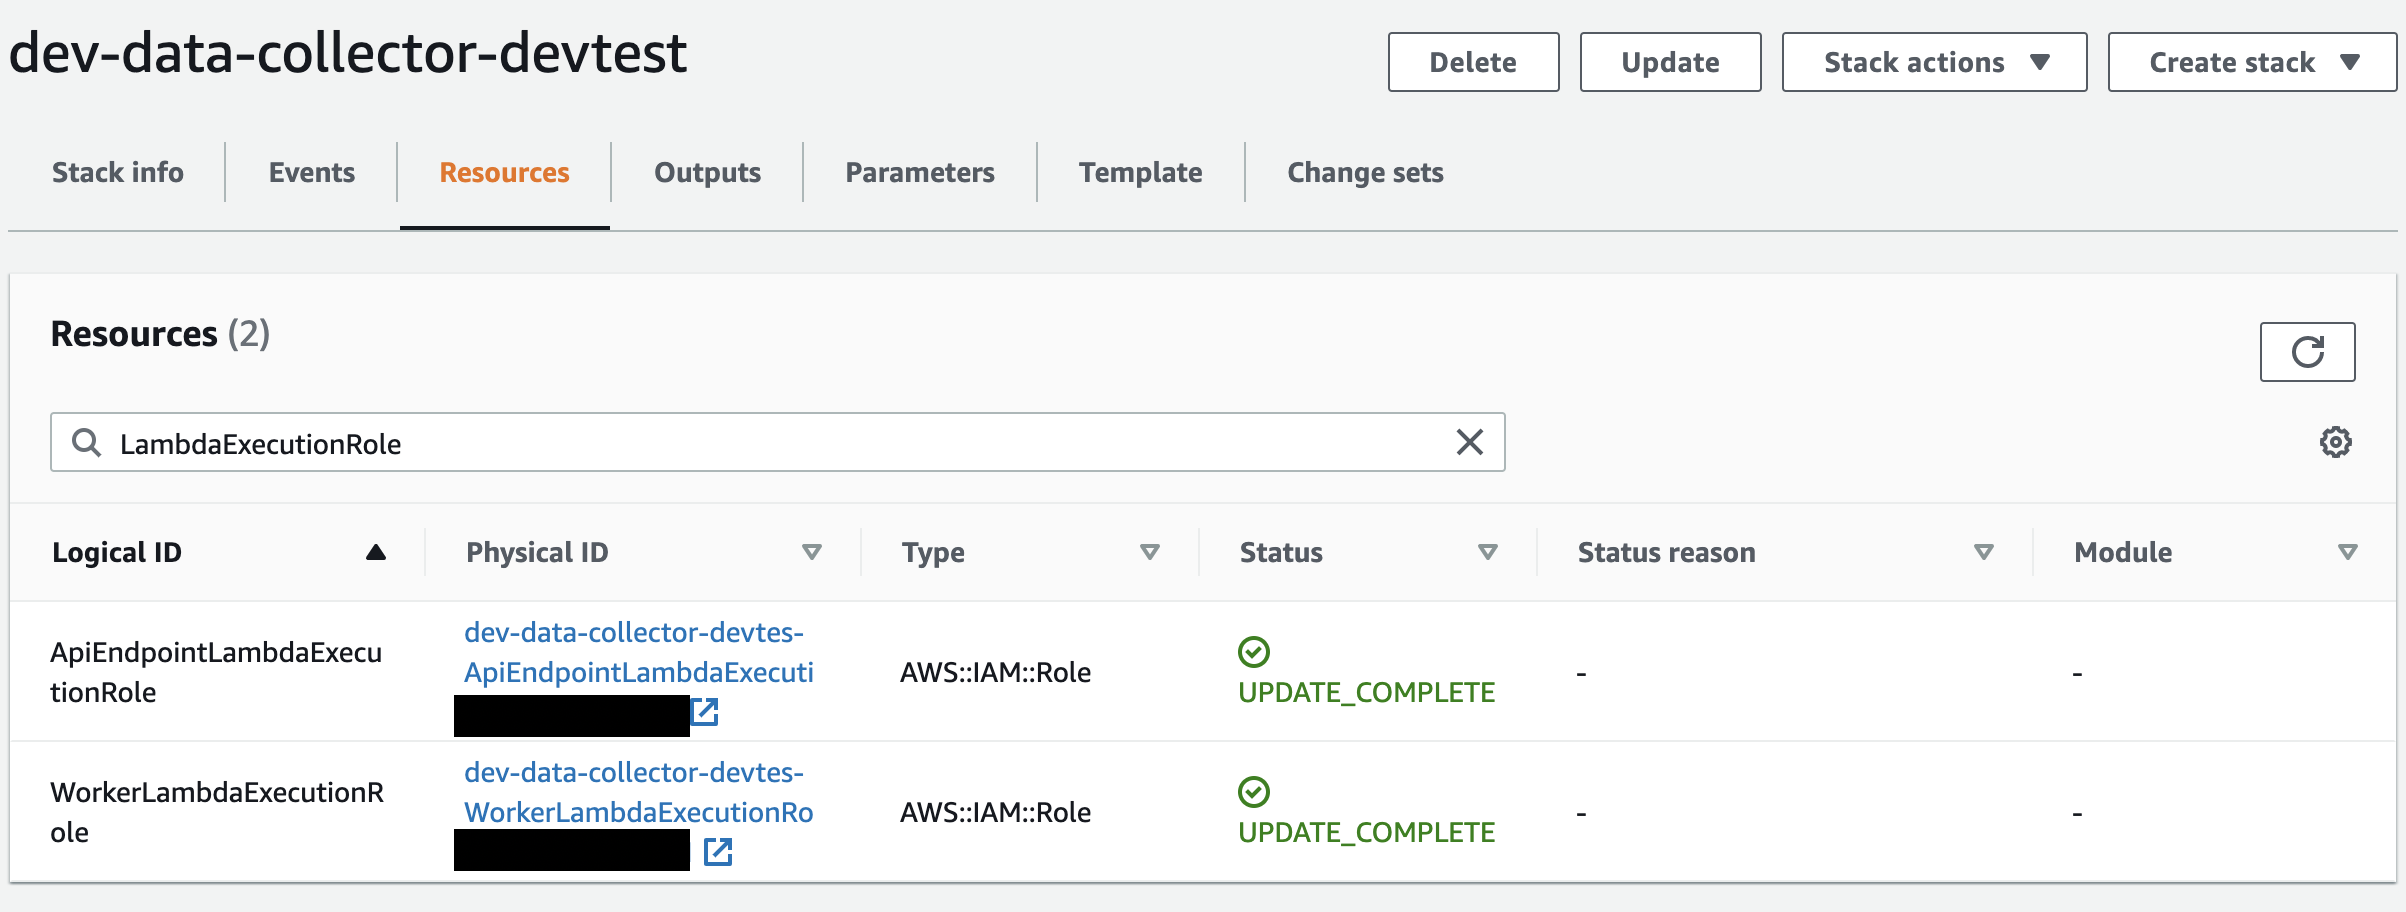
What if I see three resources?If you enabled a hive/glue integration you might see three resources. Save all three ARNs in this case. These will be used in step 5.
3. Go to IAM on your AWS console and navigate to roles and search for the role created in step 8 of "Create an assumable rule". Click when found.

4. Click Trust Relationships and edit Edit Trust Relationship.
5. Replace the existing relationship with the following (use ARNS from Step 2 in this section) and click update Trust Policy:
{
  "Version": "2012-10-17",
  "Statement": [
    {
      "Effect": "Allow",
      "Principal": {
        "AWS": [
          "<REPLACE WITH ROLE ARN FROM FIRST ENTRY>",
          "<REPLACE WITH ROLE ARN FROM SECOND ENTRY>"
        ]
      },
      "Action": "sts:AssumeRole",
      "Condition": {}
    }
  ]
}
Updated about 1 month ago