Rotating Keys
About
This document provides examples of how to rotate keys for various platforms and deployments.
Requirements
- Monte Carlo Role and Subscription: You must have the Account Owner role in Monte Carlo. Additionally, your account must be subscribed to either the Scale or Enterprise tier with the Advanced Networking option for a hybrid deployment.
- Cloud Admin: Administrative access to your cloud (e.g., Azure, AWS, or GCP) is necessary.
Platforms
Azure Agent
Storage Accounts
The Azure Agent uses two storage accounts where you can rotate keys.
| Type | Terraform Name | Description |
|---|---|---|
| Durable Functions Storage | mcdagent0fs<ID> | The account is used by Azure Durable Functions for app functionality. |
| Data Store storage | mcdagent1fs<ID> | The account is used to store Monte Carlo-related files (such as sampling data). |
More information about managing storage account access keys is available in the Azure documentation here.
Steps: Rotating Durable Functions storage access keys
- Before starting, confirm that the agent is operational. See docs here for details.
- Then, confirm any associated integrations. You can do this by navigating to the Integrations tab in Settings (here) and selecting "Test" under the kebab menu (vertical triple dots).
- Next, open the Azure Portal and locate the Azure Function. This can be done by searching in the agent's resource group.
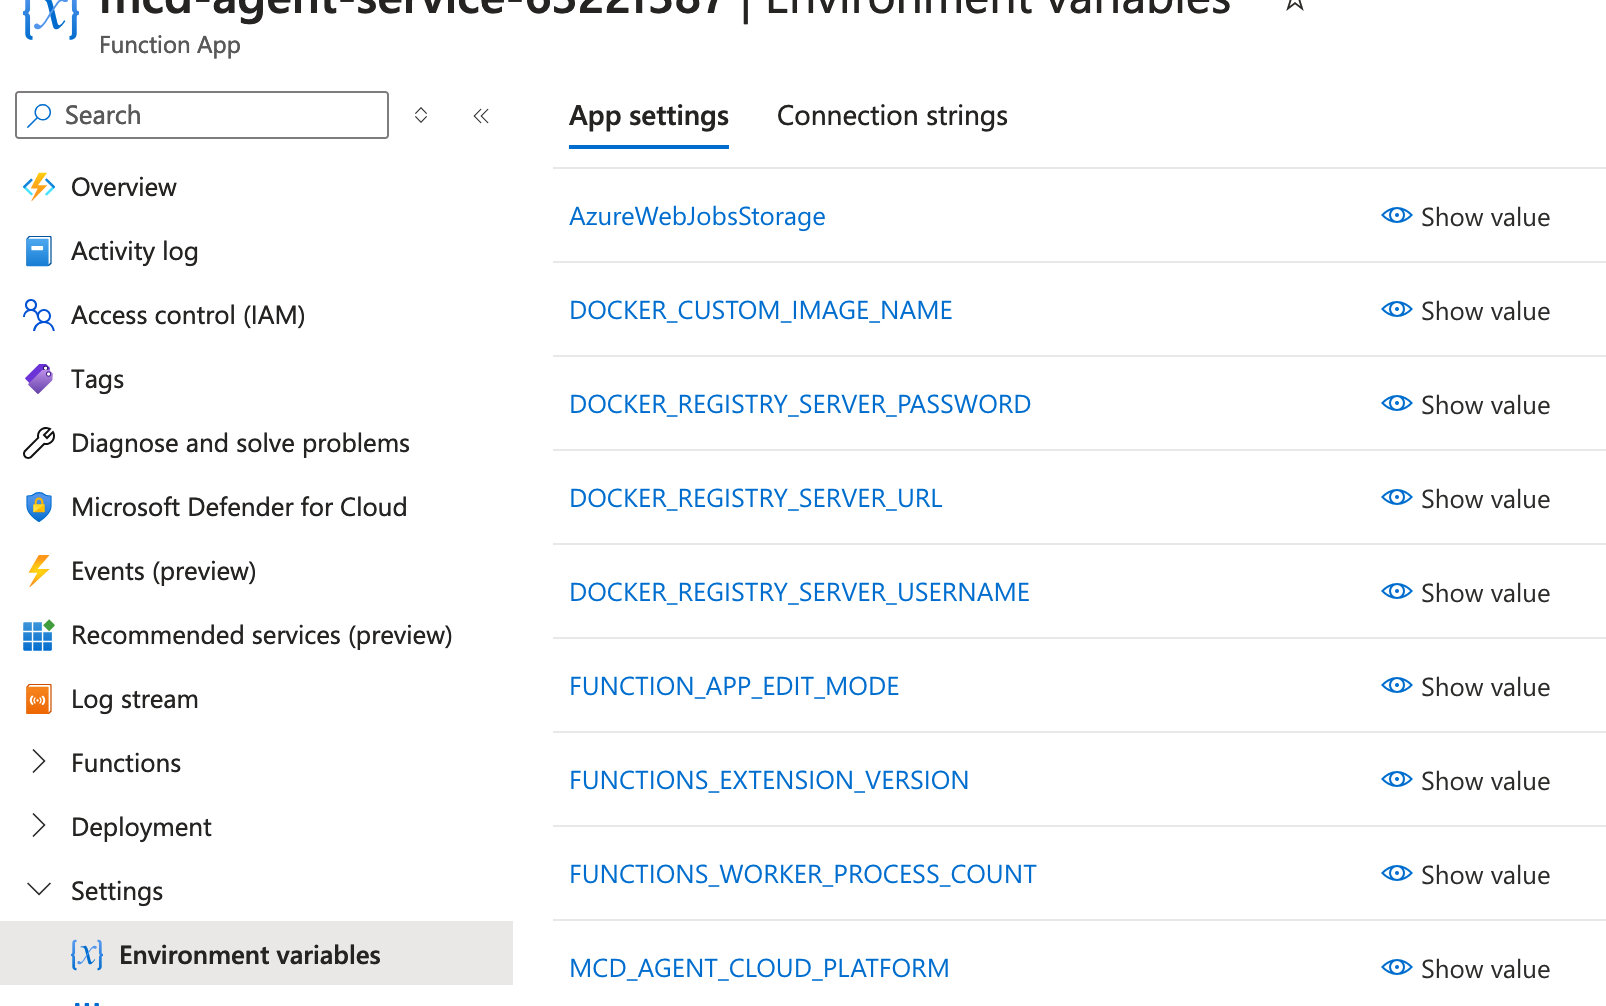
- From the function's Settings tab, select 'Environment variables', and then locate the variable named
AzureWebJobsStorage. Copy its value for future reference, and leave this tab open.

Azure Portal Example
- Next, open the Azure Storage Account Portal and locate the storage account named
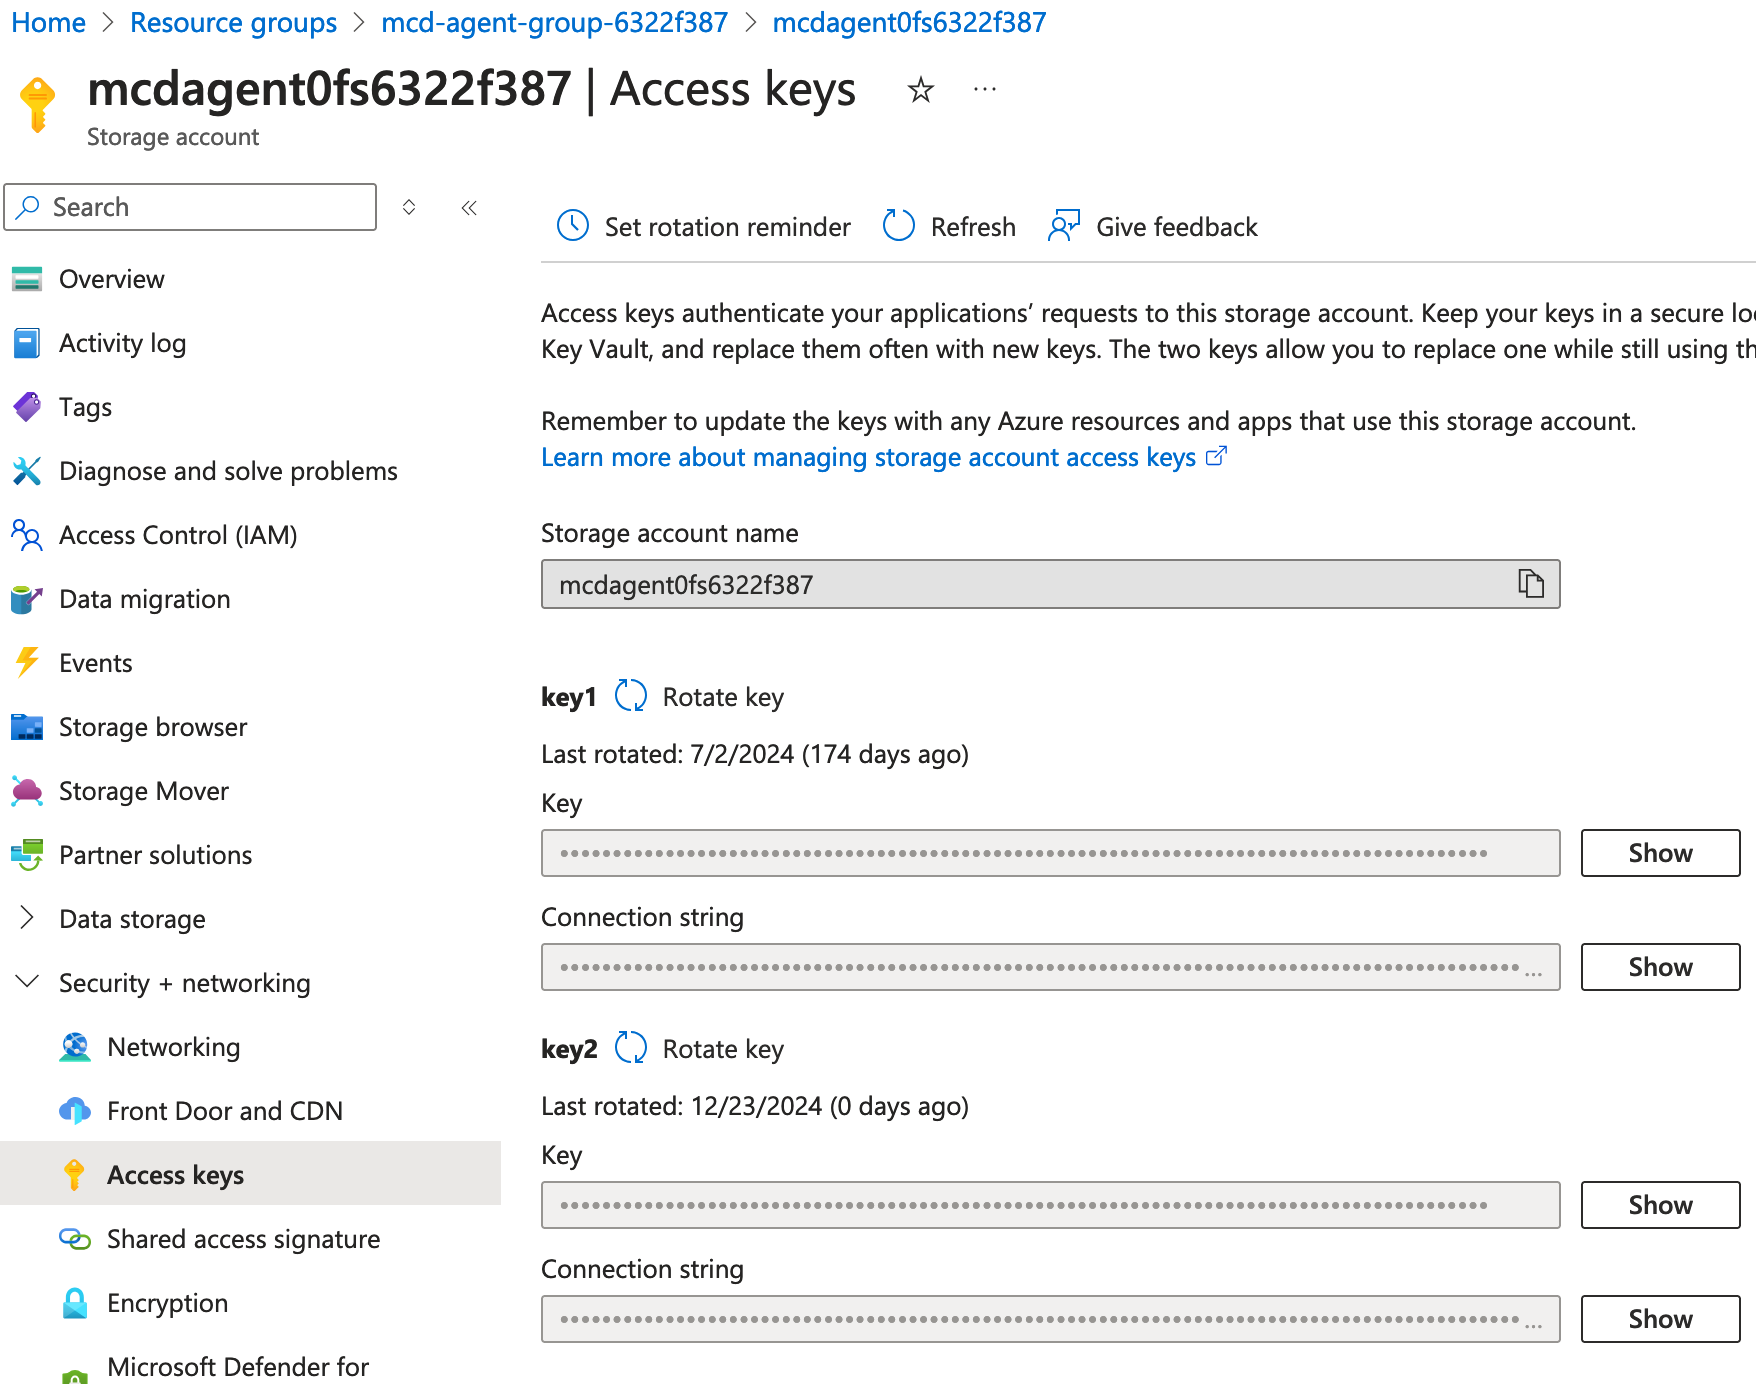
mcdagent0fs<ID>. From there, open the Security + Networking tab and select 'Access keys'.Please ensure that you select the storage account with '0fs' in the name and not '1fs'.

Azure Portal Example
- Next, check the value of the
Connection stringforkey 1and compare it with the value of theAzureWebJobsStorageenvironment variable in the Azure Function from step 4. If this is the first time the keys have been rotated, they should match. If they do not match, check ifkey 2is being used.The following instructions assume that
key 1is the one being used.If
key 2is being used instead, swap the two keys in all instructions. - Rotate the key not in use (e.g.,
key 2) by clicking the “Rotate key” icon next to the key name. - Then, copy the value for
Connection stringfor the rotated key (e.g.,key 2). - Navigate back to the Azure Function from step 4 and set the
Connection stringfrom the previous step as the value for the following two environment variables in the Azure Function:AzureWebJobsStorageWEBSITE_CONTENTAZUREFILECONNECTIONSTRING
- Apply the changes, then confirm and save the changes to the environment variables
- Restart the Azure Function.
- Repeat steps 1 and 2 to confirm the agent and integrations operate as expected.
If you need to roll back the change, update the values for
AzureWebJobsStorageandWEBSITE_CONTENTAZUREFILECONNECTIONSTRINGto their previous values and restart the function. - Once you confirm that the agent is working as expected, you can rotate the key that was previously used (i.e., the key not currently in use) and test the agent again by repeating step 12.
Steps: Rotating Data Store storage access keys
Since the datastore storage account is accessed using a managed identity, you can rotate the keys without affecting the Azure Function. Even when keys are not used to access the storage, it is recommended to rotate them anyway, as they are generated and provide access to the storage account
- Before starting, confirm that the agent is operational. See docs here for details.
- Then, confirm any associated integrations. You can do this by navigating to the Integrations tab in Settings (here) and selecting "Test" under the kebab menu (vertical triple dots).
- Open the Azure Storage Account Portal and navigate to the account named
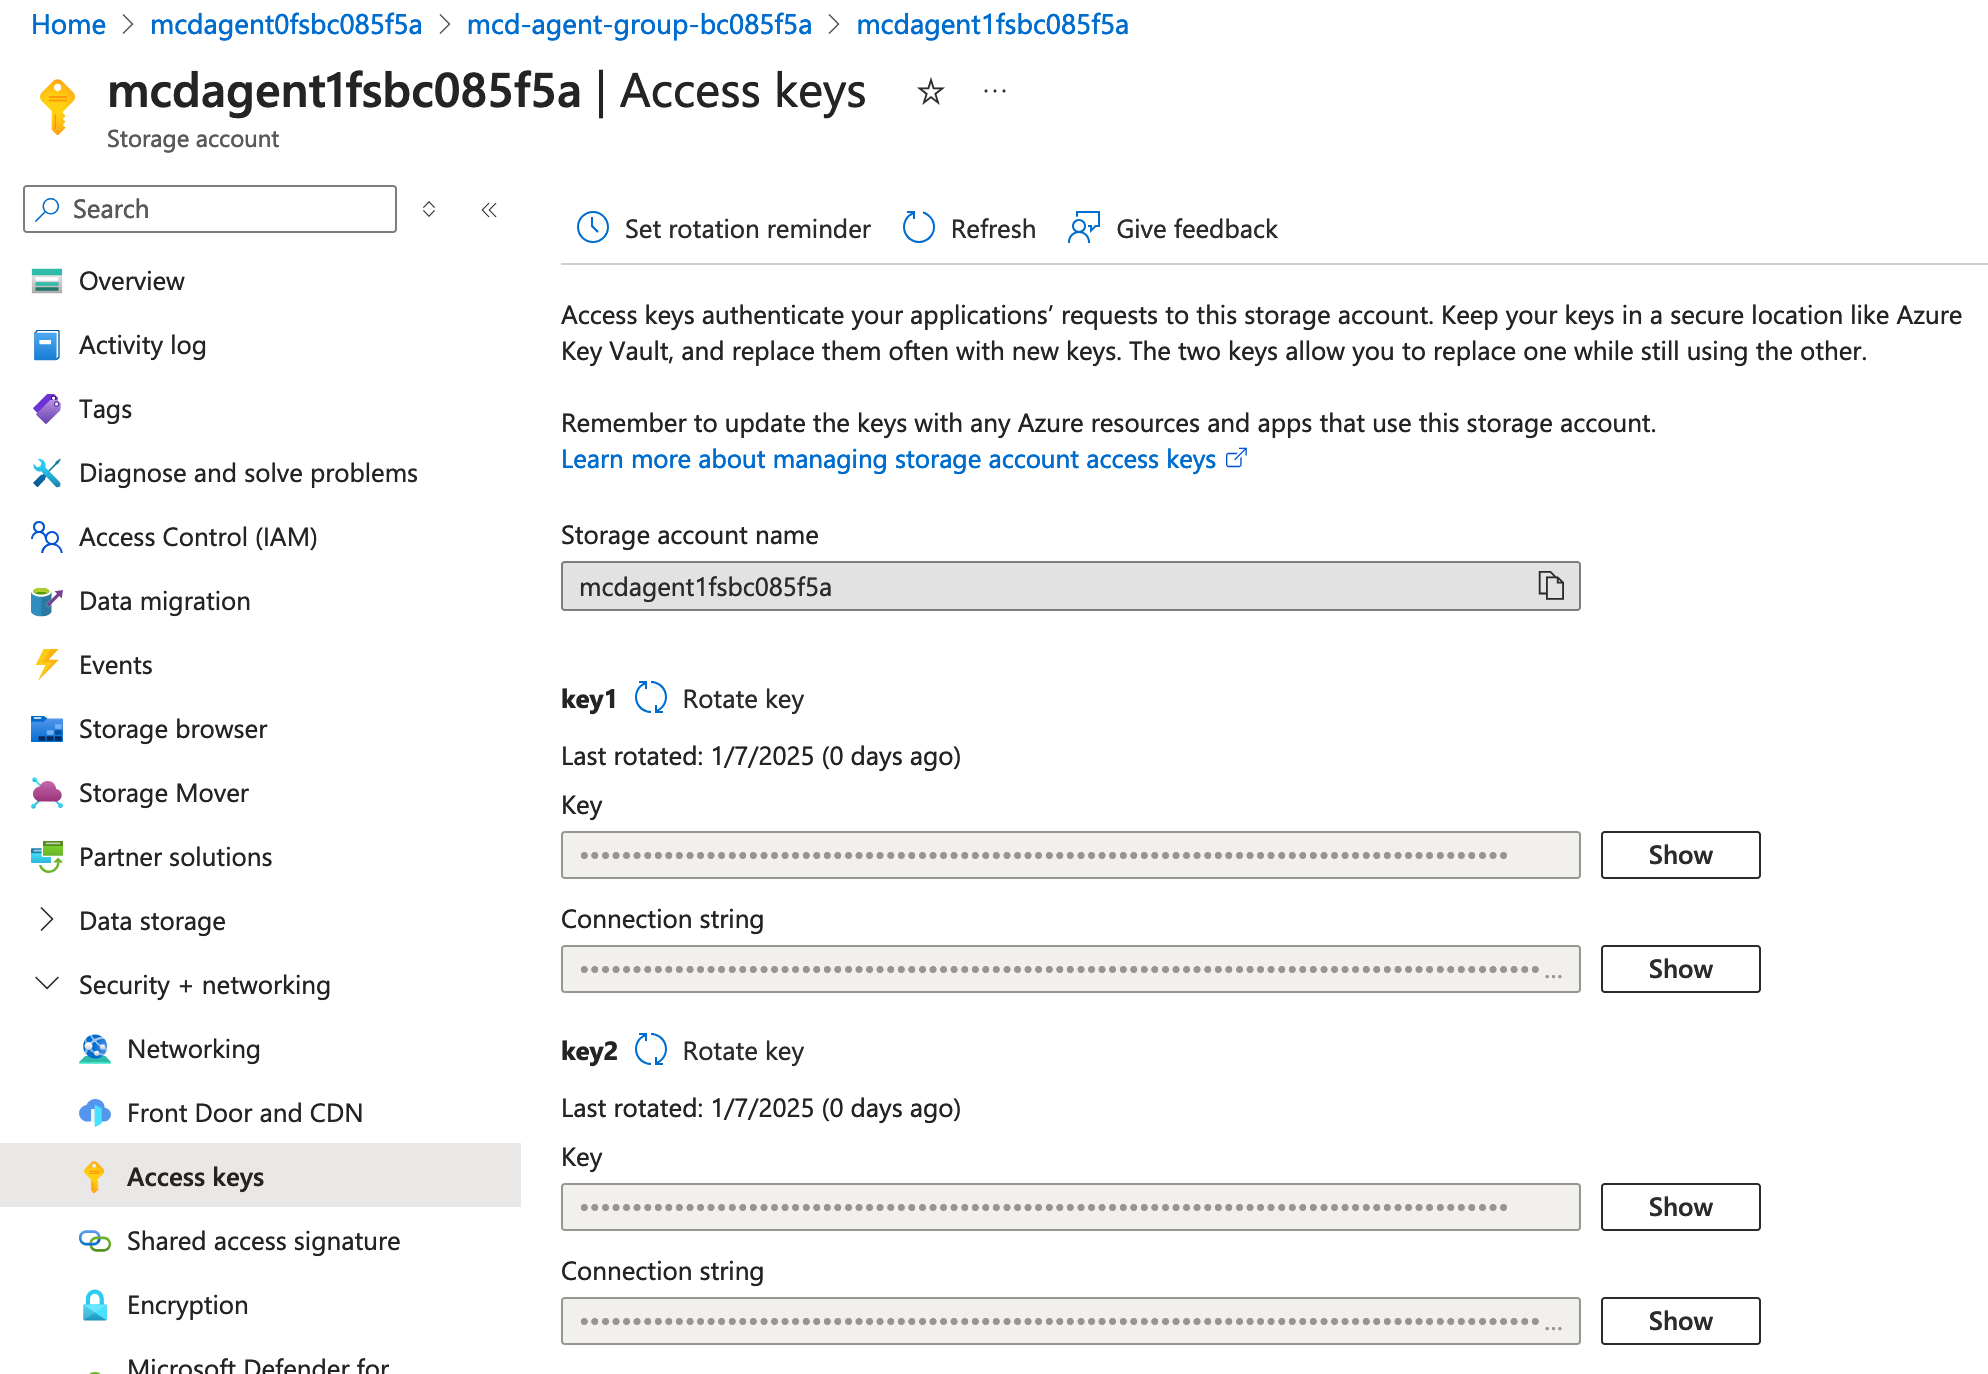
mcdagent1fs<ID>.Please ensure that you select the storage account with '1fs' in the name and not '0fs'.
- From there, open the Security + Networking tab and select 'Access keys'.

Azure Portal Example
- Then, rotate both keys by clicking the 'rotate key' icon next to each key.
- Repeat steps 1 and 2 to confirm the agent and integrations operate as expected.
Updated 6 months ago
