Single Sign On (SSO)
Monte Carlo supports Single Sign On (SSO) authentication via SAML 2.0. When you set up SSO on Monte Carlo, all users on your domain will be required to sign in using your Identity Provider (IdP).
User Level API Keys will be revoked!If you are migrating from using usernames/passwords to log in to using SSO, please be aware that all existing user level API Keys will be disabled as they are tied to username/password profiles which will be automatically disabled once SSO is enabled. Account level API Keys will still remain active.
Unfortunately, there is no way to prevent this for security reasons. You will need to remake any keys once SSO is enabled.
Configuring your Identity Provider
In your Identity Provider, add Monte Carlo as a new site for SSO authentication. Depending on your provider, you will need the following information:
- Supports Service Provider-initiated SSO:
Yes - Supports Identity Provider-initiated SSO:
No
SP v IdP Log in FlowsService Provider-initiated SSO means Monte Carlo supports starting your log in flow directly from our home page: getmontecarlo.com/signin.
Identity Provider-initiated SSO means Monte Carlo does not currently support logging in directly from your IdP. This means any users trying to access MC by clicking on the tile in your IdP will result in a error. Please see the following guide for options around this restriction.
- Entity ID (Audience): Provided in Account information page.
- ACS endpoint URL / Single SignOn URL / Recipient URL: Provided in Account information page.
- NameID Format:
unspecified - Required metadata attributes: Note that the name of the attribute must be the URL in the first column.
| Name ID / Claim Name | Okta | AWS SSO | OneLogin | Entra ID |
|---|---|---|---|---|
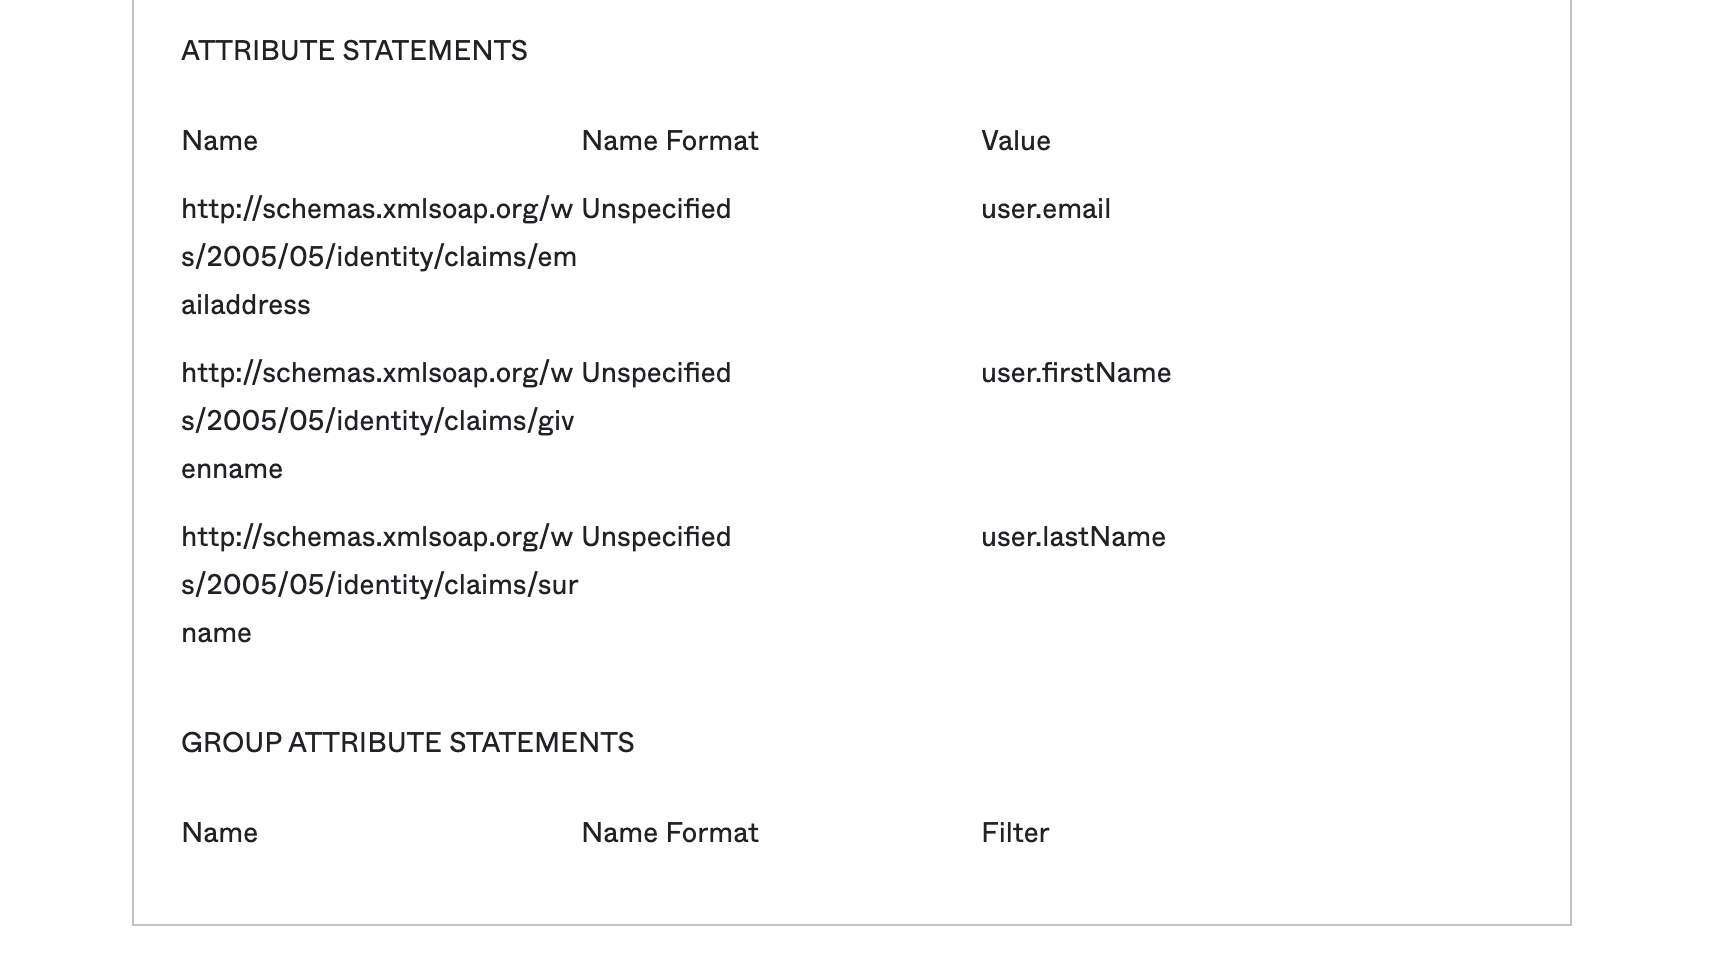
| http://schemas.xmlsoap.org/ws/2005/05/identity/claims/emailaddress | user.email | ${user:email} | user.mail | |
| http://schemas.xmlsoap.org/ws/2005/05/identity/claims/givenname | user.firstName | ${user:givenName} | First Name | user.givenname |
| http://schemas.xmlsoap.org/ws/2005/05/identity/claims/surname | user.lastName | ${user:familyName} | Last Name | user.surname |
Okta
In Okta, this should look like below.
OneLogin
Use the "SAML Custom Connector (Advanced)" to create the application.
During setup, make sure to set:
- SAML Initiator to
Service Provider - SAML nameID format to
Unspecified - Recipient field to the value given at the start of this document.
- In the attribute mapping section, leave NameID value as
Email.
Configure these claims (attribute mappings) by setting the appropriate name and values:
Check the Include in SAML assertion box for each of the metadata attributes (email, first name, last name).
After SSO has been enabled in Monte Carlo, you can input the SSO bookmark link on the Login URL field to let users access Monte Carlo through the OneLogin Portal (read below on Identity Provider Initiated Login for instructions to get the SSO bookmark link).
Entra ID
Make sure to check the Entity ID referencing Monte Carlo as the default. In the Use Attributes & Claims section, as Unique User Identifier (Name ID) use user.mail and set the name identifier format to Unspecified.
Configure these claims by setting the appropriate name and values:
AWS SSO
In the attribute mappings section, set the mandatory Subject to $USER:EMAIL.
Configure these claims by setting the appropriate name and values:
| Name | Value |
|---|---|
| http://schemas.xmlsoap.org/ws/2005/05/identity/claims/emailaddress | ${user:email} |
| http://schemas.xmlsoap.org/ws/2005/05/identity/claims/givenname | ${user:givenName} |
| http://schemas.xmlsoap.org/ws/2005/05/identity/claims/surname | ${user:familyName} |
Google SSO
You will need to create a custom SAML app through the Google Admin page. The Name ID will be 'Basic Information > Primary Email' and the Name ID format will be 'UNSPECIFIED'. For attribute mapping you will need to map the default Google Basic Information fields Primary email, First name and Last name to the URLs that are shared in the table above under 'Name ID / Claim Name'. It should look like this:

MyID
In MyID, you will have to include the Name ID/Claim Names listed above as Labels for your Attributes, and each attribute should be in the unspecified format. The top level attribute should be Email in the unspecified format.
Configuring Monte Carlo to require SSO
After configuring Monte Carlo as a new SSO site in your Identify Provider, you will need to complete your Single Sign On configuration by logging into Monte Carlo and clicking over to the Settings tab.
Within Settings, click on Single Sign On to configure the following:
| Configuration | Details |
|---|---|
| Domains | One or more domains belonging to your organization that the SAML Identity Provider represents. Users will be redirected to the Identity Provider based on their email domain, and will be allowed access to your Monte Carlo account after successful SSO authentication. Example: acme.com |
| Account Identifier | An account identifier is an optional arbitrary string, for example, your Monte Carlo account name. If there are multiple accounts with the same domain, you should provide an account identifier to distinguish between them during log in. Example: acme sales |
| Metadata | You will need to define your Identity Provider in one of the following manners. Metadata URL: Metadata XML: |
| Default Authorization Group | Specify a default authorization group to which users will be added upon if there is no mapped SSO group. Without this default setting, users logging in through SSO without any mapped SSO groups won't be associated with any authorization group, preventing them from using Monte Carlo. Learn more about mapping authorization groups during user login using SSO Group mapping. |
Identity Provider Initiated Login
Though there isn't yet a true IdP initiated login, you can create a Monte Carlo SSO bookmark link in your IdP that will automatically authenticate users so they do not need to re-enter credentials.
You can copy this link from within Settings > Users > Single Sign On.
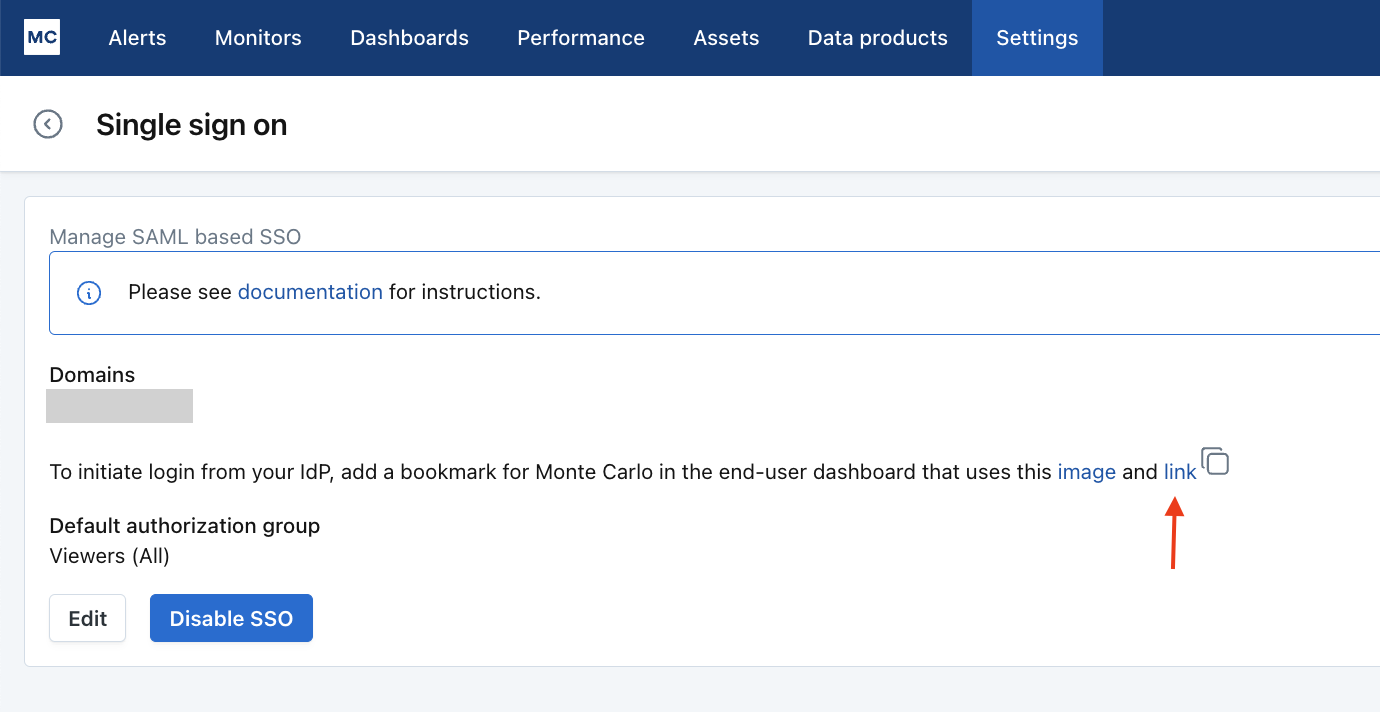
Please note that the link will regenerate each time you reactivate the Single Sign-On (SSO) feature. If you disable and later reconfigure it, ensure to copy the updated link.
FAQ & Troubleshooting
Please see our FAQs and Troubleshooting
Updated 22 days ago