dbt Cloud
Prerequisites
- requires admin privileges for the dbt Cloud account that hosts and runs your production dbt models
- requires Data Collector v14099+
Step 1: Obtain a dbt Cloud API token and account ID
Please follow the instructions in dbt Cloud's API documentation to create a dbt Cloud API token. This token will be needed when creating the integration with the Monte Carlo CLI. The token should have read-only access.
To obtain your dbt Cloud account ID, sign into dbt Cloud in your browser. Take note of the number directly following the accounts path component of the URL -- this is your account ID. For example, if the URL is https://cloud.getdbt.com/#/accounts/1234/projects/6789/dashboard/, the account ID is 1234.
Step 2: dbt Cloud Webhooks
Monte Carlo integrates with dbt Cloud using the --webhook-hmac-secret and --webhook-id options. This provides real-time notifications that dbt Cloud jobs have completed and run results are available for collection by Monte Carlo.
-
Create an outbound webhook in the Account Settings view in dbt Cloud:
-
Endpoint URL: get the URL via the MC app, tab Settings -> tab Integration -> Add new integration -> tabOrchestration -> select dbt . You will see your Webhook URL listed in the setup form per below.
-
Events: Only
job.run.completedis supported by Monte Carlo BUT failed runs also trigger this event so we will be handling run failures as well.
-
Step 3 Option A: Create a dbt Cloud integration through the Monte Carlo UI
You can set up the dbt cloud integration all through the UI.
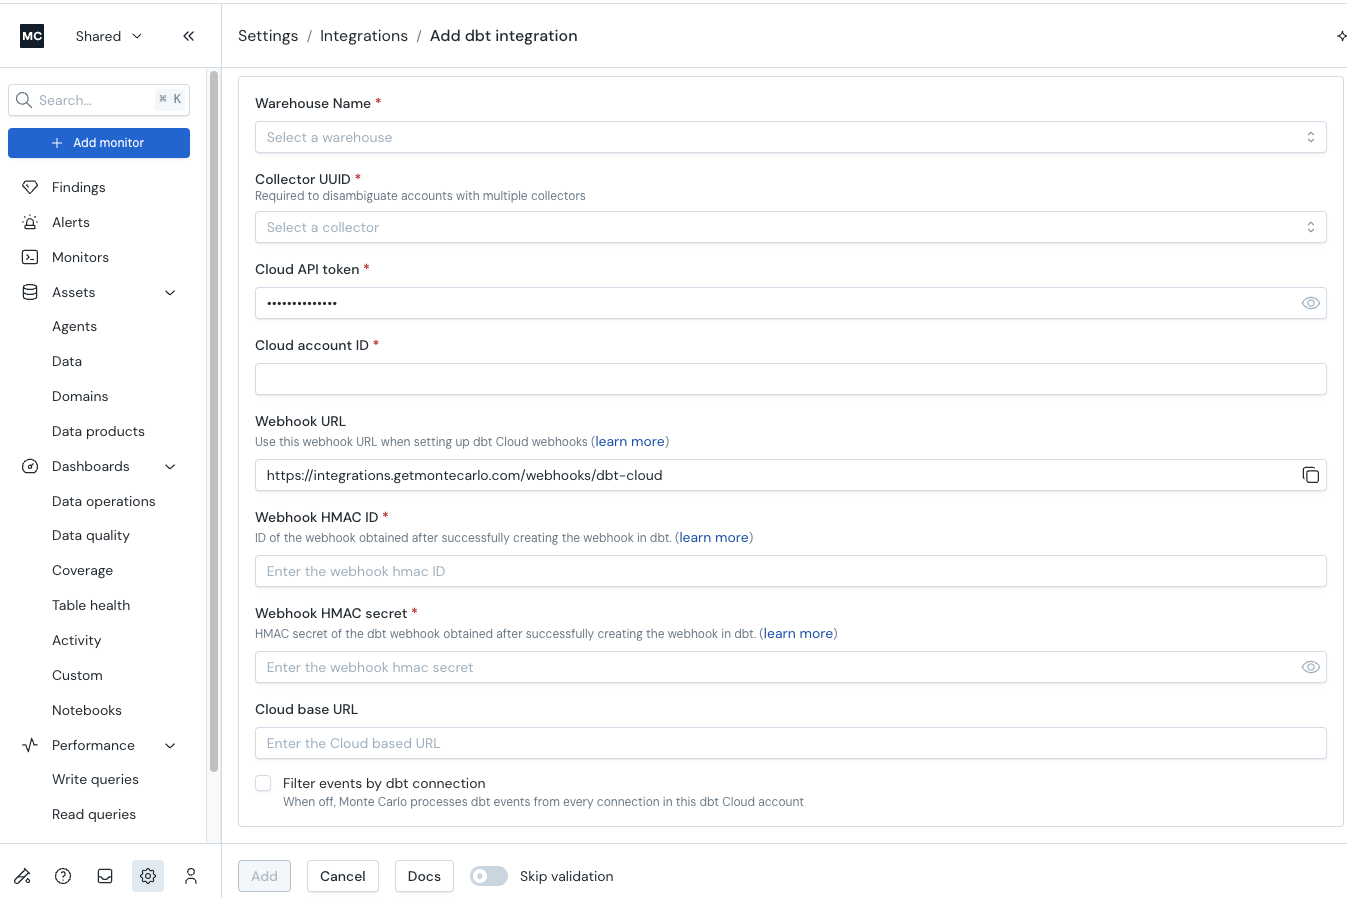
- From the integration tab on the settings page scroll down to the ETL Tool Connection section and click the Create dropdown and select DBT
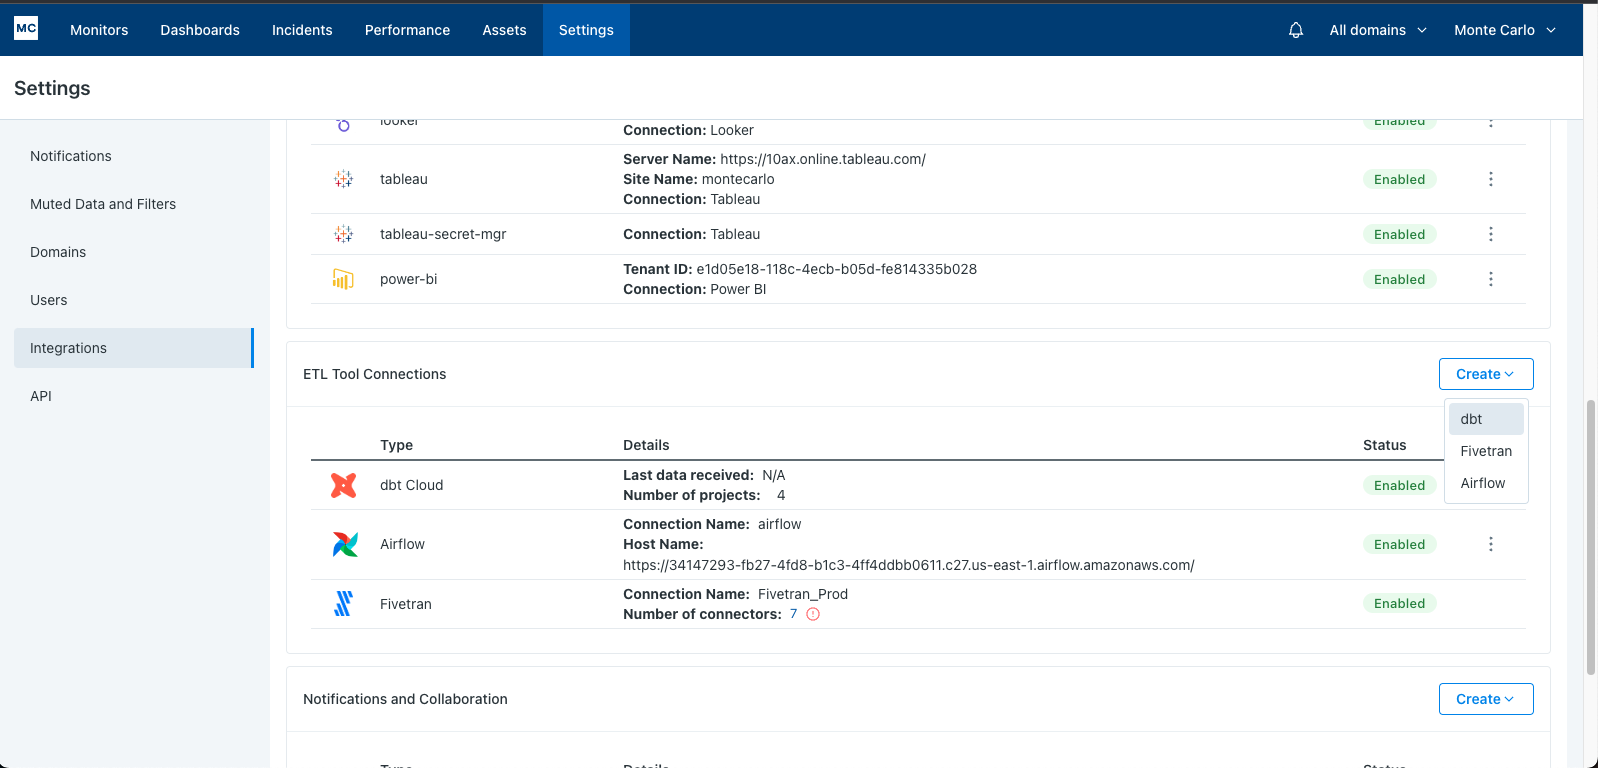
-
Fill out the fields in the form. Add the webhook related fields to ensure the timeliness of your dbt data in MC. See the section above on how to create the webhook and dbt docs on how to obtain hmac ID.
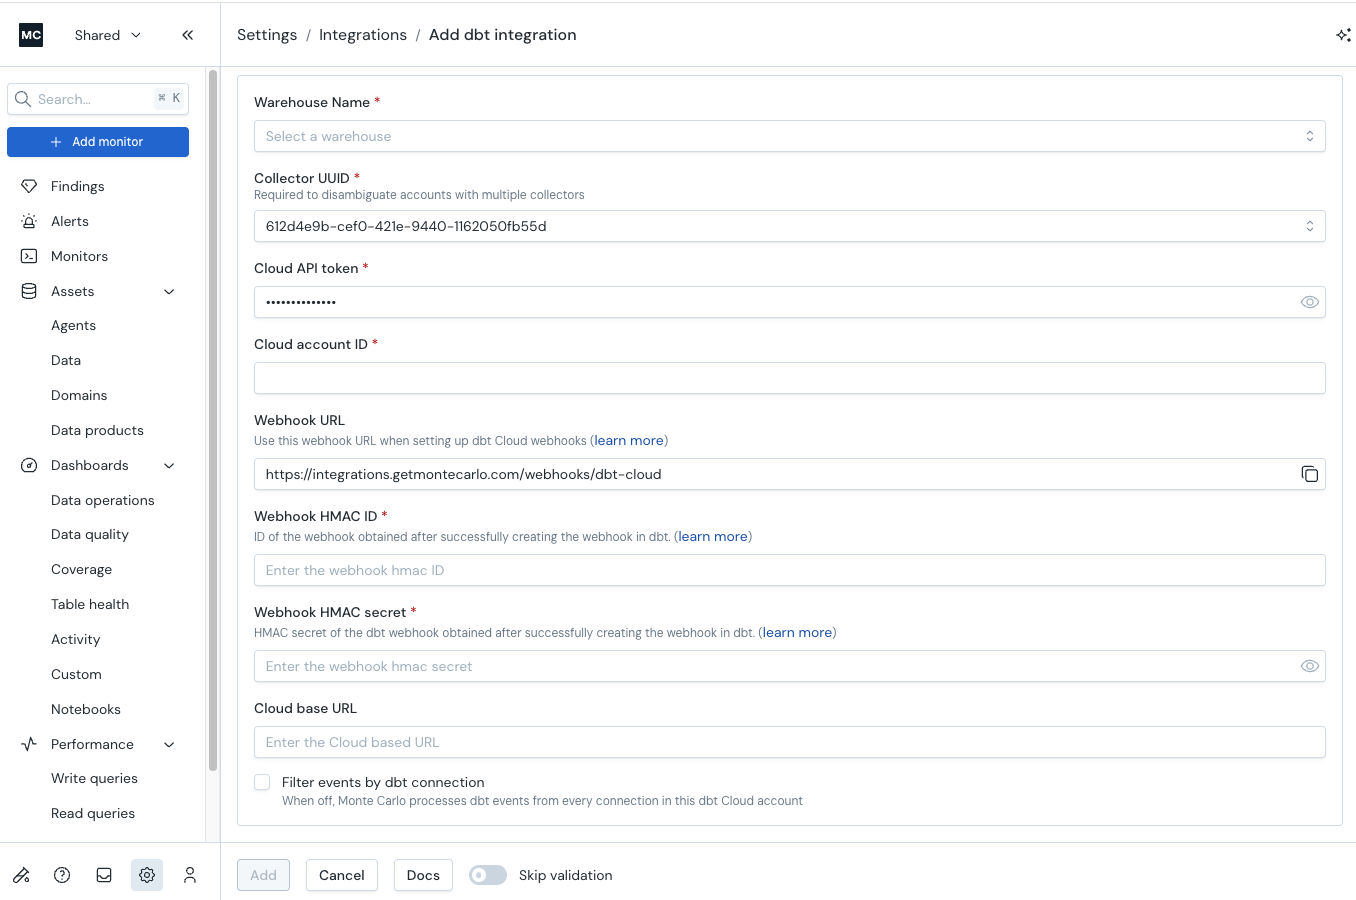
Filter events by dbt connectionThis option can limit the scope of events that are processed by this integration:
- If left unchecked (this is the default), all events will be processed.
- If checked, there's a further choice of automatic matching (default) or matching to a specific set of dbt connections.
Why filter
The dbt Cloud webhooks typically fire on any event within the dbt account, and depending on your dbt Cloud setup you might want to target only some events to this particular integration. For example: you might have have Dev, Stage, and Prod warehouses in your dbt account, and this particular integration is meant for Prod warehouse only. In this scenario, you would need to exclude the events originating in Dev and Stage warehouses.
Auto-matching
In this mode, Monte Carlo will inspect connections details for each webhook event and attempt to match those details with the existing Monte Carlo connections to the same warehouse. It should work reliably in most cases. Specifically, it's a good option for Snowflake and BigQuery warehouses because they do not rely on hostname matching.
Specifying dbt connections
In this mode, Monte Carlo will only process events whose connections match a given list of dbt connections (specified either with names like Redshift Prod 1 or with IDs like 4321). This is the most reliable option, and it will work even in cases where auto-matching fails. Specifically, this can be the only viable option for warehouses that (a) match by hostname (Redshift, Databricks, and so on) and (b) have private links or custom DNS setups, so that Monte Carlo and dbt Cloud use different hostnames to reach the same warehouse. Choose this mode if your runs are missing or are mis-attributed to the wrong warehouse.
Note: if specifying dbt Cloud connections, copy IDs or names of the desired connections exactly as they appear in dbt Cloud UI or API.
Now your dbt integration is set up and ready to go.
Step 3 Option B: Create a dbt Cloud integration with the Monte Carlo CLI
- Make sure Monte Carlo CLI version is v0.54.2+
- Choose a warehouse to link with your dbt Cloud:
- If you only have a single warehouse integrated with Monte Carlo, proceed to step two.
- Otherwise, you will need to select a warehouse to link with the dbt Cloud integration. Use
montecarlo integrations listto list out all available connections, and take note of the ID of the warehouse that is used as the target for your dbt Cloud production models.
EMEA and Single Tenant SetupsIf you are using dbt cloud and have a single tenant setup or are based in EMEA, you will need to include
--dbt-cloud-base-urlin the command set to your base URL for the validation to work. Please refer to the dbt documentation to obtain this.Note: Make sure to include the api and version in the URL you provide (always use v2). For example, for the URL https://cloud.getdbt.com, you should provide https://cloud.getdbt.com/api/v2.
Note: If you are using dbt cloud in EMEA, please use https://emea.dbt.com/api/v2.
- Run
montecarlo integrations add-dbt-cloud:
$ montecarlo integrations add-dbt-cloud --help
Usage: montecarlo integrations add-dbt-cloud [OPTIONS]

  Setup a dbt Cloud integration.

Options:
  --dbt-cloud-api-token TEXT   dbt Cloud API token. If you prefer a prompt
                               (with hidden input) enter -1.  [required]
  --dbt-cloud-account-id TEXT  dbt Cloud Account ID.  [required]
  --dbt-cloud-base-url TEXT    dbt Cloud Base URL.
  --webhook-hmac-secret        HMAC secret of the dbt webhook obtained
    													 after successfully creating the webhook in dbt. [required]
  --webhook-id                 ID of the webhook obtained after successfully
                               creating the webhook in dbt.[required]
  --name TEXT                  Friendly name of the warehouse which the
                               connection will belong to.
  --collector-id UUID          ID for the data collector. To disambiguate
                               accounts with multiple collectors.
  --skip-validation            Skip all connection tests. This option cannot
                               be used with 'validate-only'.
  --validate-only              Run connection tests without adding. This
                               option cannot be used with 'skip-validation'.
  --auto-yes                   Skip any interactive approval.
  --help                       Show this message and exit.
montecarlo integrations add-dbt-cloud --dbt-cloud-api-token <dbt api token> --dbt-cloud-account-id <dbt account id> --webhook-hmac-secret <webhook hmac secret> --webhook-id <webhook id>- See section the above on how to create the Webhook
- Monte Carlo will perform a validation step to ensure that the dbt Cloud account can be successfully accessed. If validation passes, you will be prompted to create the dbt Cloud integration. If validation fails, please double-check that you provided the correct API token and account ID.
At this point, the integration has been created.
Step 4 (Optional): Query Tagging To Get Performance Features
Setup in this section enables MC to link your queries to dbt objects to provide additional features from the integration:
- you will be able to filter for dbt jobs and models in the performance dashboard to drill into performance issues for a dbt job or model of interest
- you will be able to identify the dbt job run for each query run from the performance dashboard details drawer
- you will be able to leverage a dbt job gantt view in assets page to identify problematic models and queries in a job, then leverage MC's query-level metadata to investigate what caused the performance problems
See how you can use those features here
To achieve those, configure your dbt project with the following macro to add additional query comments.
- In your dbt project, create a new file
macros/query_comment.sqlwith these contents:
{% macro query_comment(node) %}
    {%- set comment_dict = {} -%}
    {%- do comment_dict.update(
        app='dbt',
        dbt_version=dbt_version,
        profile_name=target.get('profile_name'),
        target_name=target.get('target_name'),
        invocation_id=invocation_id,
        dbt_cloud_project_id=env_var('DBT_CLOUD_PROJECT_ID', ''),
        dbt_cloud_job_id=env_var('DBT_CLOUD_JOB_ID', ''),
        dbt_cloud_run_id=env_var('DBT_CLOUD_RUN_ID', ''),
        dbt_cloud_pr_id=env_var('DBT_CLOUD_PR_ID', ''),
        dbt_cloud_git_sha=env_var('DBT_CLOUD_GIT_SHA', '')
    ) -%}
    {%- if node is not none -%}
      {%- do comment_dict.update(
        file=node.original_file_path,
        node_id=node.unique_id,
        node_name=node.name,
        resource_type=node.resource_type,
        package_name=node.package_name,
        relation={
            "database": node.database,
            "schema": node.schema,
            "identifier": node.identifier
        }
      ) -%}
    {% else %}
      {%- do comment_dict.update(node_id='internal') -%}
    {%- endif -%}
    {% do return(tojson(comment_dict)) %}
{% endmacro %}- Update
dbt_project.ymlto include a query-comment configuration that references the macro you just added in step (1):
query-comment:
	comment: "{{ query_comment(node) }}"
	append: true # Required for Snowflake
query-commentThe
append: trueproperty is REQUIRED for Snowflake, which removes leading SQL comments from queries.
Q&A
Q: I've set up the integration following the docs. Why don't I see my dbt projects showing up on the settings page for the dbt integration?
A: A dbt project will not show up in UI until after a dbt job under that project runs, so you will see the expected projects populating in the UI overtime as their jobs run.
Q: How long does it take to see my dbt models and jobs on Assets page?
A: dbt models and jobs will show up as assets in the UI after the dbt job runs. Lineage takes additional up to 24 hours to show up in UI after models and jobs show up due to batch processing.
Q: What is the largest manifest.json that can be processed by Monte Carlo?
A: 300 MB, this should contemplate the vast majority of the dbt jobs. If for any reason you need larger manifest.json to be processed, please reach out via our Support Agent and we can evaluate your use case.
Updated about 1 month ago