Creating a notification in Monte Carlo
This tutorial will teach you how to set up a notification in Monte Carlo to get real-time alerts about anomalies detected on your data in the tool of your choosing.
With Monte Carlo, you can explore data incidents within the UI, and you can also set up notifications to have incidents sent to your preferred collaboration tools.
We recommend that every customer set up notifications for incidents so that you can have information pushed to you rather than proactively looking for it, leaving to chance missing critical data incidents.
Before starting this tutorial, please set up an integration for your collaboration tool if you haven't already:
There are two general types of notifications you can set up:
- Real-time notifications (these are sent as they occur)
- Daily digests (these are sent as a daily summary)
Real-time notifications
You will likely want to set up some notifications to receive incidents as they occur throughout the day. You have the ability to set these up for automated monitors as well as custom monitors.
We have separated the notification configuration for automated monitors from custom monitors. This is to give the creators of custom monitors more control over where the notifications from those monitors are sent. Historically, users could route the notifications from custom monitors using the same filters as automated monitors, but this led to chronic problems of notifications being sent outside of where the creator of the monitor intended.
Setting up notifications for automated monitors
In your Monte Carlo UI, navigate to the Notifications tab under the Settings section:
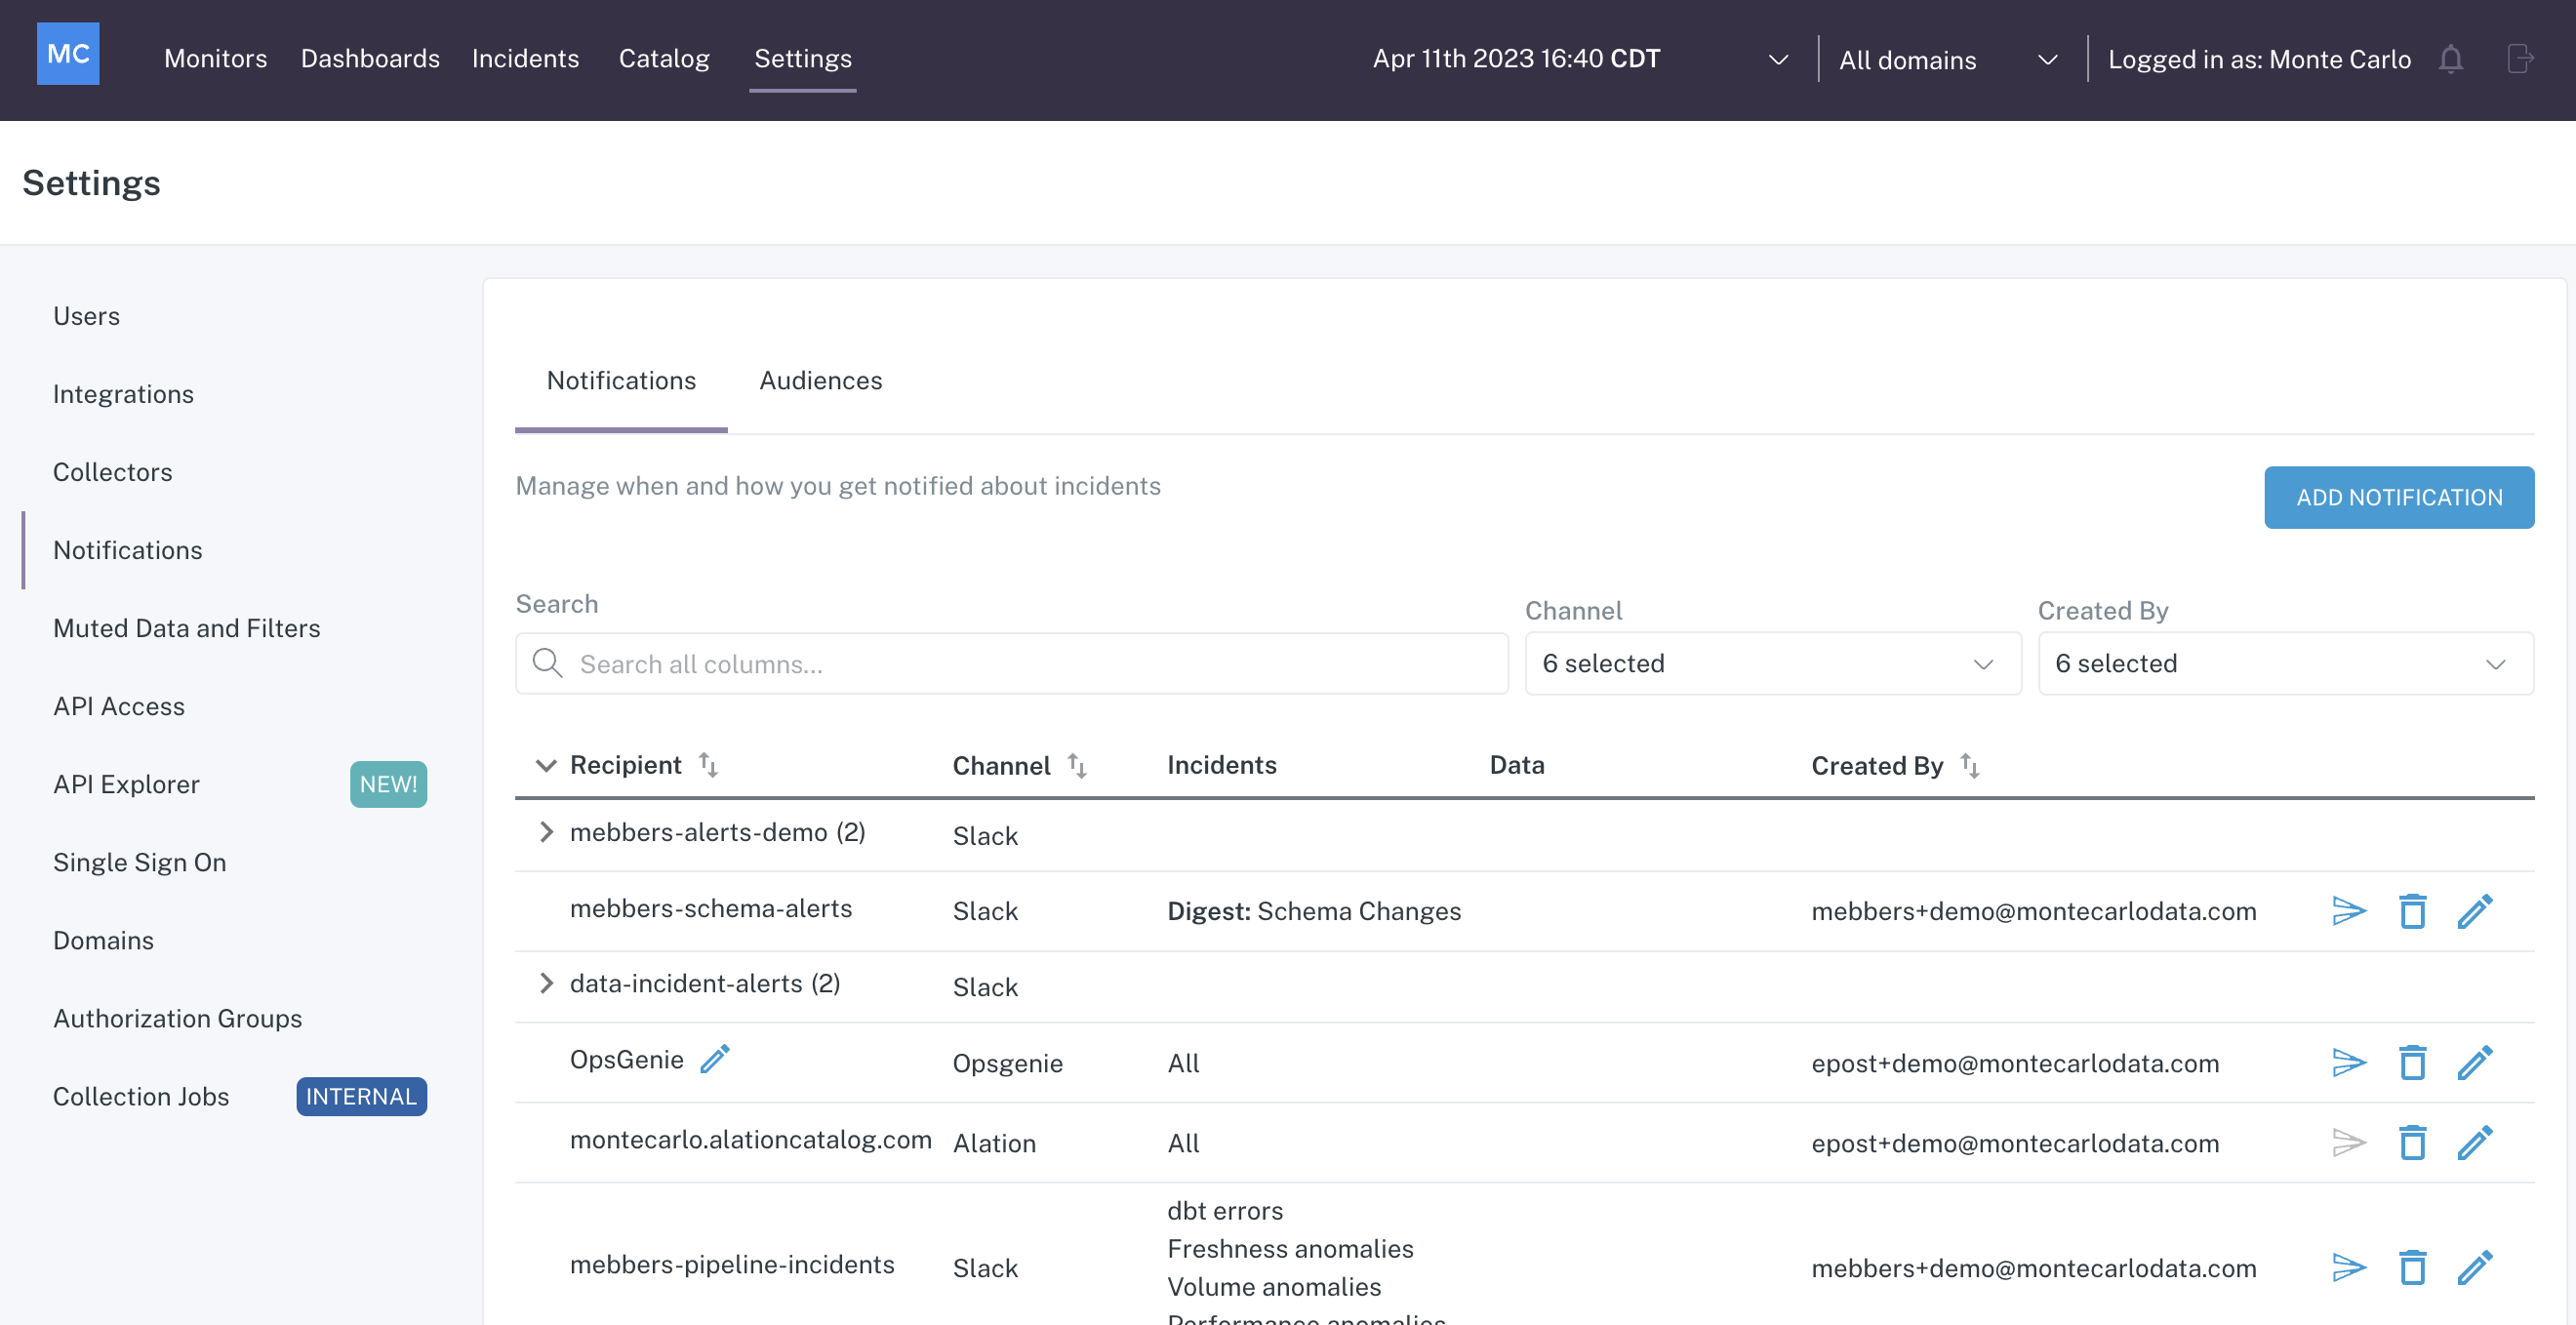
Notifications tab within the Settings page
Click on the Add Notification button. For initial setup, select Automated Monitors:

Dropdown after clicking Add Notification button
This will take you to a detail modal where you can specify how to you want receive incidents:
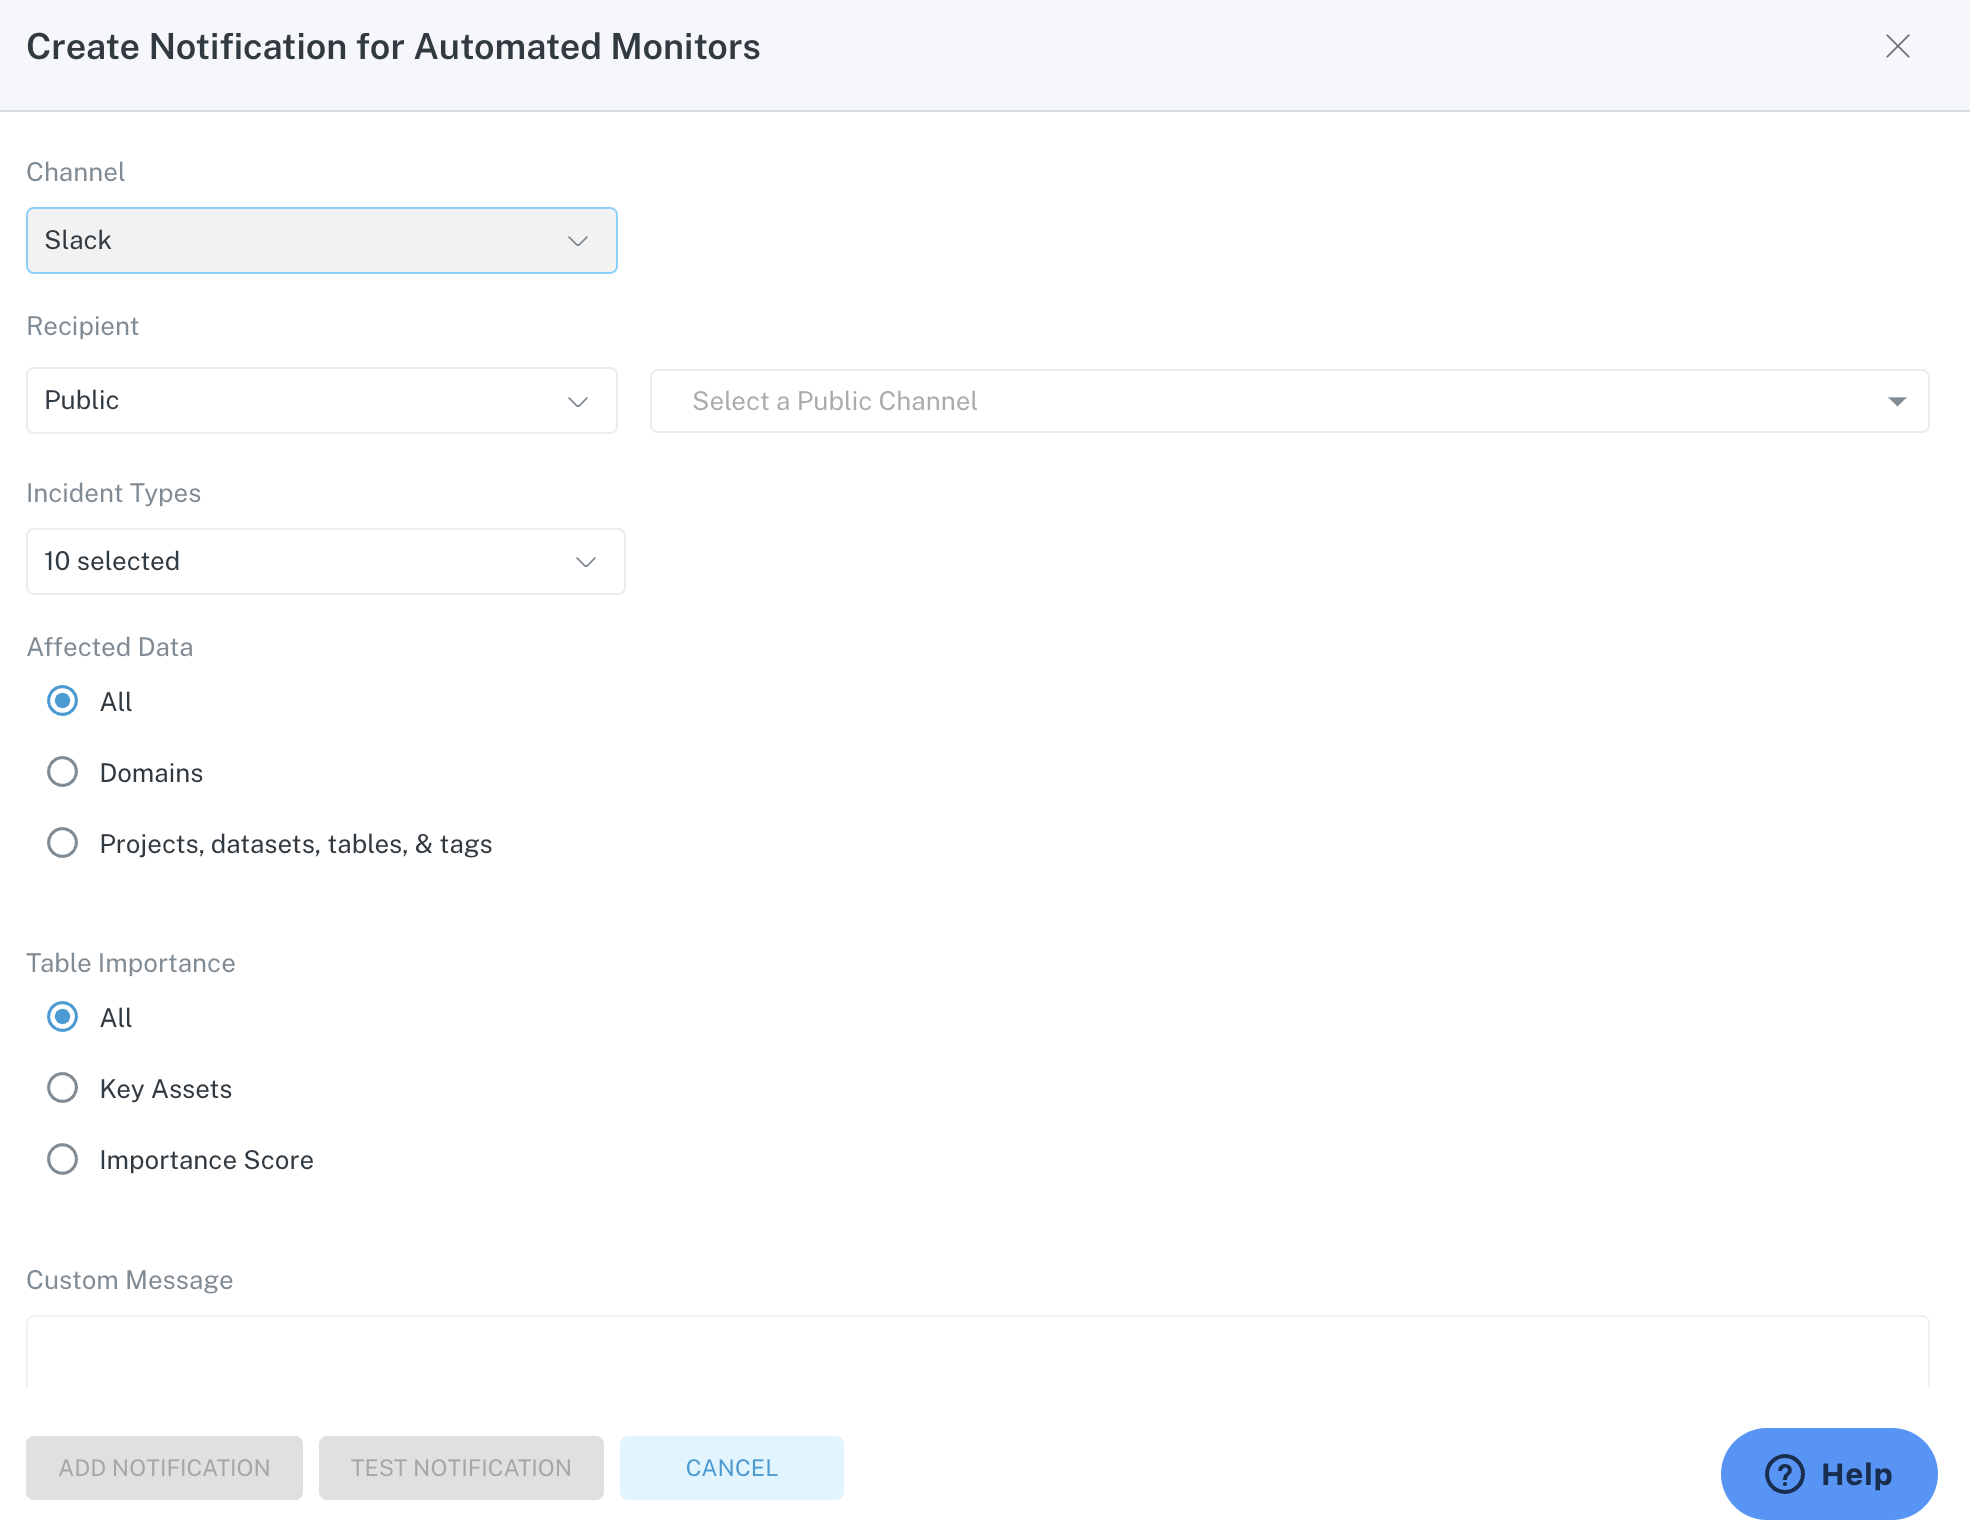
Automated Monitors setup detail page
As you can see, you can select the following:
Channel: Here you will select which collaboration tool you want notifications routed to.Recipient: If you are using Slack, you can select whether you want the notification routed to a private group or public channel. If you are using other collaboration tools, you will select the routing for that tool.Incident Types: You can select all automated incident types or a specific set. For instance, some of our customers prefer for schema change incidents to be funneled into a separate channel.Affected Data: You can select all data assets or a subset that you want routed to your notification channel. You can utilize Monte Carlo domains (which are predefined groups of data assets) to route notifications, or you can define the projects, datasets, tables & tags that you want to be included in this specific notification channel. Many of our customers split notifications by team or data mesh-style domain.Table Importance: You can define a subset of data assets in an additional way by specifying the importance of the table or view by assigning eitherKey Assets(a Monte Carlo flag for your most important tables) or setting a threshold for the table's important score. Learn more about importance scores and key assets here.Custom Message: Finally, you can add a custom message that will be sent along with the incident. Here you might choose to list a playbook of actions, tag individuals or groups, or use variables to provide more context around the incident.
Once you are done filling out the required fields, you can test and add the notification.
Setting up notifications for custom monitors
You can route incidents from custom monitors into the same channel as your automated monitors, or you can route them in whichever way makes the most sense for your team setup. The way that you will do this is by setting up Audiences.
Audiences are a way of tagging custom monitors so that they can be funneled into the right notification channels and reach the right audience. Audiences are often named after a team ("Data platform"), product ("Loans"), or priority ("Critical"). You can set up Audiences under the subtab within Notifications:
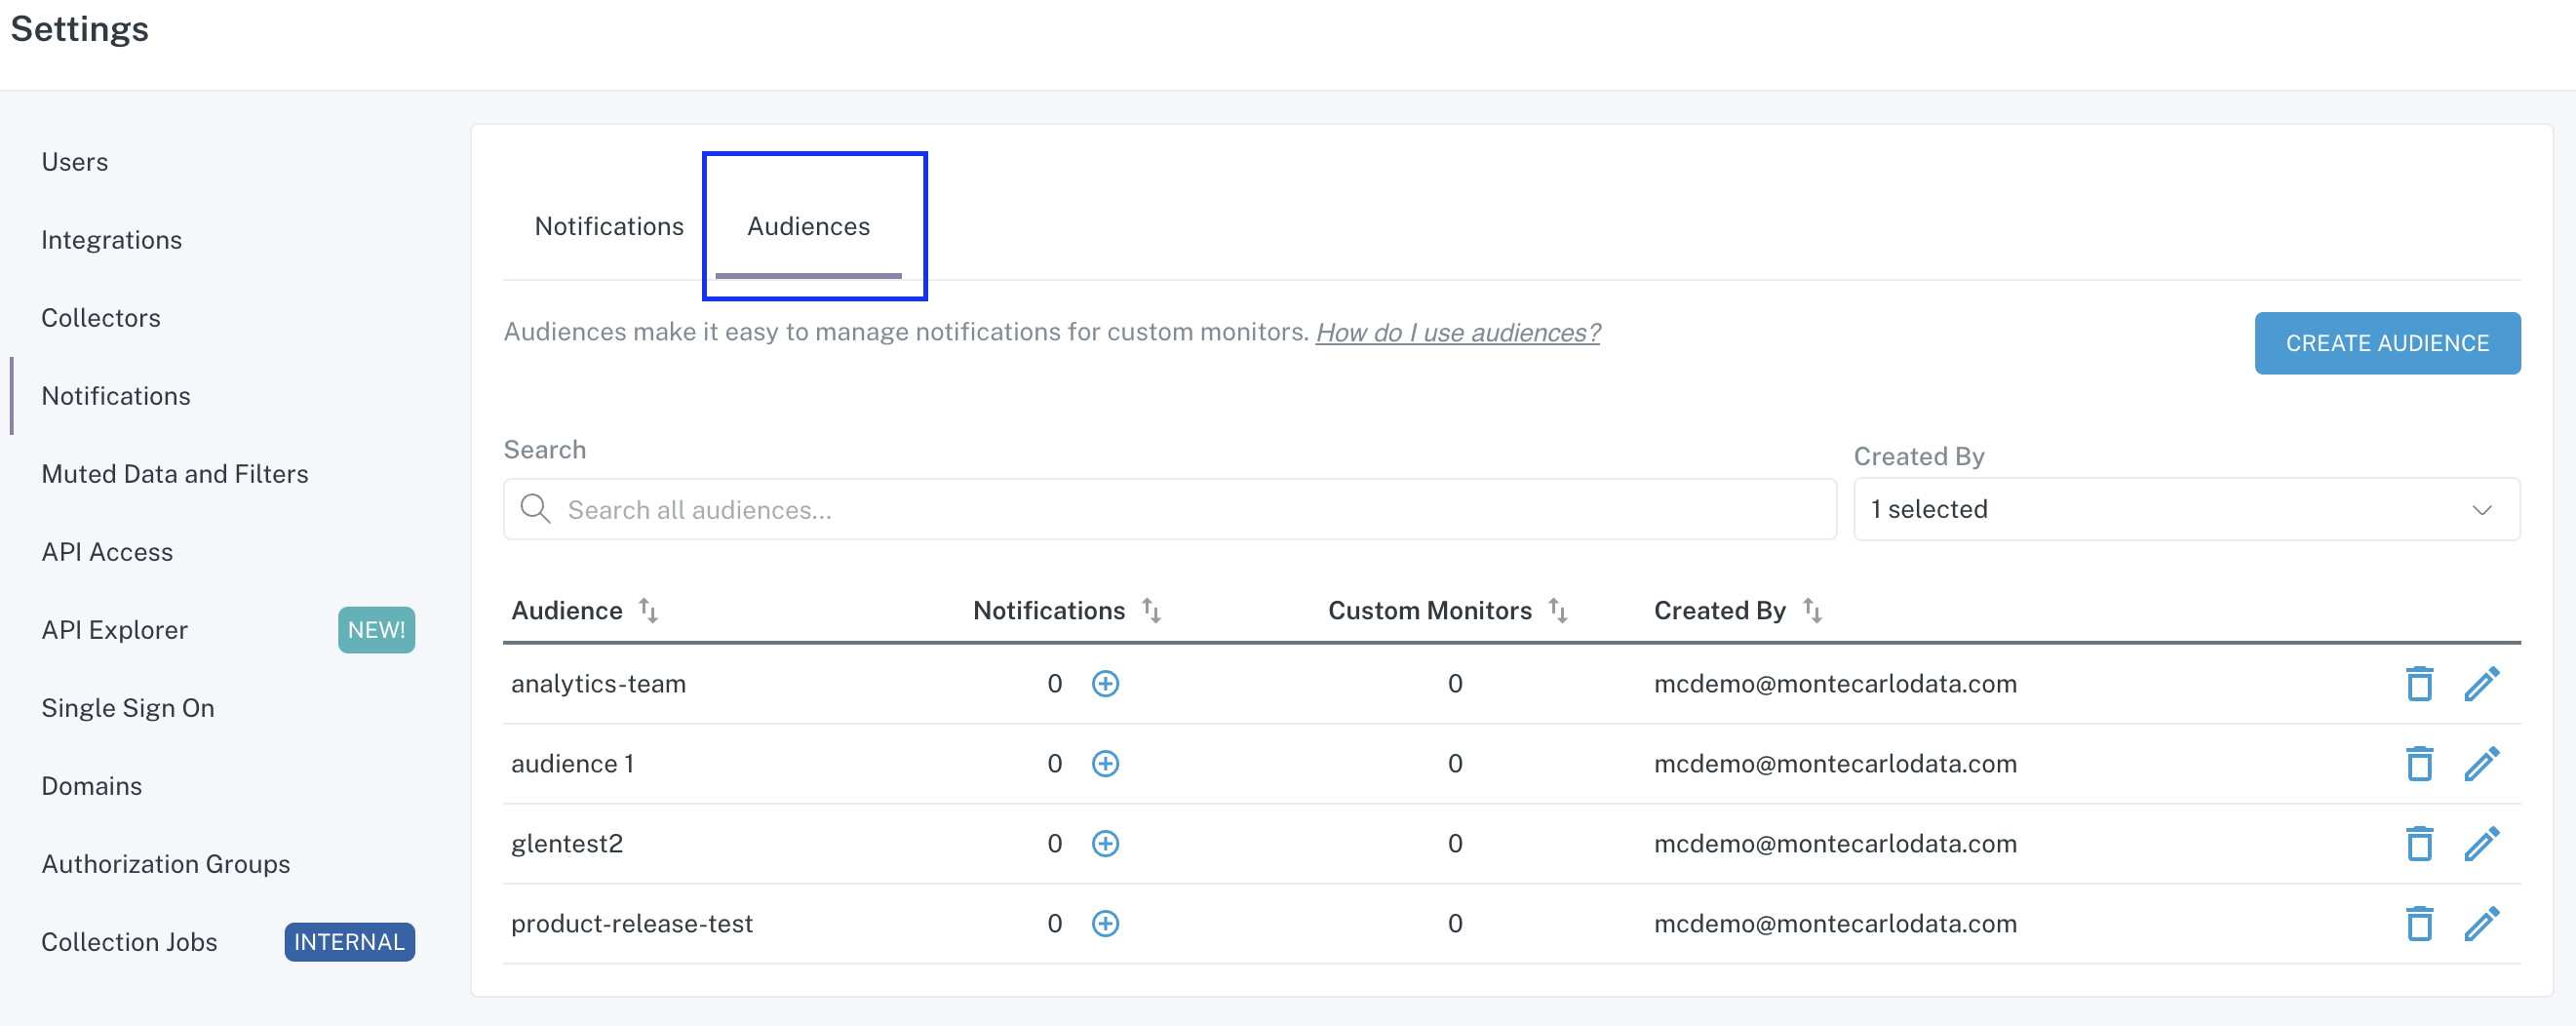
Audiences subtab within Notifications
In the example above, you can see the current set of audiences, how many are being used to route notifications and how many custom monitors that are tagged with that Audience.
Once you have set up an Audience, you can apply that Audience to your custom monitor:
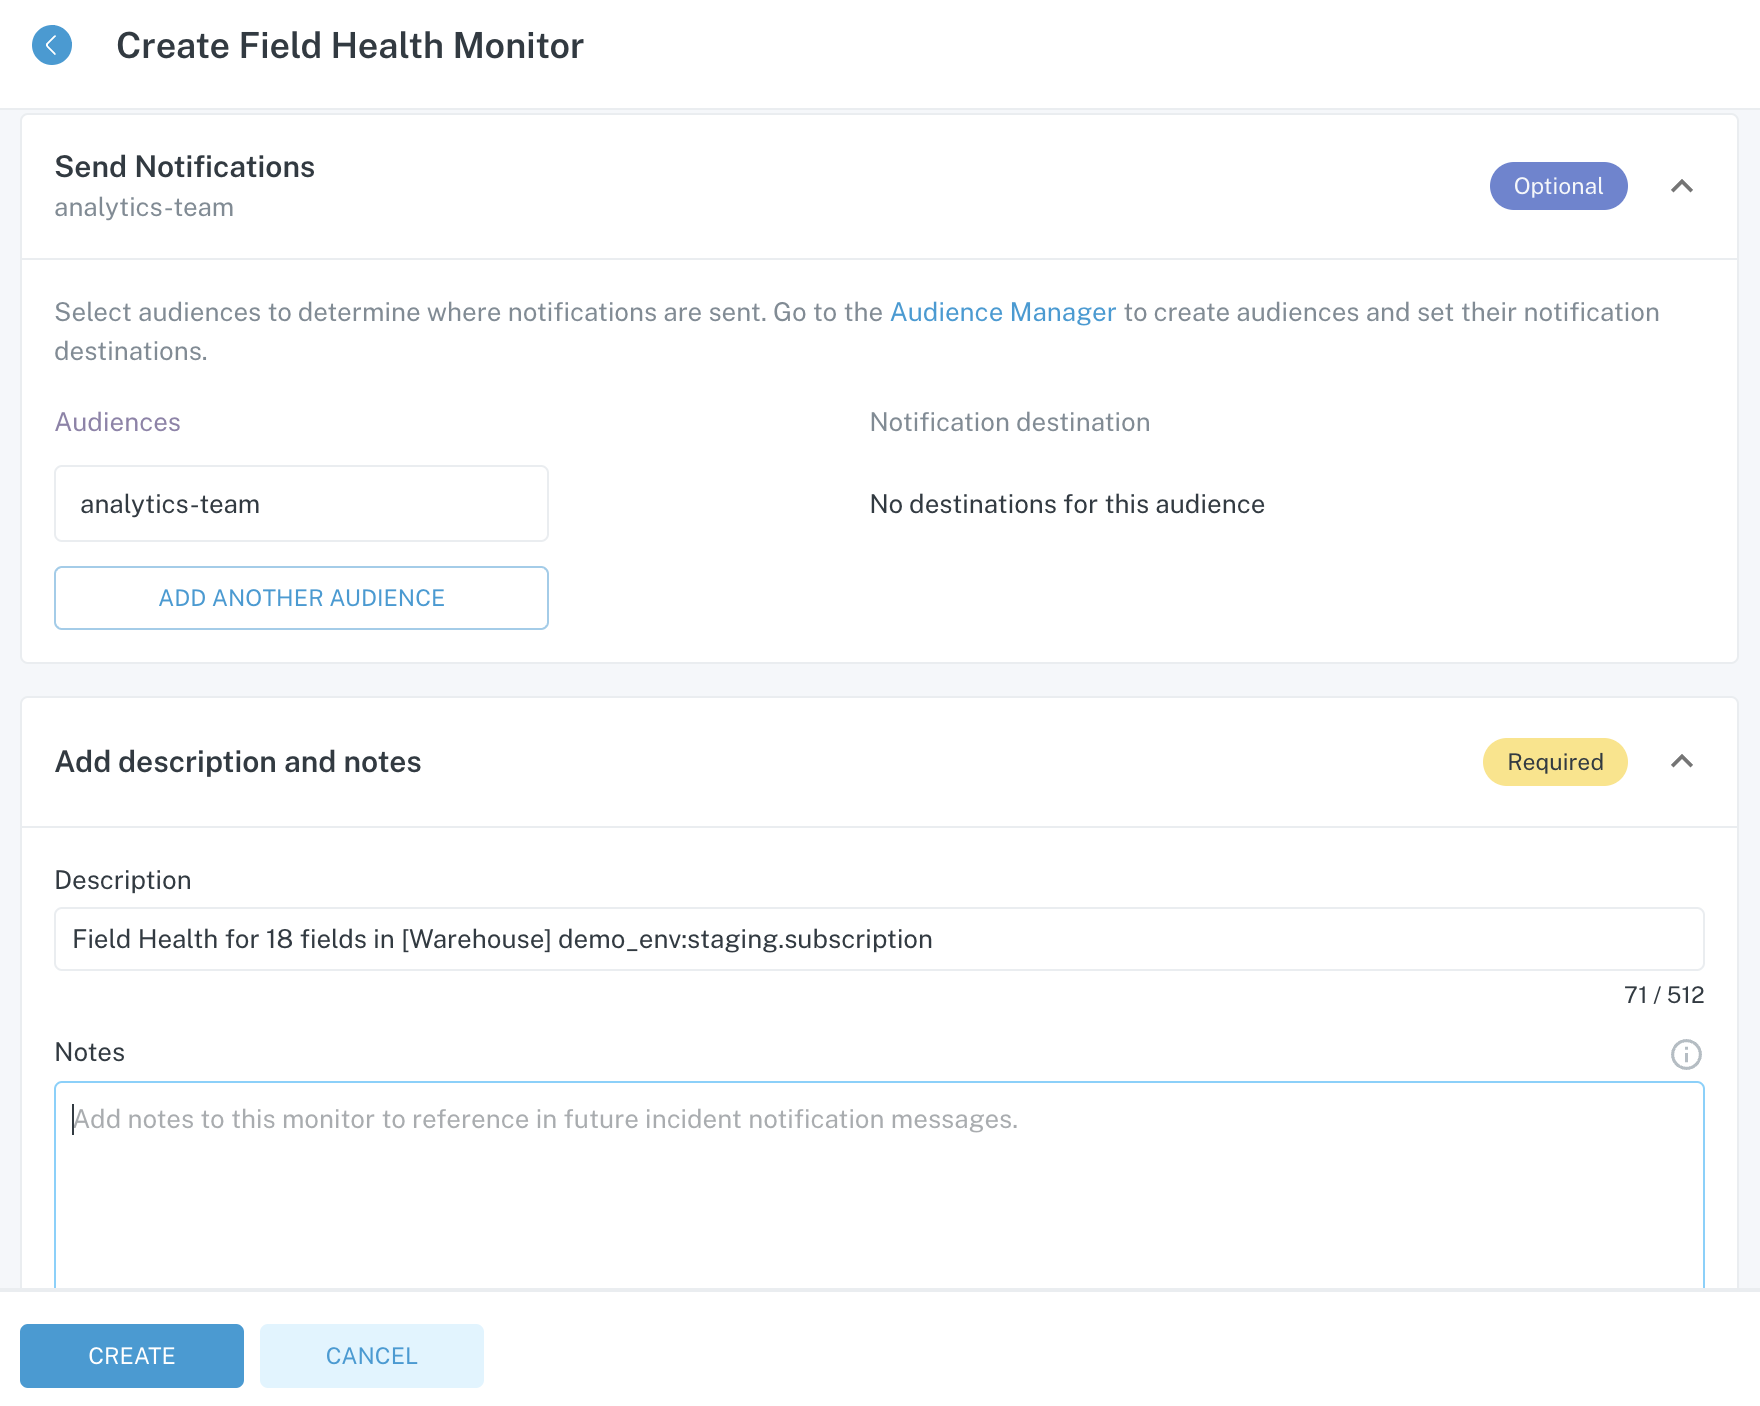
Audience setup in the monitor creation workflow
You are now ready to route notifications for incidents generated by your custom monitors.
Note that if you are using Monitors as Code, the configuration name for Audiences is labels. The term labels is used in certain cases, but is otherwise equivalent to audiences.
To set up the notification routing, return to the Notifications tab and click on Add Notifications > Custom Monitors. This will land you on a setup modal:
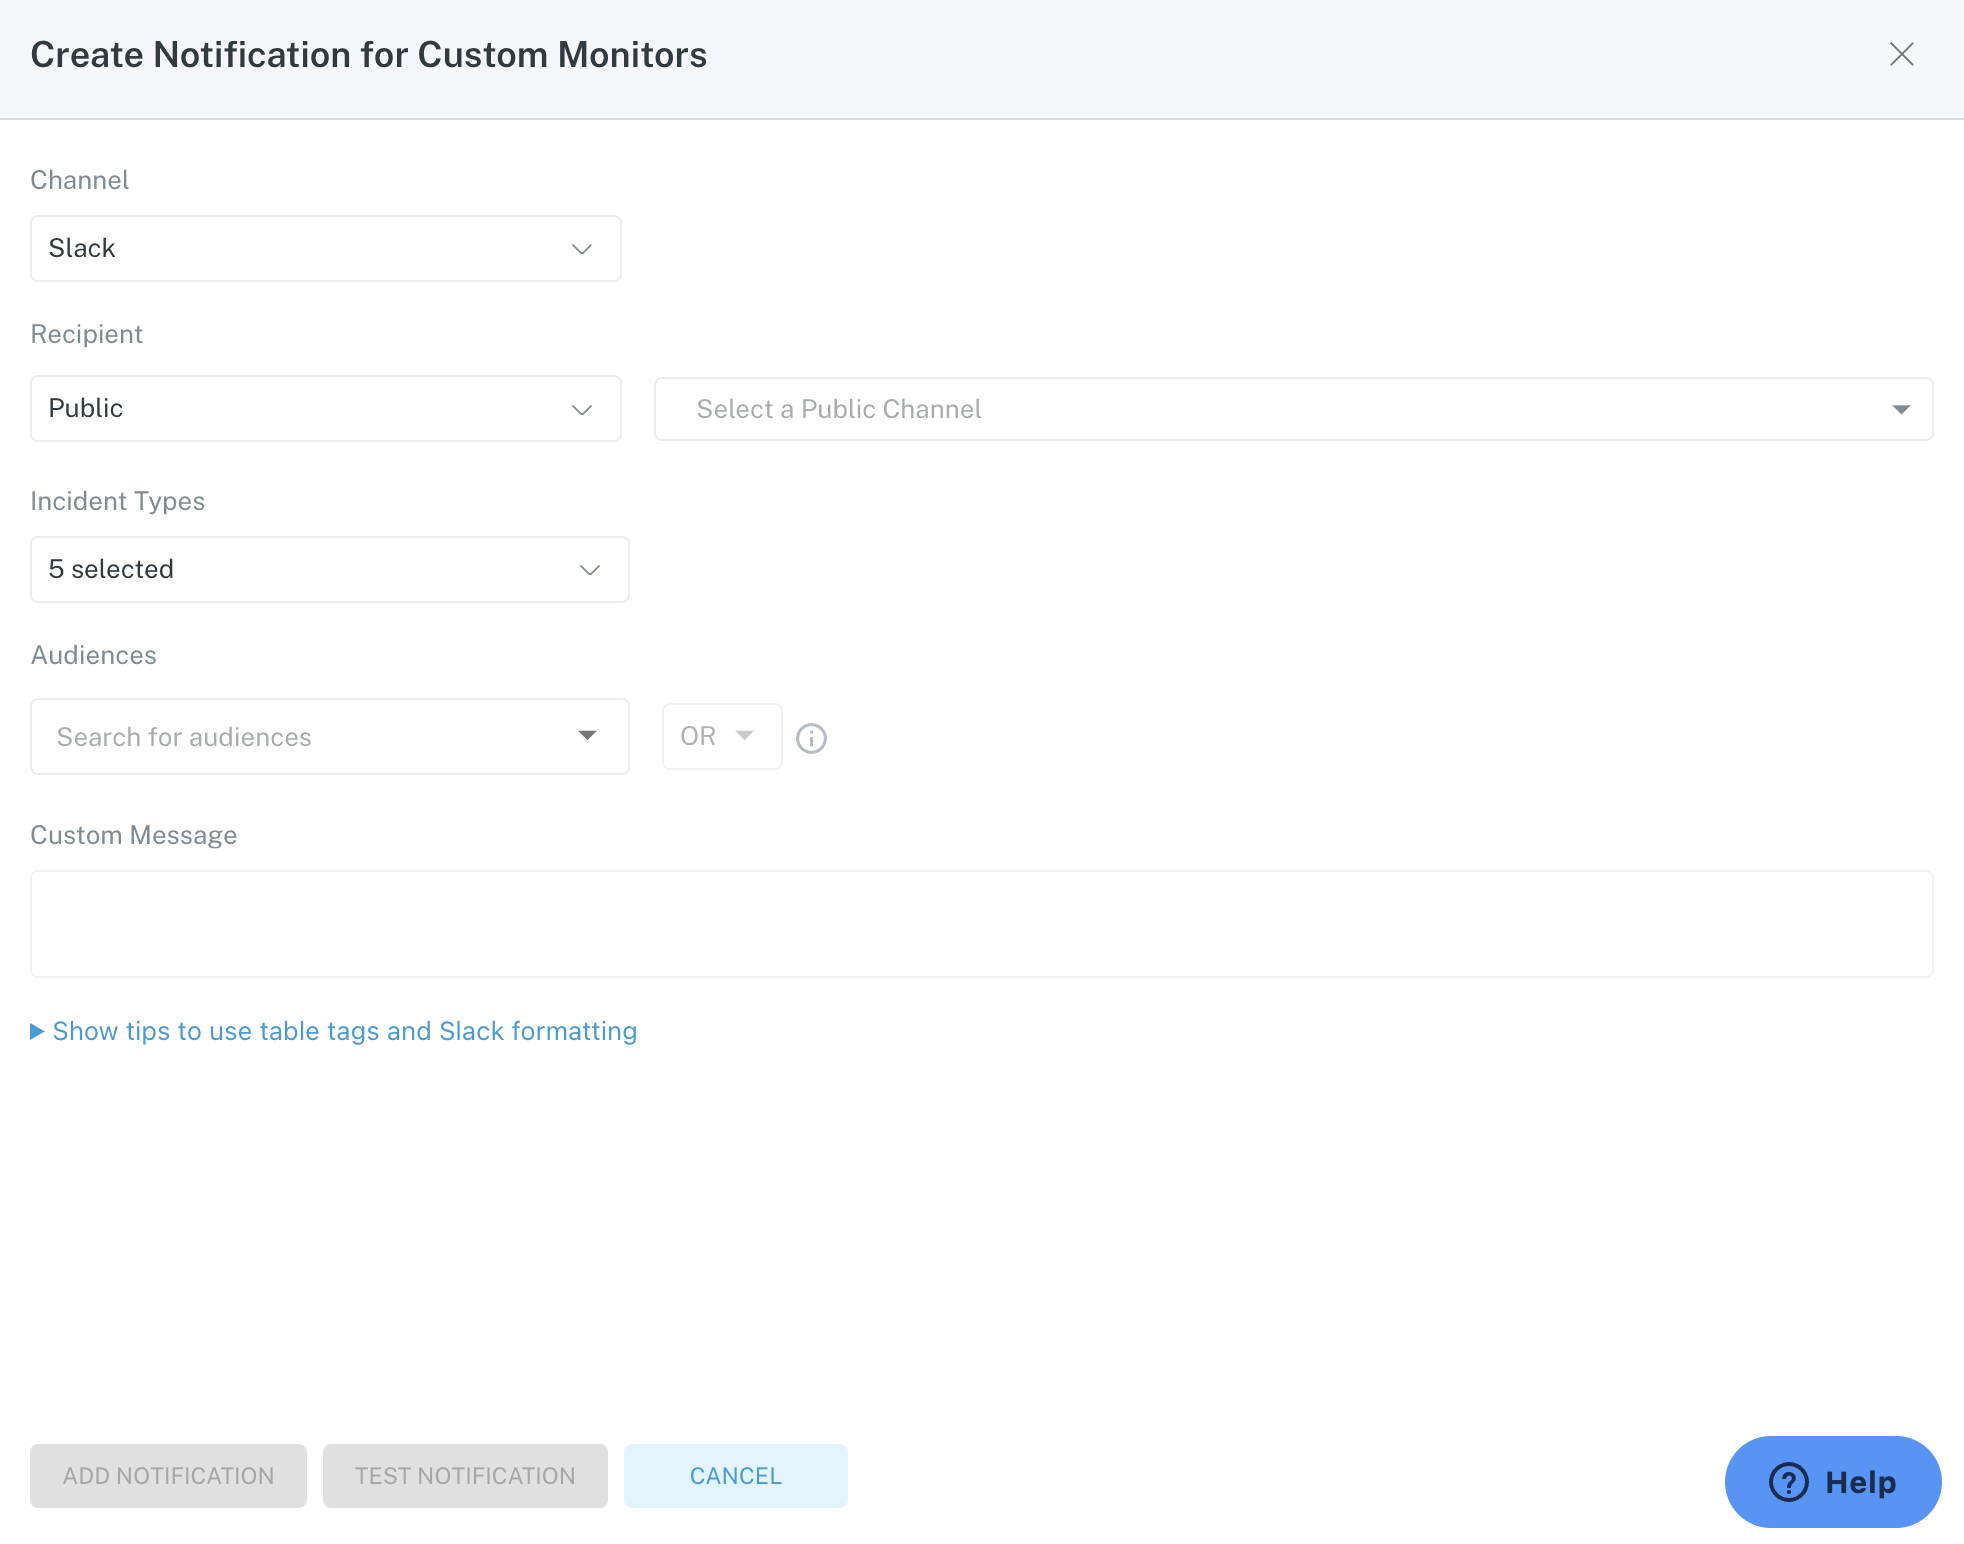
Notification setup for custom monitors
Similar to setting up your automated monitor routing, you can select the collaboration channel and the types of incidents. Using the Audiences you set up, you will now select the Audience(s) you want to include in the routing. This notification routing will look for any incidents generated by custom monitors with those Audiences applied and funnel them into the channel you have set up.
Daily digests
In addition to sending real-time notifications, you can send a single notification per day that summarizes information for the following:
- Schema changes
- Misconfigured monitors
- Inactive monitors
Many of our customers choose to send schema changes via a daily digest so that they aren't receiving many alerts per day for what is often expected changes.
You can also keep tabs on how your custom monitors are performing by sending a daily digest of misconfigured monitors (which monitor and why it is misconfigured) and inactive monitors.
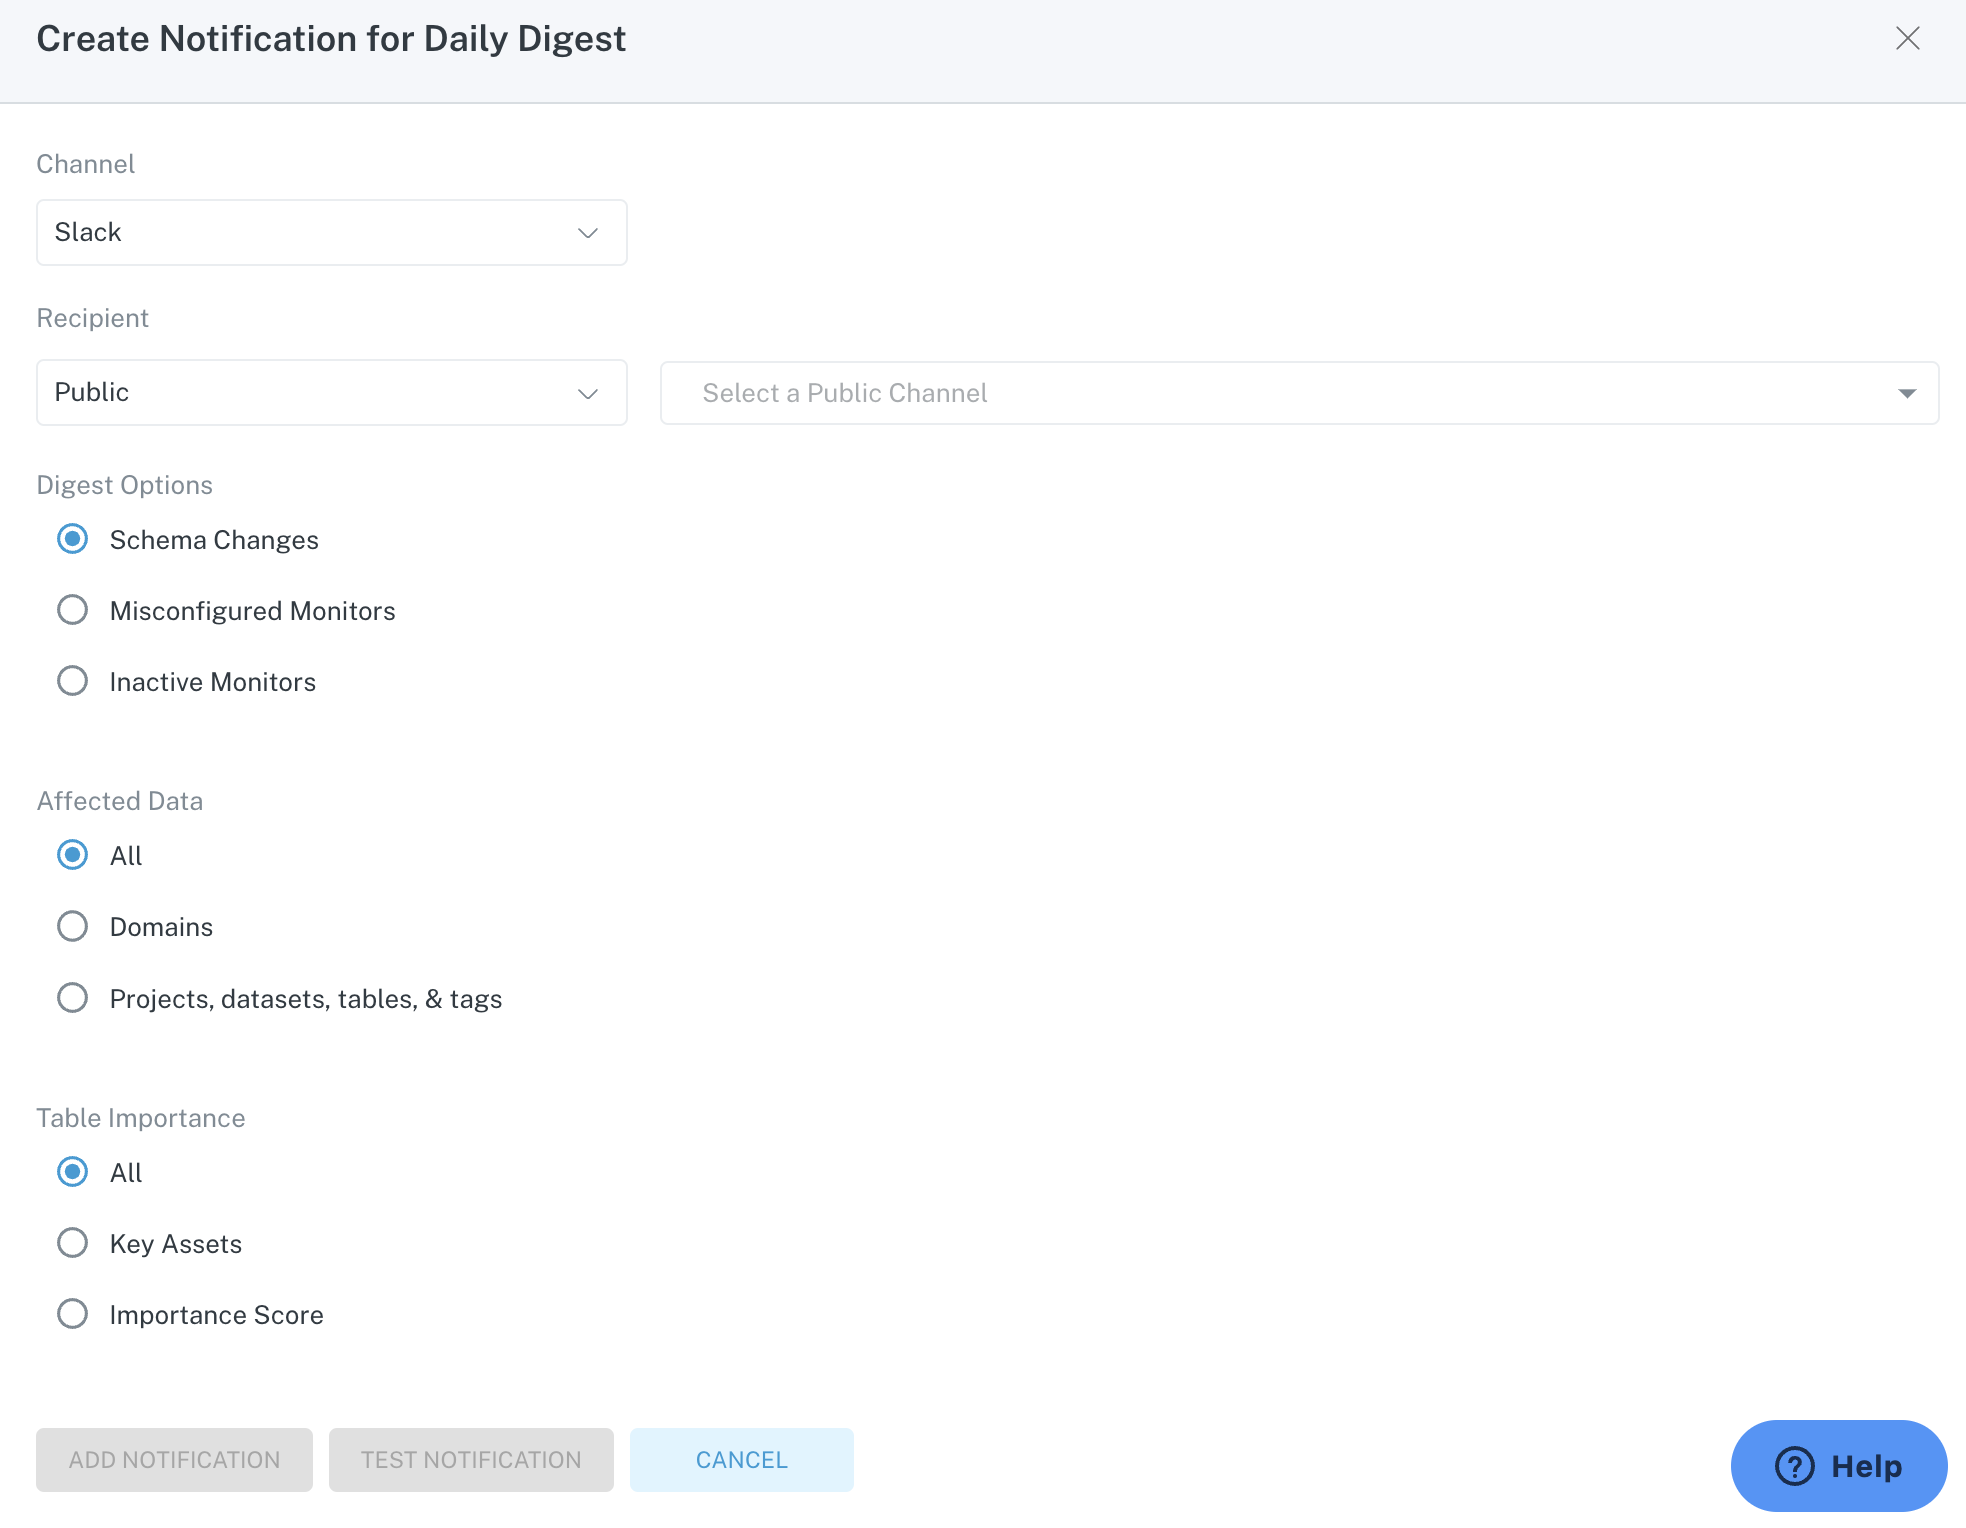
Daily digest notification setup
The configuration options for this setup is the same as what you have previously seen, with the only difference being which digest option you select.
If you'd like to learn more about best practices setting up notifications and building a notification strategy, please reach out to your Customer Success Manager!
Updated 10 months ago