Setting up SQL Rules
Last Updated: August 1, 2022
Transcript
In this video, we are going to see how to create a SQL rule in Monte Carlo. We'll start by navigating to the monitors tab, then clicking on create new monitor. Here we're now presented with the different types of our custom monitors available. And in this tutorial, we're going to focus on this one: SQL rules.
As a quick introduction, SQL rules are the most flexible type of custom monitor you can create in Monte Carlo. They allow you to write custom SQL statements to check for anomalies that are specific to your business, as well as provide the specific threshold that you breached. Just to mention a few examples of use cases for SQL rules: You may want to use them to detect duplicate entries or negative columns, to detect things like nulls or negatives when these are considered invalid, to get alerted if a field exceeds or falls under a certain threshold to run referential checks across tables and many, many more.
Let's proceed now with the configuration of the monitor, clicking on configure monitor takes us to this four step configuration, where we will define our SQL query, define the alert condition, and define the schedule for when this check will run.
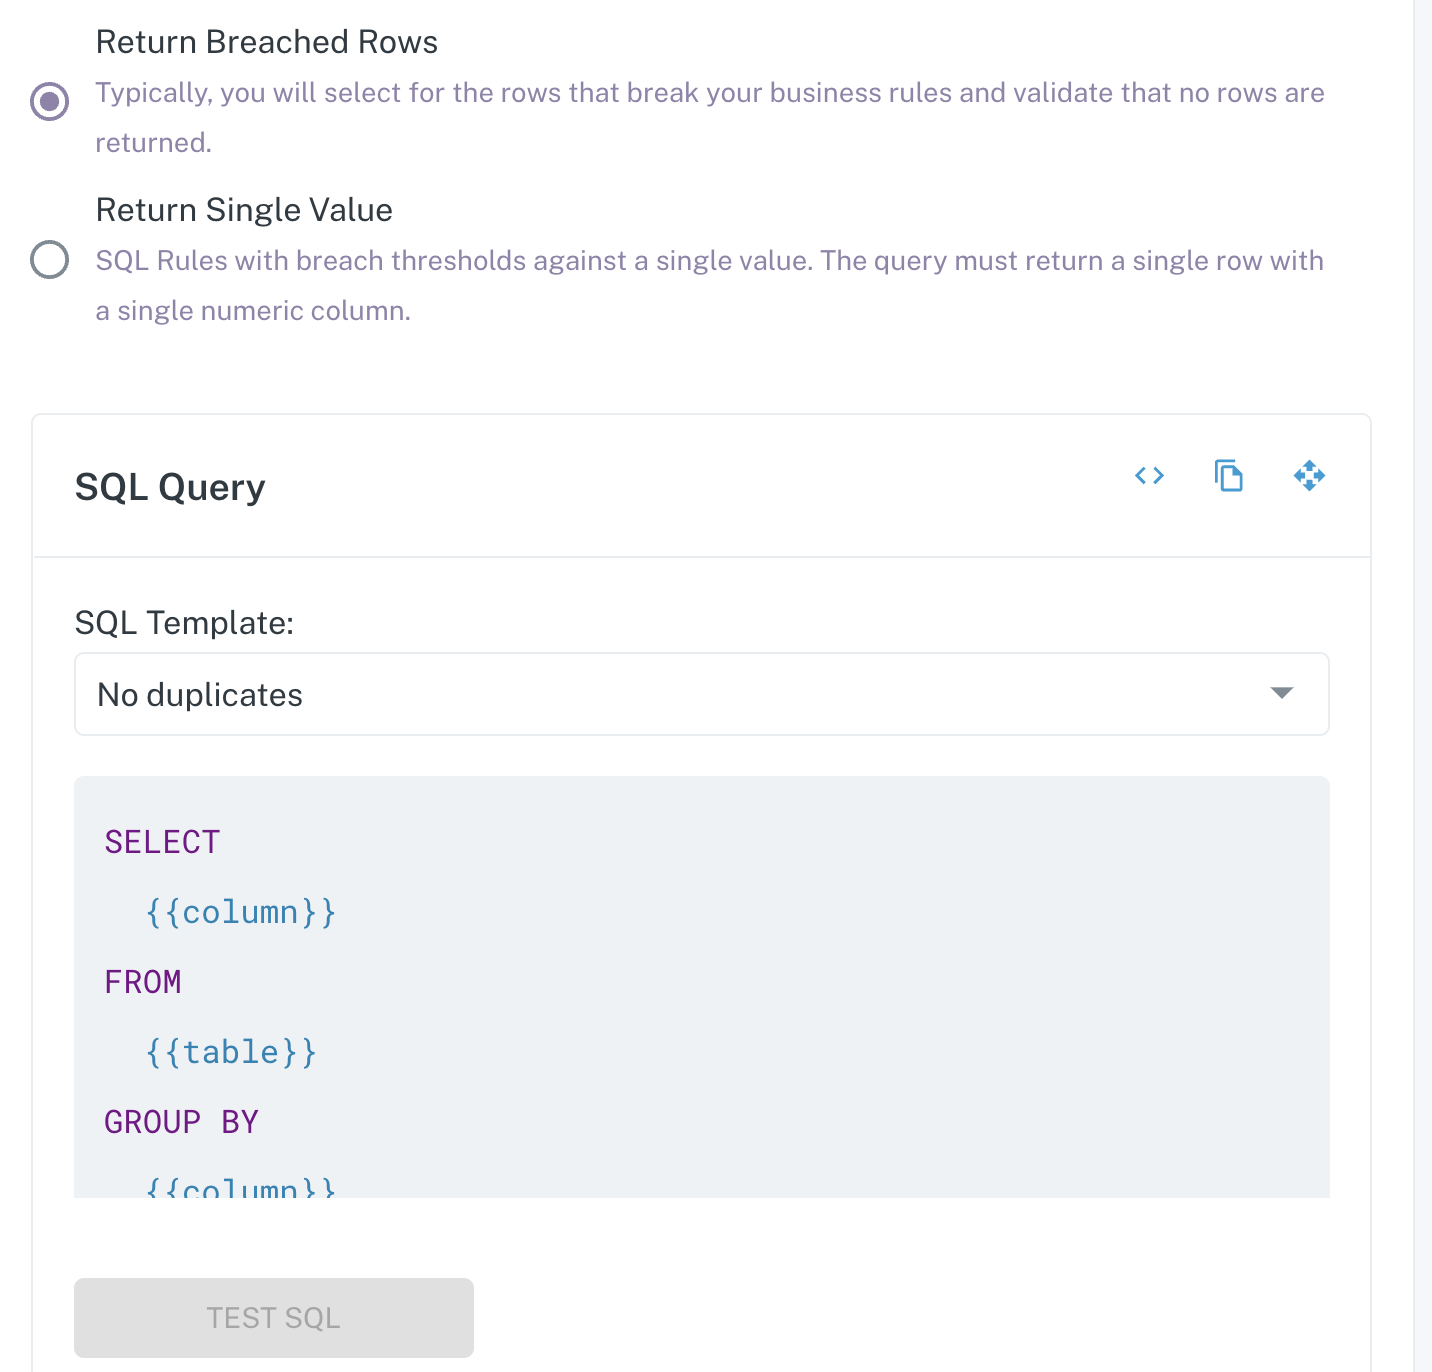
Now on this first step, we'll start defining details such as the connected warehouse in which the SQL query will run, and the actual SQL query. Note that here you can either write your own SQL query from scratch or leverage one of our predefined SQL templates. For this example, I'm going to use this one to take for duplicate entries, and as you can see, when I select it, the query editor is pre-populated with a skeleton of the query, providing place holders for things like column and table names here.
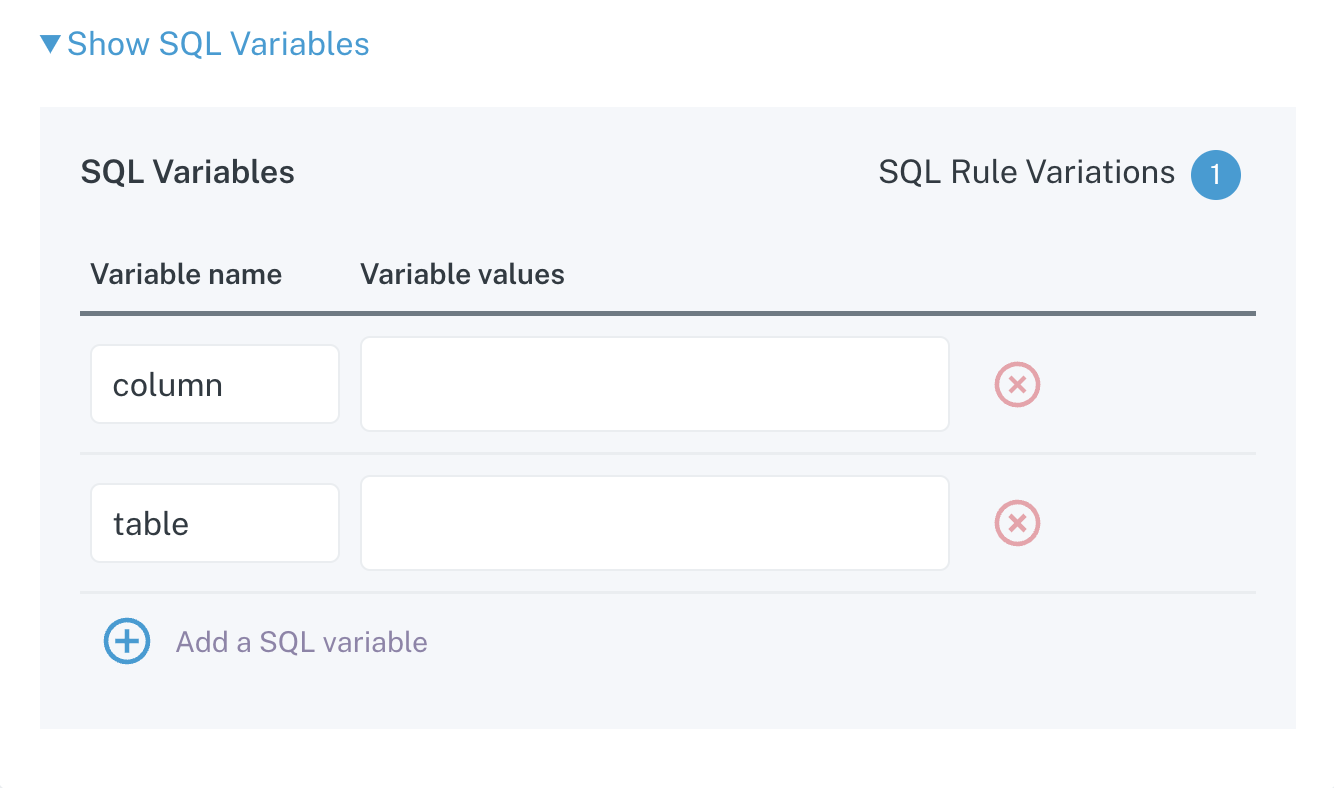
Once I have this, I could just go ahead and replace these place holder with the column tables I want to include in my query, or I could leverage a SQL variables. SQL variables allow you to easily define multiple queries in one single SQL rule. In this case, I'm going to leverage SQL variables to provide one table name or two, and I'm also going to provide a couple of column names.
As you can see, I'm trying add values here for the variables.
In this case, I have four variations because this would be all the combinations possible between the variables of the columns and table names I have provided. Once I'm done with defining my query, I could either test it for validity, but know that there's a 30 second query time out. So when taking longer, we recommend that you either take this query and run it in your warehouse or limit the results. If you are sure that the query is valid, you can also skip testing.
I'm going to skip testing and move to the second step here, which is to define the alert condition. This is the definition for what will be considered a breach. To determine if the rule is breached, we will compare the number of roles returned by your query against the condition you provide here. Let's see the available options.
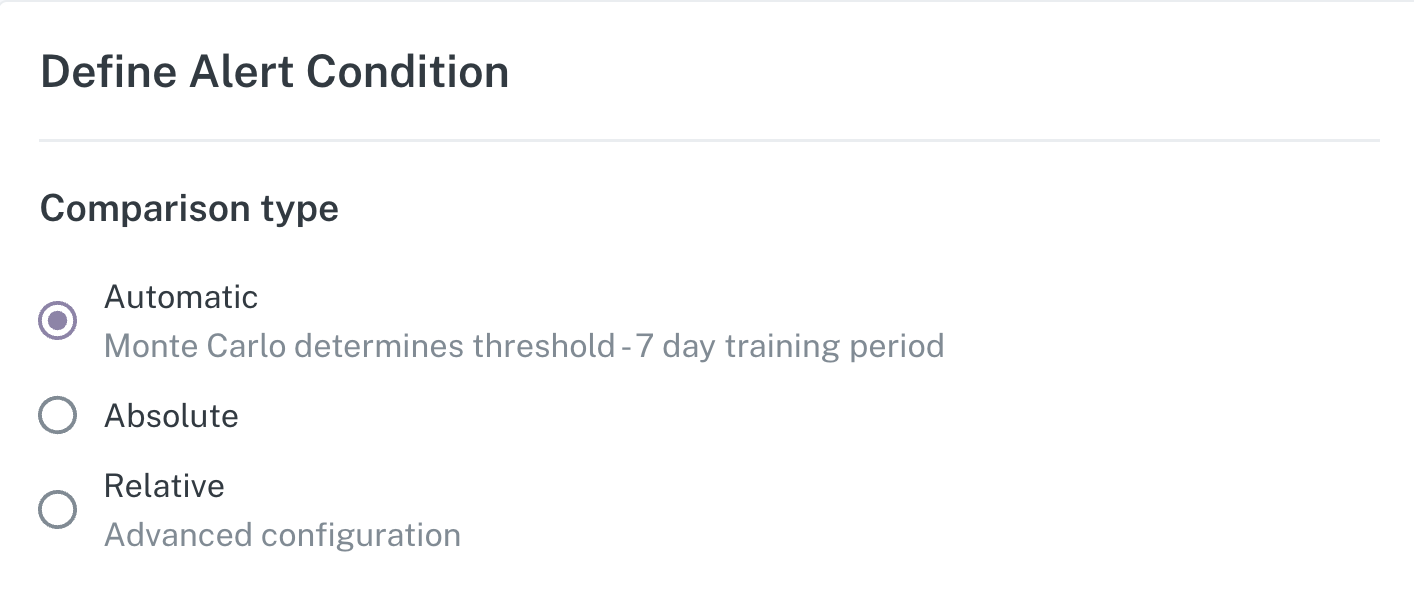
When selecting automatic, Monte Carlo will determine the breach threshold and will trigger an alert if the query returns a row count that is significantly different to historical rows return.
You can instead provide an absolute condition so that you can choose to be notified when the row count is greater than a value, less than a given value, or you can choose to provide a relative threshold based on comparing the number of rows returned relative to historical trends like row count average, max, or min over a give period of time.
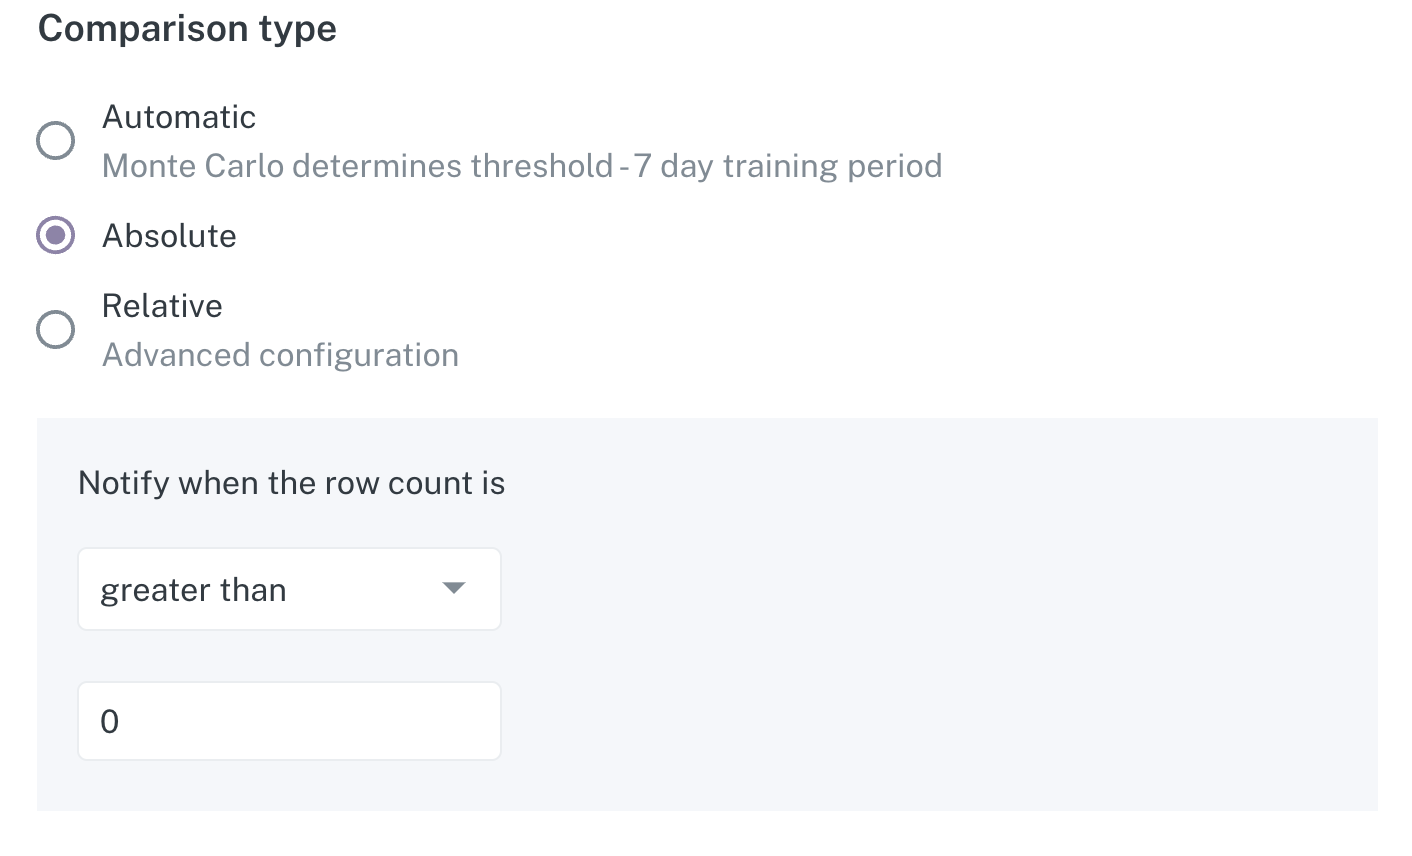
For this example, I'm just going to choose to be notified when the row count is greater than zero, and I'm going to continue to the next step.
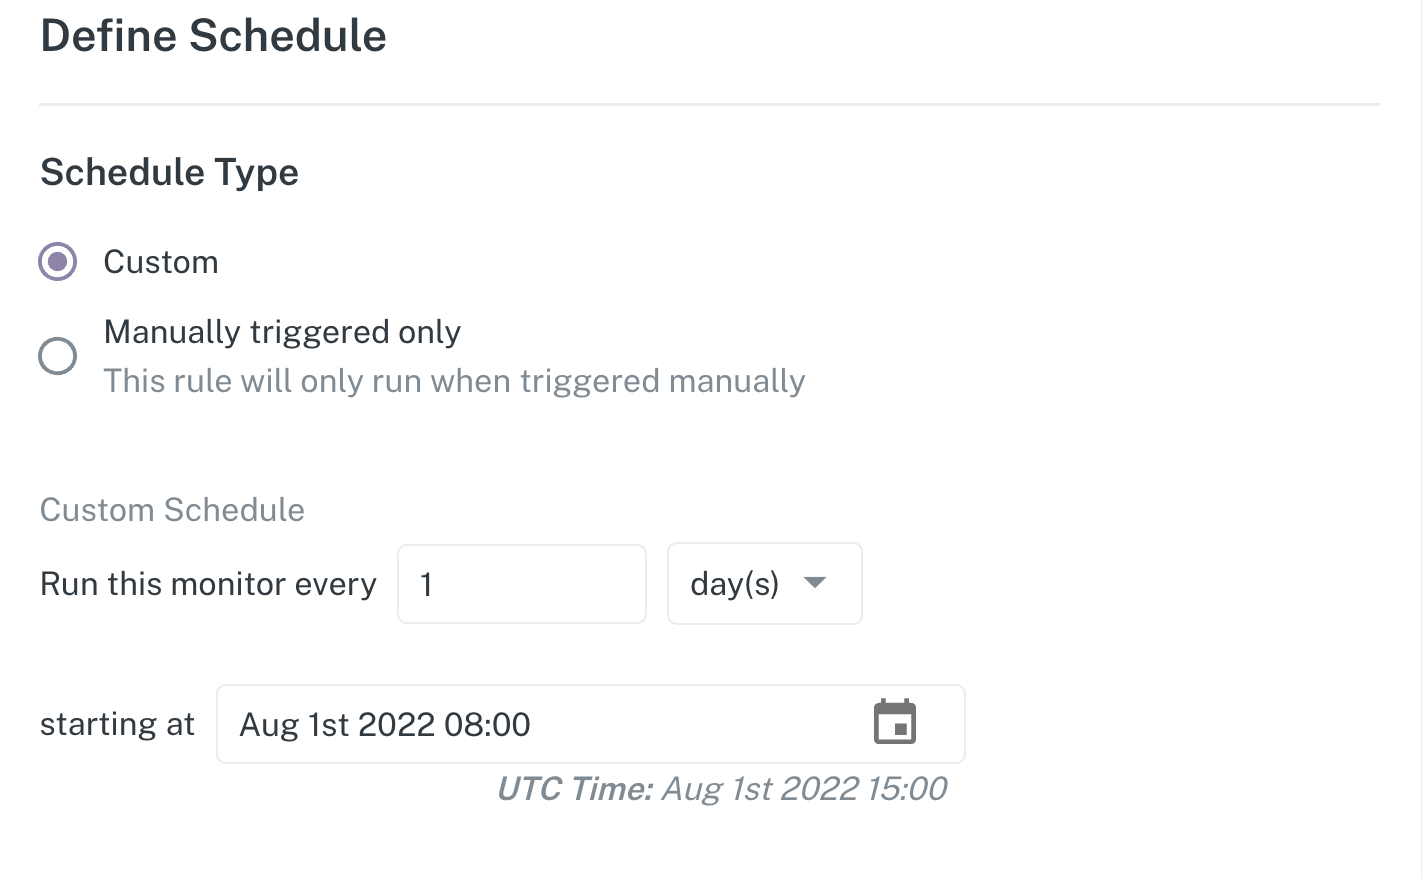
This step allows you to define when and how often your rule will run. You will choose whether the rule will only be triggered on demand or manually. This could be either from the UI programmatically, or if instead you want to provide a customized schedule based on weeks, days, hours, or minutes, starting at your selected time.
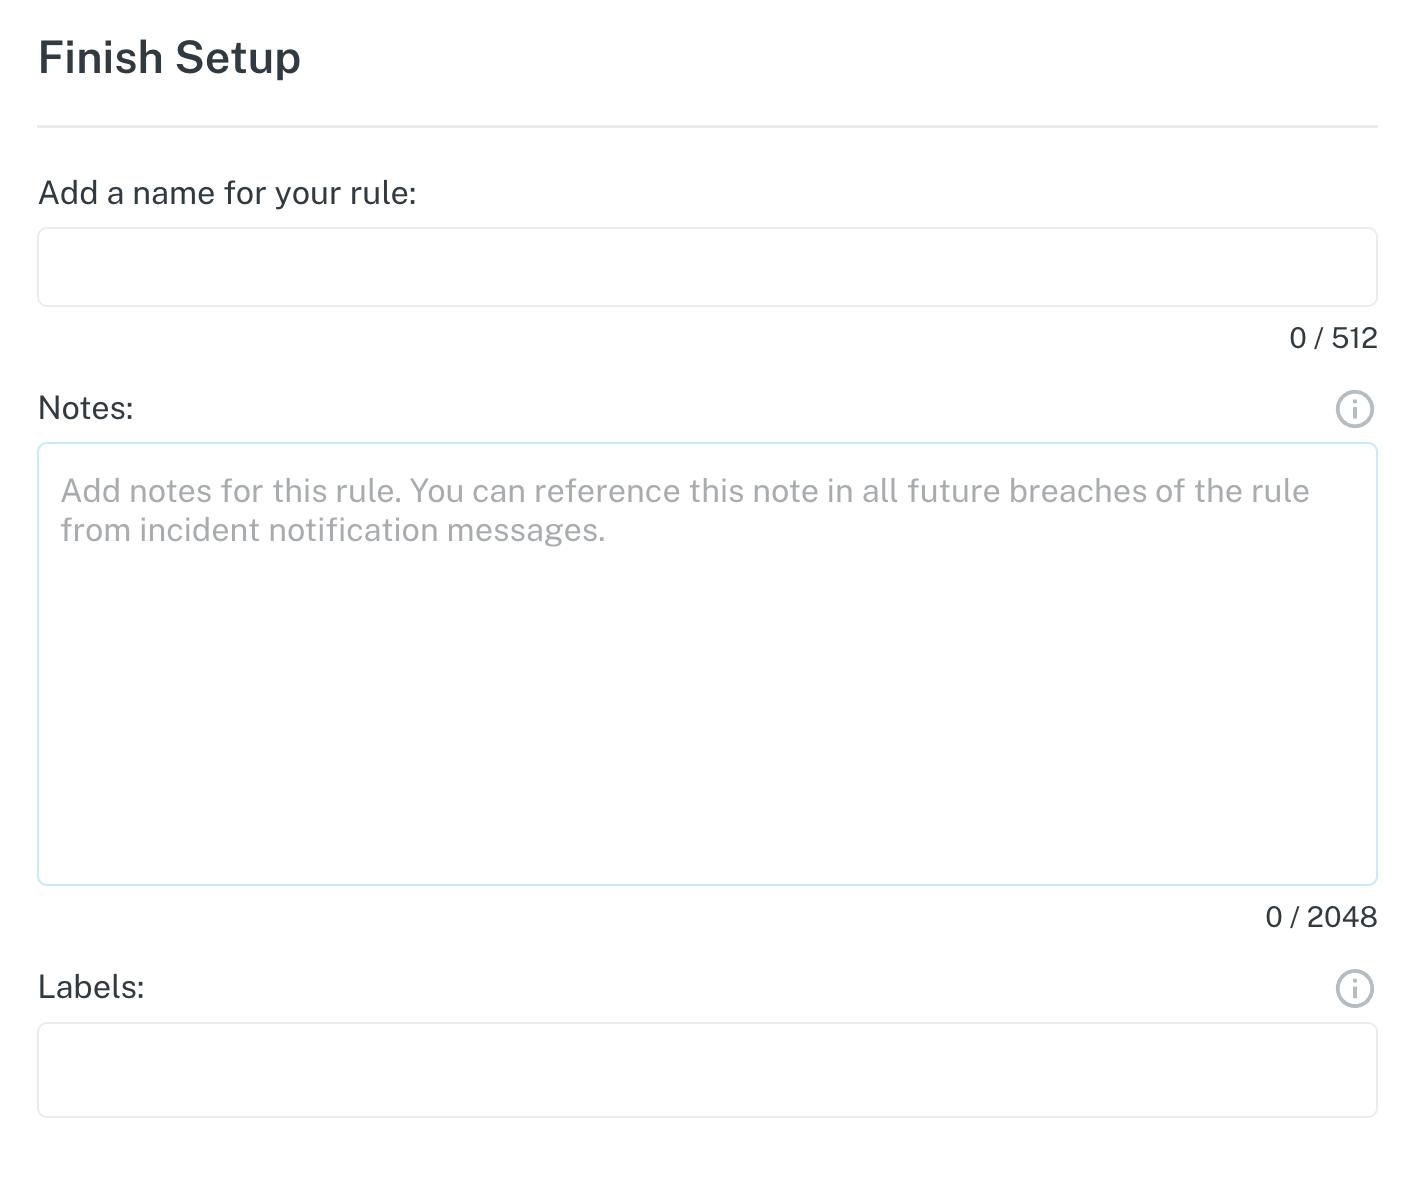
I'm going to continue to the fourth step, which is to provide a description or name to your rule and some notes. Here we recommend providing a clear and descriptive name to help you and anyone else in your team to quickly understand what the rule is checking for as well as leveraging the notes to provide additional details about the rule, or tips to troubleshoot the incidents triggered by this monitor. Once you are done, you can click create, and that's it.
I hope this was helpful and please feel free to reach out to [email protected] or the chat bot in the lower right hand corner if you have any more questions!
Updated 8 months ago
