Scenario One
Follow these steps to enable S3 events if your needs fit under scenario one:
- Retrieve relevant SQS ARNs
- Retrieve your account ID
- Open the S3 event management pane
- Update the SQS access policy
- Create event notification
Retrieve relevant SQS ARNs
Follow these steps to get the relevant SQS ARNs. If the data collector is managed by Monte Carlo, please reach out to your representative for these values instead.
- Open the Cloudformation console and search for the Monte Carlo data collector. Select the stack

- Select the “Outputs” tab
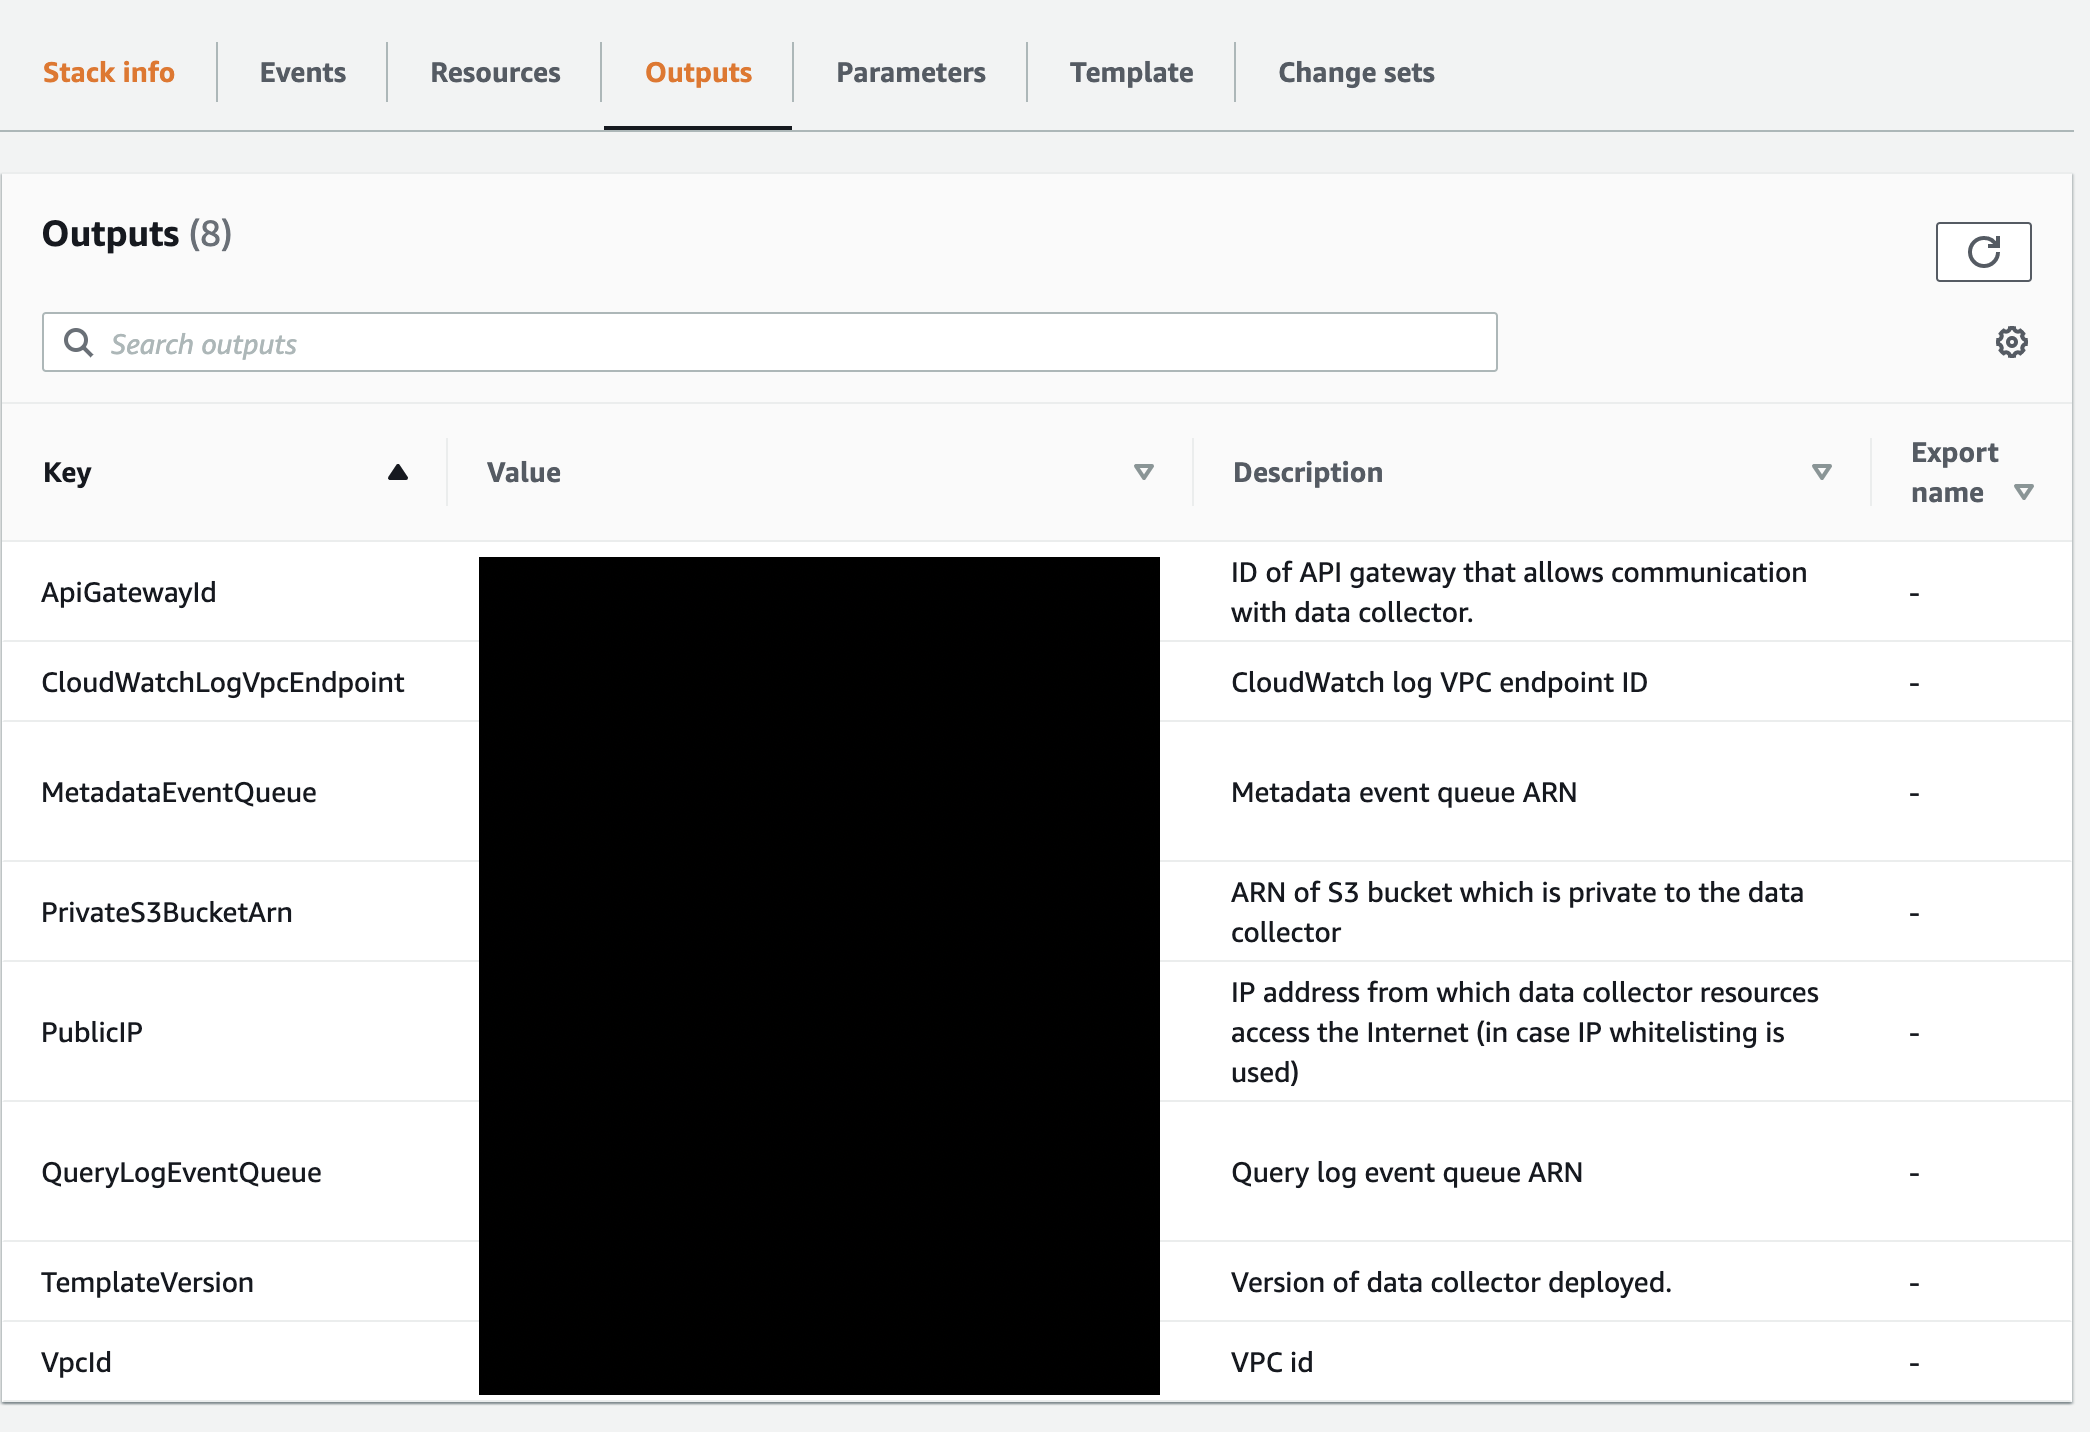
- Save the Metadata Queue ARN for later
Key: MetadataEventQueue
Retrieve your account ID
Follow these steps to retrieve your account ID. If the data collector is managed by Monte Carlo, please reach out to your representative for these values instead.
Be sure you are logged in the same account as the Monte Carlo Collector before proceeding.
- From the console, select your username in the upper right corner.
- Select “My Account”.
- Save the Account Id (without dashes) for later.
Open the S3 event management pane
Follow these steps to help locate the event configuration page for the bucket you want to enable events for.
- Open the S3 Console and search for the bucket that you would like to enable events for
- Select the bucket
- Save the bucket ARN by selecting “Copy Bucket ARN” for later.
- Select the “Properties” tab. Leave this page open you will come back to it later.
Update the SQS access policy
Follow these steps to allow your S3 bucket to write to the relevant queue. If the data collector is managed by Monte Carlo these steps can be skipped by just sending the S3 Bucket ARN to your representative. Your representative will in turn send you the SQS ARN and relevant account ID
- Open the SQS console in the account the Monte Carlo Collector was deployed to
- Search for the queue. The name follows this structure: {CF_STACK}-MetadataEventQueue-{RANDOM_STR}
- Select the queue and confirm the the ARN matches the ARN you saved previously
- Select the “Access Policy” Tab and Select “Edit”.
If the access policy is empty or looks something like this:
{
  "Version": "2012-10-17",
  "Id": "arn:aws:sqs:<region>:<account>:<name>/SQSDefaultPolicy"
}
Paste the following (replacing any values in brackets):
- The COLLECTOR_ACCOUNT_ID is the account ID you saved in the "Retrieve your account ID" subsection
- The EVENT_QUEUE_ARN is the ARN you saved in the "Retrieve relevant SQS ARNs subsection"
- The S3_ARN is the bucket ARN, which you saved in the "Locate the S3 event management pane" subsection
{
   "Version":"2008-10-17",
   "Statement":[
      {
         "Sid":"__owner",
         "Effect":"Allow",
         "Principal":{
            "AWS":"arn:aws:iam::<COLLECTOR_ACCOUNT_ID>:root"
         },
         "Action":"SQS:*",
         "Resource":"<EVENT_QUEUE_ARN>"
      },
      {
         "Sid":"__sender",
         "Effect":"Allow",
         "Principal":{
            "AWS":"*"
         },
         "Action":"SQS:SendMessage",
         "Resource":"<EVENT_QUEUE_ARN>",
         "Condition":{
            "ArnLike":{
               "aws:SourceArn":[
                  "<S3_ARN>"
               ]
            }
         }
      }
   ]
}
But, if the access policy already has a SID with “__sender” (i.e. looks like above) append your S3_ARN to the SourceArn list instead. The S3_ARN was saved in the "Locate the S3 event management pane" subsection.
"aws:SourceArn": [
            "arn:aws:s3:::existing_bucket",
            "<S3_ARN>"
          ]
Create event notification
Follow these steps to create an event notification in S3.
- Return to the page you had opened in step 4 of the "Open the S3 event management pane" subsection.
- Select “Create event notification” under Event notifications.
- Fill in a meaningful name.
- Optionally specify a prefix and/or suffix.
- Select “All object create events” and “All object delete events” under Event types.

- Enter the SQS queue ARN you had saved from the "Retrieve relevant SQS ARNs" subsection as the Destination queue ARN.
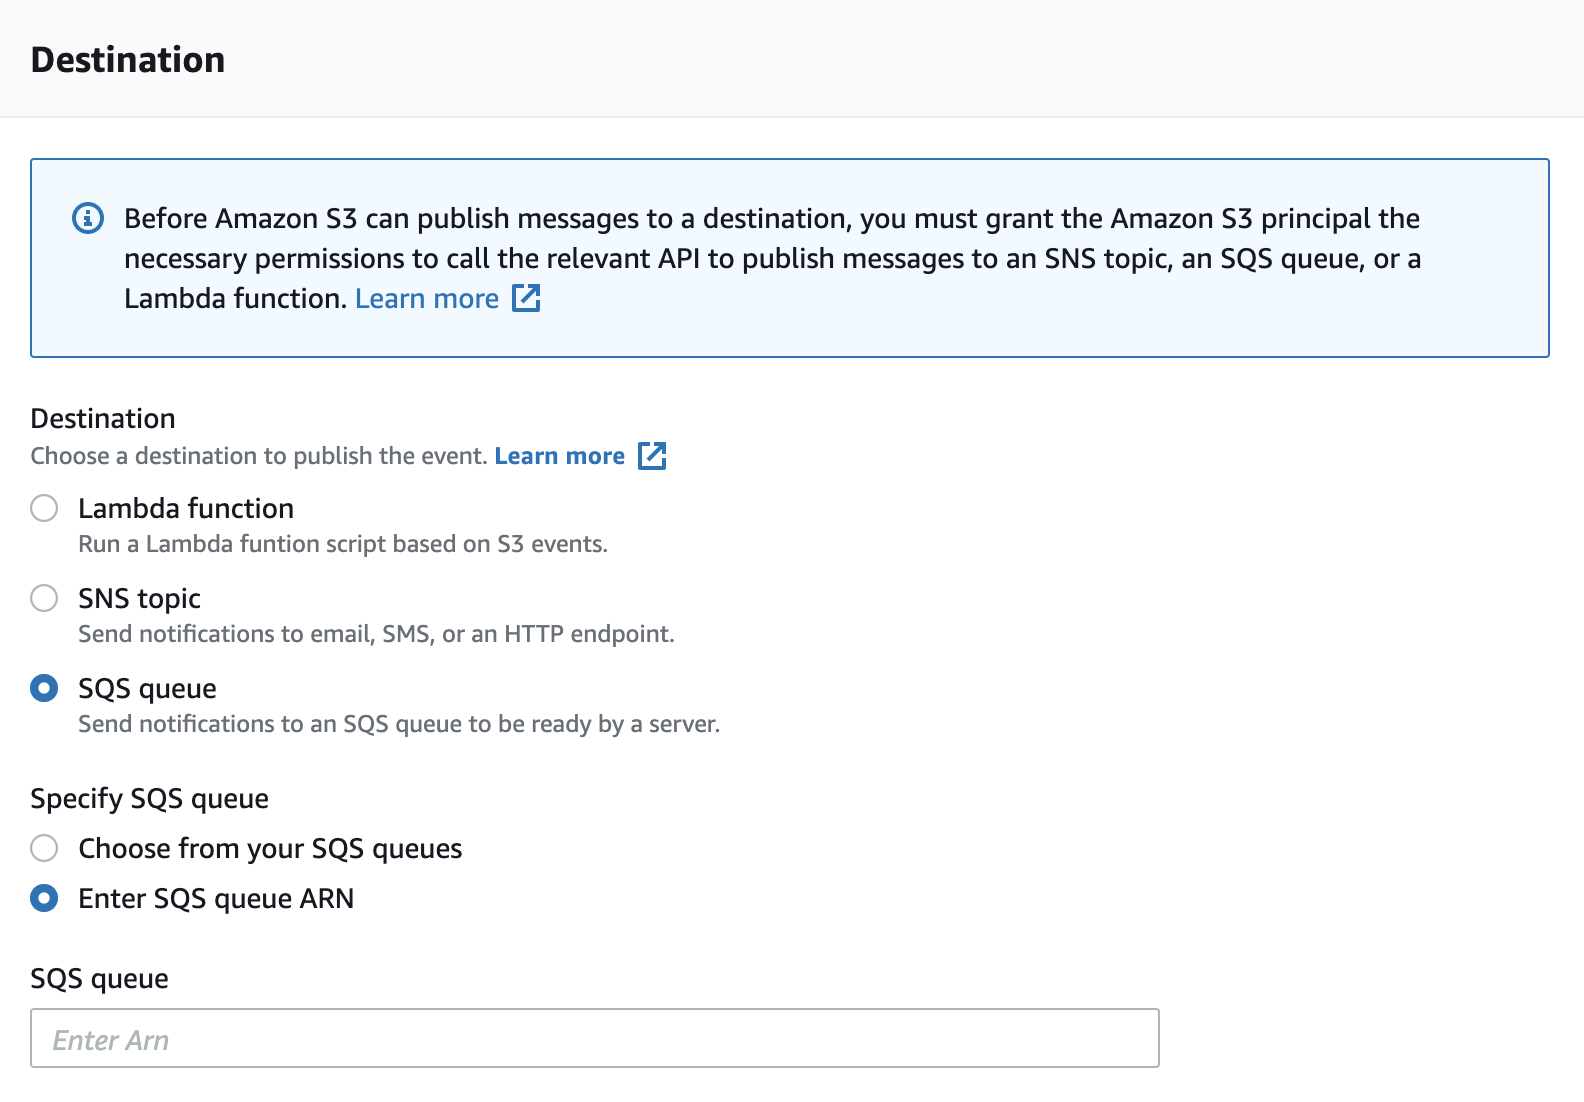
- Save changes.
Updated 9 months ago