Debugging Authorization
When a user doesn't have the access they expect — or has access they shouldn't — the permission inspector helps you understand why and trace it back to the source.
This guide walks through common authorization issues and how to use the inspector to diagnose them.
How permissions are resolved
Monte Carlo resolves a user's effective permissions by combining all of their authorization group memberships. Each group assigns one or more roles, and each role contains policy statements that allow or deny specific permissions.
Three rules govern how conflicts are resolved:
- Secure by default — Any permission not explicitly granted is denied.
- Most specific wins — A policy path of
monitors/edit(specific permission) overridesmonitors/*(an IAM resource wildcard path). - Deny beats allow — When two policies match at the same specificity, deny takes precedence.
These rules apply at every level: within a single role, across roles in a group, and across a user's groups.
For the full explanation of policy resolution mechanics, see Policies and Permission Resolution.
Common problems
Authorization issues typically surface as "this user can/can't do something I didn't expect." The root cause is almost always conflicting policies across roles or groups that resolve differently than intended.
Overlapping wildcards with different effects
A role grants broad access, while another denies a subset — or vice versa. Depending on specificity, the result may surprise you.
Example: A user belongs to two groups:
| Group | Role | Policy statement | Effect |
|---|---|---|---|
| Editors | editor-role | monitors/*: allow | Allow all monitor actions |
| Restricted Ops | restricted-role | monitors/edit: deny | Deny monitor edit actions |
Result: The user cannot perform edit operations on monitors (like creating or updating), because monitors/edit is more specific than monitors/*. The deny on the more specific path wins.
Explicit deny in one group overriding allow in another
Because deny beats allow at equal specificity, a single deny statement in any group can override allows from all other groups.
Example:
| Group | Role | Policy statement | Effect |
|---|---|---|---|
| Power Users | power-role | dashboards/*: allow | Allow all dashboard actions |
| Compliance | compliance-role | dashboards/delete: deny | Deny dashboard deletion |
Result: The user can do everything with dashboards except delete them. The explicit deny on dashboards/delete is more specific than dashboards/*, so it wins regardless of which group it comes from.
Cumulative allows producing more access than expected
Allows are cumulative across roles and groups. A user who belongs to multiple groups inherits the union of all their allowed permissions.
Example:
| Group | Role | Policy statement | Effect |
|---|---|---|---|
| Viewers | viewer-role | settings/users/read: allow | Can view users |
| Managers | manager-role | settings/users/*: allow | Can do everything with users |
Result: Even if the intent was for the user to only view users, belonging to the Managers group grants full user management. The broader settings/users/*: allow adds edit permissions on top of the read-only grant.
Missing permissions on custom roles
Custom roles don't automatically receive new permissions when Monte Carlo releases new features. If a user's access relies entirely on custom roles, they may lack access to new functionality until the role is updated.
Tip: Using wildcard paths like monitors/* (or /read or /write) in custom roles helps future-proof them, since new permissions added under that resource will be covered automatically.
Using the permission inspector
The permissions list shows the effective (resolved) permissions for a role, authorization group, or user — and explains why each permission resolved the way it did.
Where to find it
The permissions list is available on the Permissions tab on three auth detail pages:
- Role detail — Settings → Roles → select a role → Permissions tab
- Authorization group detail — Settings → Authorization Groups → select a group → Permissions tab
- User detail — Settings → Users → select a user → Permissions tab
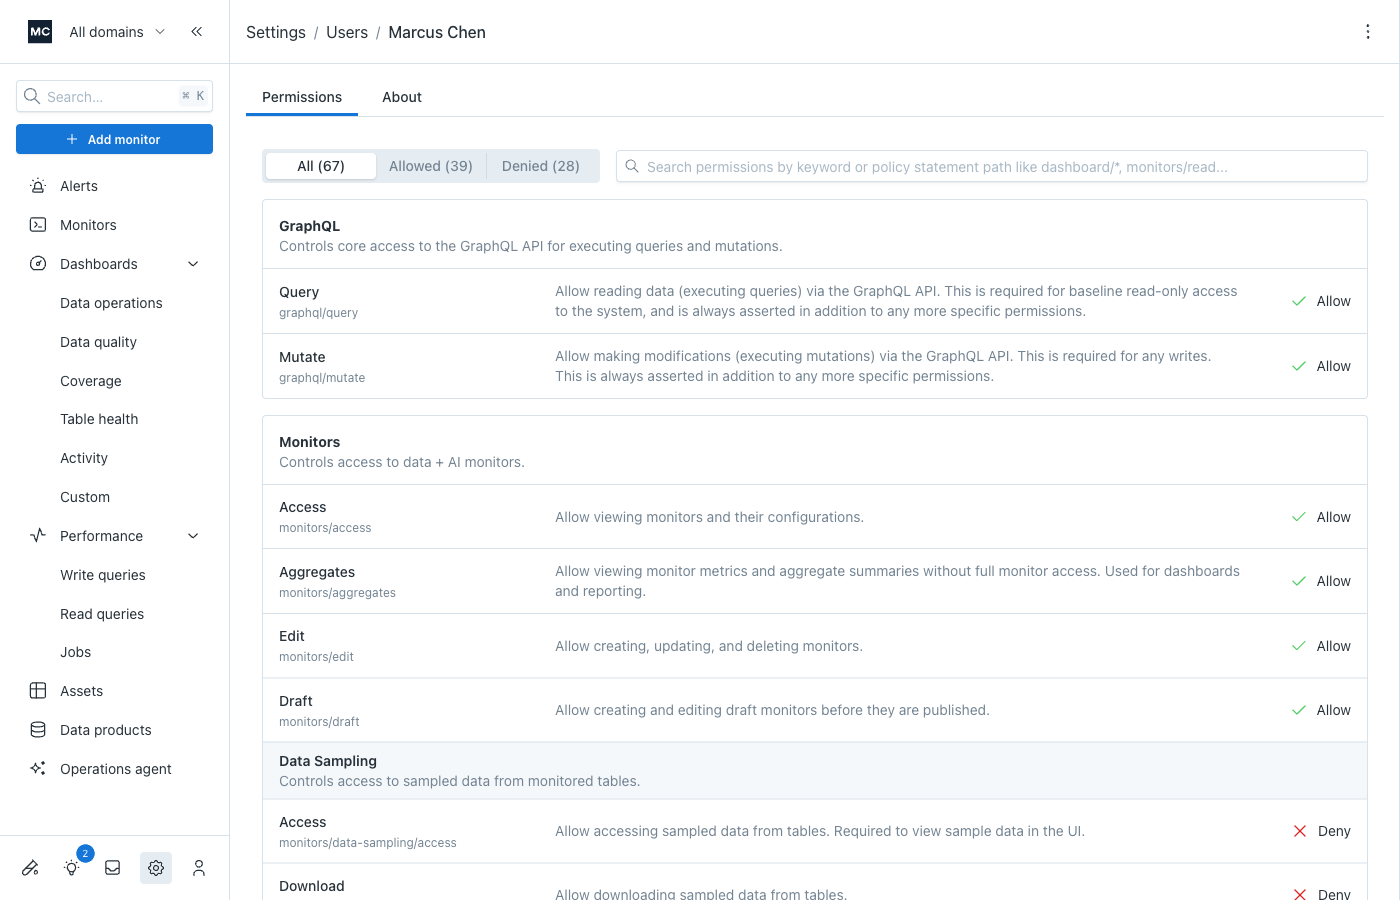
Permissions are organized by resource (e.g., Dashboards, Monitors, Settings) and sub-resource. Each row shows:
| Column | What it shows |
|---|---|
| Name | The permission label and its path (e.g., monitors/edit) |
| Description | What the permission controls |
| Effect | The resolved result: Allow or Deny |
Filtering and searching
Optionally, use the filters at the top of the permissions list to narrow down what you're looking at:
- All / Allowed / Denied — Filter by effect to quickly find unexpected results
- Search — Keyword search by name, path, or description. Also supports policy path patterns (e.g.,
monitors/*) - Only explicitly defined (role detail only) — When toggled on, shows only permissions that this role's policy statements directly address. Permissions not covered by any statement default to deny (per our secure-by-default principle) and are hidden.

Understanding why a permission resolved the way it did
Tip: When debugging a user's permissions, start from the user's permissions tab — it shows the fully resolved picture across all their groups. Once you identify the problematic policy, follow the link to the specific role to make the fix.
Hover over any permission's effect (Allow/Deny) to see the permission inspector — a breakdown of how the system arrived at that result.
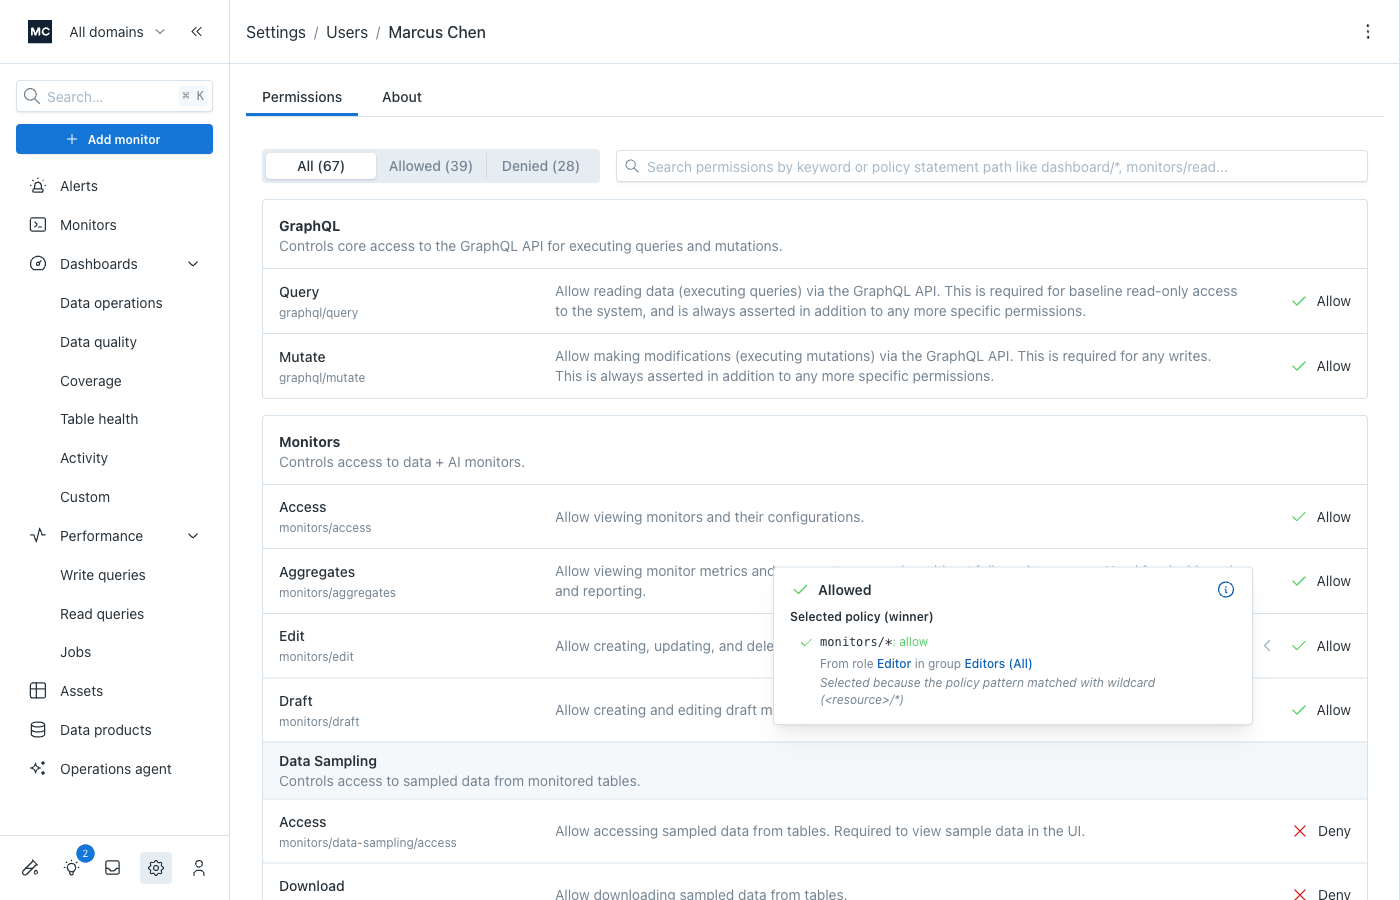
The explanation shows:
-
Selected policy (winner) — The policy statement that determined the final effect, including:
- The policy statement path and effect (e.g.,
monitors/*: deny) - Which role it comes from (linked — click to jump to that role's permissions tab)
- Which group(s) it comes from, when viewing a user's permissions (linked — click to jump to the group's permissions tab)
- Why it won — A plain-language explanation of the resolution decision (e.g., "Selected because the policy pattern matched with wildcard")
- The policy statement path and effect (e.g.,
-
Other policies evaluated — Any other policies from other roles or groups that applied to this permission but didn't win. This is especially useful for understanding conflicts — you can see exactly which policies competed and why the winner was chosen.
When viewing permissions for a role, the explanation shows policies from that role only. For a group, you'll see policies from all of the group's roles. For a user, you'll see policies from all groups and roles, with group attribution.
Tracing back to the source
The links in the permission explanation are designed for quick navigation:
- Identify the issue — Use the filter (Allowed/Denied) and search to find the permission that isn't resolving as expected.
- Understand why — Hover the effect to see which policy won and why.
- Follow the links — Click the role or group name to jump directly to its permissions tab, pre-filtered to the applicable policy statement's path.
Fixing the problem
Depending on what's causing the issue, you may have to change different aspects of your configuration. You cannot change built-in roles (or groups);
so your leverage will be using custom roles and groups. See Managing Roles for details on editing role policies.
The most likely solution will be creating (or updating) a partial role that has the desired effect. Typically, you'll use a more specific policy to override a more general one. However, when a deny is at the most specific level (exact permission match), overriding by specificity isn't possible. In that case, you'll need to either:
- modify the role that has that exact permission policy (if it is specified in a custom, not built-in role)
- or, if the statement is in a built-in role, create a new custom standalone role that does not include that specific policy
You may also be able to find a different built-in role to replace the other one that is causing trouble.
Updated 25 days ago